You can safely bleach wood with household bleach if you take precautions: work outdoors or ventilate well, wear chemical‑resistant gloves, eye protection, and a respirator, and never mix bleach with acids or ammonia. Test a hidden spot, strip any nonporous finish, dilute bleach (start 1:3 bleach to water), apply evenly, rinse, neutralize, and dry fully before finishing. Go slowly, monitor for damage, and follow up with sealing; keep going for full guidance on steps and alternatives.
Quick Answer: Can You Safely Bleach Wood With Household Bleach?

While household bleach can lighten some stains and sanitize wood, it isn’t the safest or most effective choice for most bleaching jobs. You can use diluted sodium hypochlorite for mild surface stains, but it often raises grain, weakens fibers, and leaves uneven color.
It won’t fully remove tannin or deep discoloration, and fumes and skin irritation are risks. If you decide to use it, test a hidden area, wear gloves and eye protection, ventilate well, and neutralize with plenty of water.
For consistent, durable results, consider oxalic acid or two-part wood bleach instead.
Quick Guide: What This Article Covers
You’ll start by covering safety precautions so you know what gear and ventilation you need before you begin.
Then you’ll get a clear, step-by-step process for bleaching different types of wood without causing damage.
Follow these sections in order to keep the project safe and effective.
Safety Precautions First
Because bleaching wood involves strong chemicals and dust, start by protecting yourself and your workspace before you touch any products. Wear chemical-resistant gloves, eye protection, and a respirator rated for chemical fumes. Work outdoors or in a well-ventilated area, keep children and pets away, and have neutralizing agents and plenty of water ready. Read product labels and never mix bleach with ammonia or acids. Test on scrap wood first. Clean spills immediately and dispose of soaked rags safely.
| Personal PPE | Workspace Prep | Emergency Items |
|---|---|---|
| Gloves | Ventilation | Water |
| Respirator | Barriers | Vinegar |
Step-By-Step Process
Before you begin bleaching, gather materials, set up ventilation, and review the brief sequence below so you can work steadily and safely from start to finish. You’ll prep, test, bleach, and neutralize methodically to protect the wood and yourself.
- Sand and clean: remove finish, dust, and grime so bleach penetrates evenly.
- Test: try a small hidden spot to check timing and color change.
- Apply bleach: use a brush, work with the grain, reapply as needed until desired lightening.
- Neutralize and rinse: stop the chemical reaction, dry thoroughly, then refinish to protect the wood.
When to Choose Household Bleach Versus Other Wood Bleaches
When deciding between household bleach and specialty wood bleaches, consider the stain type, wood species, and desired outcome.
You’ll pick household bleach for light surface stains, mildew, or when you need a quick, inexpensive brightening on softwoods and previously finished pieces after finish removal.
Use household bleach for light surface stains, mildew, or quick, inexpensive brightening on softwoods or stripped pieces.
Choose specialty bleaches—two-part oxalic, potassium, or multi-step restorers—when dealing with tannin burns, deep discoloration, or when color control and grain contrast matter.
Also use specialty products on dense hardwoods or antiques to avoid fiber damage.
Match product strength to wood condition, test a small area, and prioritize safety and ventilation during any bleach work.
What Household Bleach (Sodium Hypochlorite) Does
Although it’s a strong disinfectant and brightener, household bleach (sodium hypochlorite) works mainly by breaking down organic stains and killing mold, mildew, and bacteria on wood surfaces. You’ll use it to remove biological discoloration and lighten tannin bleed if applied correctly. It oxidizes colored compounds, opening fibers so you can rinse and sand for a more even tone. Take care with concentration and contact time to avoid excessive wood damage.
- Kills microbes that cause staining and decay.
- Breaks chemical bonds in organic pigments.
- Opens wood fibers for easier cleanup.
- Rinses away soluble residues.
How Oxalic Acid, Hydrogen Peroxide, and Two‑Part Bleaches Differ
Because they work by different chemistries and target different problems, you’ll choose oxalic acid, hydrogen peroxide, or a two‑part bleach based on the stain type and how much wood you can risk altering.
Oxalic acid removes iron and tannin stains with minimal lightening of surrounding wood; it’s fast and predictable for small, localized discolorations.
Hydrogen peroxide oxidizes organic pigments and lightens overall color more gently than household bleach, good for brightening without heavy fiber damage.
Two‑part bleaches (peroxide plus alkali) produce stronger, deeper bleaching for stubborn or mixed stains but increase risk of grain raising and surface softening.
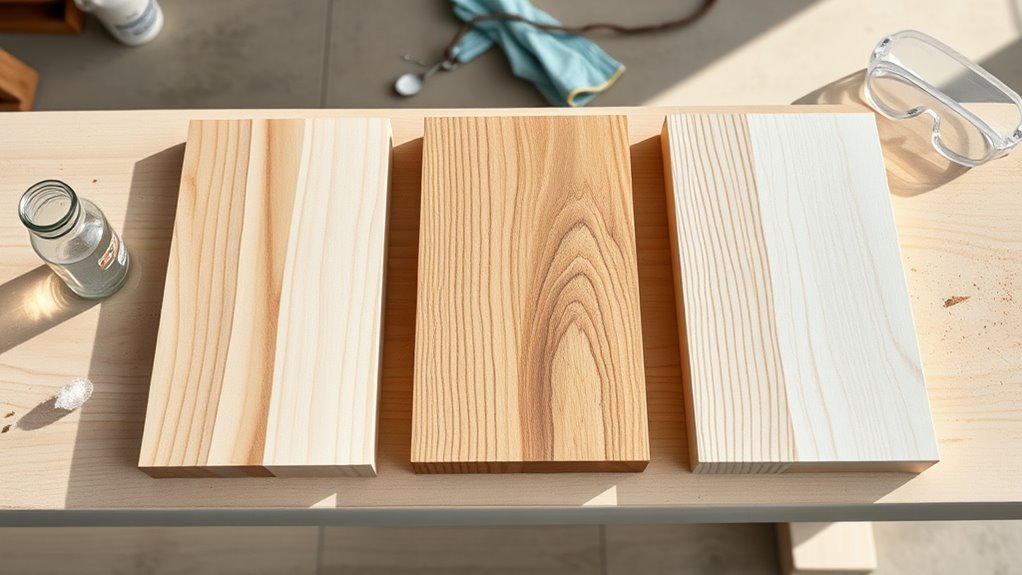
Which Wood Types Respond Well to Household Bleach
If you’re planning to use household bleach (sodium hypochlorite), know that it works best on lighter, open-grain woods—like pine, poplar, and maple—where the bleach can reach and lighten surface pigments without overly stressing the fibers.
- Pine: accepts bleach evenly; knots may remain darker, so test first.
- Poplar: responds well; you’ll get a soft, uniform fade that’s easy to finish.
- Maple: lightens nicely but can blotch; sanding and tests reduce surprises.
- Oak (red/white): open grain reacts predictably; grain contrast may increase, so plan your look.
Which Finishes and Stains Cannot Be Bleached With Household Bleach
Knowing which woods bleach well helps, but the finish or stain already on the piece determines whether household bleach will work at all.
If the wood has lacquer, shellac, varnish, polyurethane, or water-based topcoats, bleach won’t penetrate; you’ll need to strip the finish first.
Oil-based stains and dyes often chemically bond or sit beneath sealed surfaces, so bleach won’t change their color reliably.
Gel stains and tinted sealers also resist household bleach.
Painted surfaces block bleach entirely and can react unpredictably.
Always test an inconspicuous spot after removing or abrading finishes to confirm whether bleaching will be effective.
Essential Safety Gear You Must Wear When Bleaching Wood
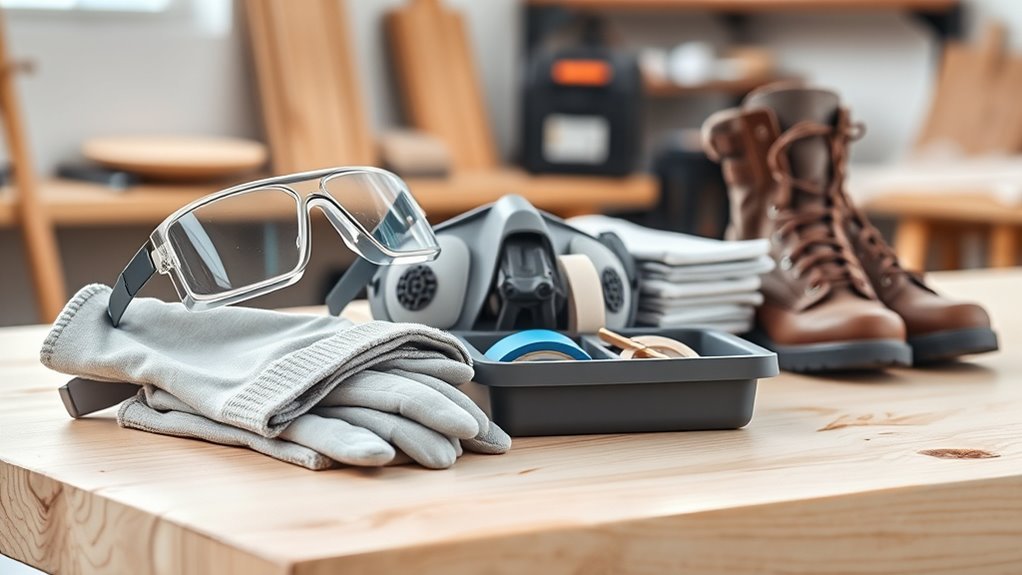
When you’re bleaching wood, you should protect your eyes and face with goggles or a full-face shield to block splashes and fumes.
You’ll also need a respirator rated for chemical vapors and gloves that resist bleach to keep your lungs and hands safe.
Wear these consistently whenever you mix, apply, or rinse bleaching solutions.
Eye And Face Protection
Because bleaching solutions can splash and emit irritating vapors, you should protect your eyes and face every time you work. Wear gear that prevents contact and reduces irritation immediately.
- Wear splash-resistant safety goggles with a snug seal to block liquid and fumes.
- Use a full-face shield over goggles when pouring, scrubbing, or working close to the wood.
- Keep a clean water source nearby to flush eyes and face for at least 15 minutes if contact occurs.
- Remove contact lenses before working or have spare glasses; lenses can trap irritants against your eye.
Check gear for damage before each use.
Respiratory And Hand Protection
If you’re working with bleach or other wood-stripping chemicals, protect your lungs and hands every time you mix, apply, or rinse solutions. Wear an N95 or respirator rated for chemical vapors when ventilation is limited or fumes are strong; replace cartridges per manufacturer guidance.
Use chemical-resistant gloves—nitrile or neoprene—long enough to cover wrists and overlap sleeve cuffs. Inspect gloves for holes and change them after spills or extended exposure. Avoid latex if you have sensitivities.
Wash hands thoroughly after removing gloves and before eating. Keep a spare pair nearby and store PPE cleanly to prevent contamination between jobs.
How to Set Up and Ventilate Your Workspace Safely
Before you start bleaching, clear and organize a well-ventilated workspace so fumes can’t build up and you can move safely around the project. Position your work near an open window or door and create cross‑ventilation with a fan directed outwards. Keep children and pets away and mark the area as off‑limits.
- Open windows and doors to create airflow.
- Use a box fan or exhaust fan pointing outside.
- Remove flammable materials and clutter from the area.
- Keep a clear exit path and a damp cloth handy for spills.
Monitor fumes and pause work if odors feel strong.
Tools and Materials Checklist for a Household‑Bleach Project
When you’re ready to bleach wood with household bleach, gather the right tools and materials so the job’s safe, controlled, and efficient. You’ll need household bleach (sodium hypochlorite), distilled water for dilution, a plastic spray bottle or acid-resistant container, and measuring cups.
Wear chemical-resistant gloves, eye protection, and a respirator rated for chlorine fumes. Have plastic sheeting, painter’s tape, and disposable rags to protect surroundings.
Use nylon or natural-bristle brushes, plastic scrub pads, and a plastic or stainless steel mixing stirrer. Keep a neutralizer (white vinegar), buckets for rinsing, and a well-ventilated workspace with a fan handy.
How to Determine Whether to Strip the Finish First
First, check what kind of finish is on the wood—shellac, lacquer, varnish, or oil-based finishes react differently to bleach.
Then assess the finish condition: if it’s flaking, yellowed, or heavily built-up, you’ll usually need to strip it before bleaching.
If the finish is intact and clear, you can often bleach through it or lightly abrade instead.
Check Finish Type
Want to know whether you need to strip the finish before bleaching? Check the finish type first — some finishes block bleach, others don’t. Do this simple test and decide.
- Identify sheen: glossy often means polyurethane; sand a tiny spot to see if finish gums.
- Try solvent: rub a hidden area with denatured alcohol; shellac or lacquer will soften.
- Test water: drop water—if it beads, finish is likely intact and may resist bleach.
- Read product history: if you know prior treatments (poly, varnish, shellac), plan to strip non‑porous finishes before bleaching.
Assess Finish Condition
Before you strip anything, assess the finish’s condition so you know whether bleaching will penetrate or just sit on top.
Lightly scuff an inconspicuous area with fine sandpaper; if sanding removes shine and reveals raw wood quickly, the finish is thin or worn and bleach can reach fibers.
If the surface remains glossy or feels plastic-like, it’s likely a modern film finish that will block bleach.
Test a small bleached spot after cleaning—no change means strip first.
Also watch for stains, dyes, or tannin bleed that require full removal.
Plan to strip if coatings or contaminants resist both sanding and bleach.
How to Test a Hidden Area to Predict Results
When you’re preparing to bleach a piece of furniture, test a hidden area to see how the wood and finish will react—this simple step prevents surprises. Choose an inconspicuous spot, like inside a drawer or underside, and follow a clear procedure:
- Clean the area so dirt or oils don’t skew results.
- Apply a small amount of undiluted household bleach with a cotton swab; wait 5–10 minutes.
- Rinse thoroughly, blot dry, and let the wood dry completely for 24 hours.
- Inspect color change, grain raise, and finish reaction before committing to full treatment.
How to Dilute Household Bleach for Wood Bleaching
If your test spot reacted well, you can prepare a proper bleach solution for the rest of the piece—diluting household bleach reduces harshness while still lightening the wood.
Mix one part regular (5–6%) sodium hypochlorite bleach with three parts water for a mild solution.
For slightly stronger action, use equal parts bleach and water, but don’t exceed that without expert-grade products.
Always add bleach to water, not water to bleach.
Use a plastic container and fresh solution, work in a ventilated area, and wear gloves and eye protection.
Label leftover solution and never store it in metal containers.
Step‑by‑Step Surface Preparation Before Applying Bleach
Although proper prep takes time, you’ll get even, predictable results by following a clear sequence. Start by clearing the area and ventilating; open windows and mask up.
Check the wood for finishes—varnish, paint, or wax—and strip them where present.
Inspect for varnish, paint, or wax, and remove any existing finishes before proceeding.
Sand lightly with fine grit to open the grain and remove raised fibers, then vacuum and tack-cloth the surface.
- Remove clutter and guarantee ventilation.
- Test for finishes; strip if needed.
- Sand with 180–220 grit; don’t over-sand.
- Clean dust with vacuum and tack cloth.
Finish by wiping with a damp cloth and letting the wood fully dry.
Applying Bleach Evenly (How to Avoid Streaks)
Now that the surface is clean and dry, apply the bleach in a controlled, consistent pattern to prevent streaks. Work in small sections, maintaining a wet edge so each pass overlaps slightly. Use a well‑rung sponge or low‑nap brush to distribute solution evenly, following the wood grain.
Avoid drips by wiping excess immediately with a clean cloth. Rinse or blot any pooling areas to stop concentration differences.
If using a spray, mist lightly and back‑brush to level coverage. Check from different angles under good light, correcting uneven spots before the wood starts to dry.
Timing: How Long to Leave Household Bleach on Wood
When you apply household bleach to wood, you’ll usually leave it on for 5–15 minutes depending on the concentration and the stain’s severity. You’ll watch the color shift and test discreet spots to avoid over-bleaching. Adjust based on wood species and prior finishes.
- Light stains: 5–7 minutes for subtle brightening.
- Moderate stains: 8–12 minutes for more noticeable lift.
- Heavy stains: 12–15 minutes, checking frequently to prevent damage.
- Thin or soft woods: reduce time and test often to avoid fiber weakening.
Use consistent timing across the piece for even results.
How to Neutralize Household Bleach After Bleaching
Because household bleach keeps working after you’ve stopped scrubbing, you need to counteract it to stop the chemical reaction and protect the wood and any finish you’ll apply.
Mix a neutralizing solution—1 tablespoon of white vinegar per cup of water or a weak solution of sodium thiosulfate if you have it. Apply gently with a sponge, working the solution briefly across bleached areas to convert residual chlorine.
Don’t over-saturate; you’re neutralizing, not rinsing. Blot excess with a clean cloth.
Test a small area first to ensure the neutralizer won’t affect grain or existing stains.
How to Rinse and Dry Wood Properly After Bleaching
After neutralizing the bleach, rinse the wood thoroughly with clean water to remove any residue. You’ll want to run water over the surface until it stops foaming.
Blot with a clean cloth to lift excess moisture. Let the wood dry completely in a well-ventilated area—use fans or sunlight if possible—to prevent warping or mildew.
Rinse Thoroughly With Water
Although the bleach has done its job, you must rinse the wood thoroughly to remove all chemicals and prevent residue that can weaken fibers or interfere with finishes. Rinse promptly and methodically so the surface isn’t left acidic or soapy.
- Use clean water and a soft brush to work across grain, flushing out bleach.
- Change rinse water often or use a hose for continuous fresh flow to avoid recontamination.
- Pat stubborn areas with a damp cloth until no discoloration or foam appears.
- Finally, let excess water drain away and blot with absorbent towels to minimize standing moisture before moving to drying.
Ensure Complete Drying
Once you’ve rinsed thoroughly, make certain the wood dries completely before sanding or refinishing to prevent mold, tannin bleed, or finish failure. Wipe excess water with clean rags, then let air circulate around the piece—use fans to speed evaporation and open windows for cross-ventilation.
For thicker lumber or indoor projects, elevate the wood on sticks so all sides dry evenly. Check moisture with a reliable meter; target below 12–15% for most finishes.
Avoid direct heat or sunlight that can warp or cause surface cracking. Be patient—proper drying time ensures a stable, stain-ready surface and long-lasting finish.
When and How to Repeat Bleaching for Lighter Results
If your wood hasn’t reached the shade you want after the first treatment, you can repeat the bleaching process—waiting and testing between applications to protect the grain and surface. Plan repeats carefully: don’t rush, monitor progress, and restore pH before finishing.
- Wait at least 24–48 hours after neutralizing and drying to assess color change.
- Test a small, inconspicuous area with the same bleach mix to predict results.
- Apply additional light, even coats; avoid saturating the wood to prevent raised grain.
- Neutralize, rinse, and dry fully between cycles, then reassess before deciding to stop.
Blending Bleached and Unbleached Wood
When you need a consistent look across bleached and unbleached sections, plan your approach so shifts read natural and intentional. Test small areas to match tone; wood species and grain absorb bleach differently, so adjust concentration and dwell time.
Use gradual progression—feather bleach outward from treated zones or apply a lighter pass on adjacent wood—to avoid stark lines. After bleaching, sand gently and apply the same stain or finish to unify color and sheen.
Stand back and evaluate under the room’s typical lighting. Repeat subtle adjustments until the blended area reads cohesive rather than patched.
Spotting and Avoiding Wood Fiber Damage
After you’ve matched tones between bleached and unbleached areas, check the wood for signs of fiber damage before finishing. You’ll spot weakened fibers by touch and light, then act carefully to avoid worsening the surface.
- Run your hand gently—feel for fuzzing, roughness, or soft spots.
- Shine a light across the grain—look for raised fibers or uneven sheen.
- Tap with a fingernail—listen for dull, hollow sounds that suggest delamination.
- Test a hidden edge with fine sandpaper—if fibers pull, stop and reassess.
If damage appears, don’t sand aggressively; stabilize with minimal sanding and light sealing.
How to Treat Tannin Bleed and Brown Stains After Bleaching
After bleaching, check where tannins may be coming from—knotty areas, old water stains, or contact with metal can all cause brown bleed.
You can treat most tannin and iron stains with a diluted oxalic acid solution applied per the product instructions, then rinse and dry thoroughly.
Once the wood is clean, seal and refinish promptly to lock in the results and prevent recurrence.
Identify Tannin Sources
Tannin bleed shows up as gray, brown, or pinkish stains that can reappear even after you’ve bleached wood, so you’ll need to pinpoint where the tannins are coming from before sealing or refinishing. Look for sources and test methodically.
- End grain and sapwood: inspect joints, cuts, and growth rings where tannins concentrate.
- Metal contact: check nails, screws, and fittings that react and leach discoloration.
- Moisture paths: trace water stains, leaks, or high-humidity areas that mobilize tannins.
- Old finishes or fillers: remove varnish, shellac, or tinted putty that can mask or reintroduce stains.
Note findings before proceeding to treatment.
Use Oxalic Acid
Because brown tannin stains can resist household bleaches, you’ll want to use oxalic acid to neutralize and lift those stubborn marks before sealing.
Mix oxalic acid crystals with warm water per package directions, wearing gloves, eye protection, and a respirator.
Test a small, inconspicuous area first.
Apply with a brush or sponge, let it sit until stains lighten, then rinse thoroughly and neutralize with clean water.
Repeat only if necessary.
Dispose of runoff responsibly.
Allow the wood to dry completely and inspect for remaining discoloration before moving to final surface preparation.
Store leftover chemical safely and out of reach.
Seal And Refinish
Now that you’ve neutralized and rinsed away tannin stains with oxalic acid, you’ll want to lock in the results and protect the wood before finishing. Sealers stop tannin bleed and prepare the surface for a topcoat. Follow these steps:
- Test a shellac or stain-blocking primer on a hidden area for compatibility and color shift.
- Apply a thin, even coat of shellac or specialized tannin blocker; let dry fully.
- Lightly sand between coats with fine grit, then wipe dust clean.
- Finish with your chosen varnish, polyurethane, or oil, monitoring for any returning discoloration.
Inspect periodically and recoat if needed.
How to Remove Yellowing Caused by Old Finishes or Bleach
When old finishes or improper bleaching leave wood with a yellow cast, you can restore a neutral tone by identifying the cause and choosing the right corrective method.
First, test a small area: if yellowing sits in the finish, strip or denatured-alcohol wipe it away.
If wood fibers are stained from previous varnish or sun exposure, sand lightly with fine-grit paper following the grain, then apply oxalic acid for tannin-related dark spots.
For residual bleach yellowing, neutralize with a diluted vinegar rinse, dry, then sand smooth.
After correction, condition the wood with a suitable sealer and test stain or finish on scrap.
Safe Bleach Disposal and Cleanup
If you’ve finished bleaching wood, don’t just wash it down the drain—neutralize and dispose of the solution properly to protect yourself and the environment. Rinse pieces outdoors, wear gloves and eye protection, and dilute leftover bleach with plenty of water.
Add household hydrogen peroxide or baking soda slowly to neutralize small amounts; test pH if unsure. For larger volumes, contact local hazardous waste services.
For small amounts, neutralize bleach slowly with hydrogen peroxide or baking soda; test pH. Large volumes require hazardous waste services.
Clean tools with water after neutralizing, dry thoroughly, and ventilate the workspace. Store unused bleach sealed and upright away from heat.
- Neutralize
- Dilute
- Contact local disposal
- Clean and store
How to Restore Finish After Bleaching: Sealers and Topcoats
After bleaching, you’ll need to pick a sealer that matches the wood species and the look you want—water‑based for clarity, oil‑based for warmth.
Follow the manufacturer’s instructions for application and drying times so coats cure properly before recoating.
Finally, plan regular maintenance and periodic recoating to protect the finish and keep the wood looking its best.
Choosing The Right Sealer
Because bleached wood is more porous and chemically altered, you’ll need a sealer that restores protection without darkening the lightened tone. Choose products labeled non-yellowing and compatible with bleach-treated fibers. Consider these options:
- Water-based clear sealers — low odor, minimal ambering, good for interior pieces.
- Oil-modified polyurethanes — durable but may warm tones; test first.
- Shellac — fast-drying and bonding, but can amber over time; use dewaxed for compatibility.
- Spar or marine varnish — flexible and UV-resistant for sun-exposed items.
Always test on a scrap, check adhesion, and confirm the finished look before sealing the whole piece.
Application And Dry Times
When you’re ready to seal bleached wood, work in thin, even coats and follow the manufacturer’s recommended drying times so each layer bonds properly and won’t trap moisture.
Apply with a high-quality brush, foam applicator, or lint-free cloth depending on product type, keeping strokes in the grain.
Sand lightly between coats with fine grit to remove dust nibs and promote adhesion; vacuum and tack cloth before the next pass.
Allow final cure time before light use—film-forming finishes often need days to fully harden.
Note ambient temperature and humidity affect dry times; consult product data for specific cure schedules.
Maintenance And Recoating
If you want your bleached wood to keep its light, even appearance, plan a maintenance and recoating schedule before grime or wear sets in. After bleaching and full drying, seal and protect with appropriate finishes to avoid re-yellowing and moisture damage. Check yearly; high-traffic pieces need more care. Follow these steps:
- Clean gently with a pH-neutral cleaner and let dry.
- Lightly sand with fine grit to dull gloss and promote adhesion.
- Apply a compatible sealer (water-based for minimal ambering) and let cure.
- Topcoat with a protective finish (polyurethane or conversion varnish) per label directions.
Which Stains and Dyes Work Best on Bleached Wood
Although bleaching lightens wood dramatically, it also changes how finishes absorb and appear, so you’ll want to choose stains and dyes that account for reduced contrast and altered grain visibility.
Bleaching brightens wood but alters absorption and grain contrast, so pick dyes and stains that compensate for the change
You’ll get best results with water-based dyes or aniline dyes that penetrate evenly and layer buildably; they restore tone without reintroducing heavy contrast.
Semi-transparent water-based stains add subtle color while letting the softened grain show.
Gel stains can be useful for more control but may sit unevenly on bleached surfaces.
Always test on scraps, use conditioning agents if needed, and seal with a clear topcoat to lock color uniformity.
How to Match Color When Re‑Staining Bleached Wood
Because bleaching strips both pigment and natural contrast, matching color when re‑staining takes more than picking a similar swatch—you’ll need to assess the bleached tone, test compatible dyes or stains, and build color in thin layers until you reach the desired depth.
- Compare undertones: hold samples to the light and note warm, cool, or neutral cast.
- Test on scrap: apply candidate stains in thin coats, letting each dry to reveal true color.
- Layer gradually: mix dye and stain or glaze between coats to tune depth without overshooting.
- Record ratios and times so you can replicate the match precisely.
How to Protect Bleached Wood From Future Discoloration
When you finish bleaching, seal the wood promptly to lock in the lighter tone and cut future discoloration from sunlight, moisture, and airborne contaminants. Choose a UV-resistant clear finish—water-based polyurethane or spar varnish—for exposed pieces.
Seal bleached wood promptly with a UV-resistant clear finish—water‑based polyurethane or spar varnish—to preserve the lighter tone.
For interiors, a low-VOC oil or hardwax oil adds protection while keeping grain visible. Test finishes on scraps to confirm appearance.
Apply thin, even coats, sanding lightly between coats for adhesion. Use furniture pads, avoid direct sunlight when possible, and clean spills quickly with mild detergent.
Reapply a maintenance coat every few years or when wear appears to maintain uniform color and protection.
How Humidity and Temperature Affect Bleaching Outcomes
You’ll get the cleanest, most predictable results when you bleach wood in a moderate temperature—roughly 65–75°F (18–24°C).
Too-hot conditions speed chemical reactions and can over-lighten or damage fibers, while too-cold slows the process and may leave uneven color.
Also watch humidity: high moisture extends drying time and can cause blotching, whereas low humidity helps the wood dry evenly after rinsing.
Ideal Temperature Range
How does temperature and humidity change the way wood reacts to bleach? You want a stable, moderate range so the bleach works predictably and safely.
Aim for conditions that let the chemical act without evaporating too fast or slowing to ineffectiveness.
- 60–75°F (15–24°C): optimal reaction speed, consistent results.
- Avoid below 50°F (10°C): reaction stalls, longer exposure risks grain mismatch.
- Avoid above 85°F (29°C): rapid evaporation, blotching, stronger fumes.
- Work in well-ventilated, shaded space to keep temperature steady and protect finishes and your health.
Humidity’s Effect On Drying
Temperature sets the pace for the bleach, but humidity controls how the wood dries afterward, and that drying rate affects color, grain contrast, and final finish adhesion. You should work in 40–60% relative humidity; too high and drying stalls, leaving blotchy color and adhesion issues, too low and surface dries fast, trapping moisture and causing raised grain. Monitor conditions and use fans or humidifiers to steady the environment. Test a scrap first to see how your wood reacts under local conditions.
| Humidity | Effect | Action |
|---|---|---|
| Low (<30%) | Fast surface dry | Mist lightly |
| Moderate (40–60%) | Even drying | Ideal |
| High (>70%) | Slow, blotchy | Increase airflow |
How to Handle Sensitive Woods Like Pine, Maple, and Oak
When working with sensitive species like pine, maple, and oak, take extra care because their grain, resin content, and density react differently to bleach. Test a small, inconspicuous area first and adjust your technique based on the result.
You’ll want to:
- Sand gently to open pores without over-smoothing softwoods.
- Use a diluted bleach solution and apply with a sponge, watching color shift.
- Neutralize thoroughly and rinse to stop chemical action and prevent residue.
- Finish with a toner or light stain if needed to even tone and protect.
Work slowly and reassess after each step to avoid surprises.
Common Mistakes That Cause Blotchy or Uneven Bleaching
When you apply bleach unevenly or skip proper surface prep, you’ll get patchy, inconsistent results.
You should sand, clean, and tape off areas so the bleach soaks in uniformly. Don’t rush the prep or blotches will ruin the finish.
Applying Bleach Unevenly
If you don’t prepare and apply bleach correctly, you’ll often end up with blotchy, streaked, or unevenly lightened wood instead of a smooth, consistent finish. You need steady technique and attention to detail to avoid patchy results.
Common application errors include:
- Overloading one area with bleach while skimming others.
- Letting bleach sit too long in spots before neutralizing.
- Using inconsistent agitation or brushing direction across the grain.
- Applying bleach to areas with different porosity without adjusting dwell time.
Work methodically, keep a wet edge, and neutralize uniformly so the tone stays even.
Ignoring Wood Preparation
Because the surface dictates how bleach reacts, skipping proper prep almost guarantees blotchy results. You need to remove finishes, sanding dust, and contaminants before bleaching. Don’t assume old varnish or wax is gone—test with denatured alcohol and sand stubborn areas.
Sand consistently with the same grit, working along the grain to level the surface; inconsistent sanding leaves densified spots that resist bleach. Clean thoroughly afterward so oils or debris won’t block penetration.
If you skip these steps, bleach will lighten unevenly and highlight defects. Proper prep guarantees uniform absorption and predictable, professional-looking results.
Troubleshooting: What to Do If Bleach Darkens the Wood
Although bleaching is meant to lighten wood, it can sometimes react with tannins or finishes and leave the surface darker than you started with. You’ll want to act carefully to reverse or mitigate the darkening without causing more damage.
- Rinse thoroughly with clean water, neutralize bleach with a mild vinegar solution, and let wood dry fully.
- Lightly sand the affected area to remove altered fibers, working with the grain.
- Test a wood brightener or oxalic acid on a hidden spot; follow product instructions.
- If darkness persists, strip existing finish and consult a professional before repeating bleaching.
Troubleshooting: What to Do If Bleach Leaves a White Residue
If you see a white residue after bleaching, first determine whether it’s leftover bleach salts, mineral deposits from water, or a reaction with the wood’s natural oils.
You can usually remove it safely by neutralizing with a diluted vinegar or baking soda rinse, then gently scrubbing with a soft brush and rinsing thoroughly.
If the stain persists or the wood looks damaged, stop and consult a professional before proceeding.
Identify White Residue Source
When bleach seems to leave a white film on your wood, start by figuring out what that residue actually is so you can treat it correctly. Inspect the surface and test small spots to distinguish salt, oxidized tannins, or bleacher solids.
Use these checks:
- Smell and texture: salty, powdery = salts from evaporation.
- Color change under finish: deep brown under film = tannin reaction.
- Water test: beads vs. absorption indicates finish disruption.
- Scrape gently with a fingernail: flakes mean crystallized bleach byproducts.
Knowing the source guides whether you neutralize, rinse, or refinish next.
Safe Residue Removal
Because different residues need different treatments, you’ll want to match your cleaning method to what you identified.
If the residue is dried bleach crystals, rinse the area with plenty of water, then wipe with a damp cloth until residue stops appearing.
For mineral streaks from water, use a solution of equal parts white vinegar and water, apply briefly, then rinse thoroughly.
If the finish itself clouded, lightly sand with fine-grit paper and reapply finish.
Always wear gloves, ventilate the area, and test your chosen method on an inconspicuous spot first to avoid further damage.
When to Switch to an Alternative Bleach for Persistent Stains
Although most common wood stains respond to standard hydrogen peroxide or oxalic acid treatments, you should consider switching to an alternative bleach when repeated applications fail to lighten the discoloration or when the stain is deep, set, or uneven. You’ll pick a stronger or different chemistry based on stain type, wood species, and finish removal needs:
When peroxide or oxalic won’t do, switch to a stronger bleach tailored to stain type, wood, and finish.
- Try sodium hypochlorite only for tannin-heavy or mold stains, testing first.
- Use two-part wood bleach (A/B) for stubborn, darkened areas.
- Consider enzymatic or commercial restorers for organic residues.
- Always neutralize, sand minimally, and test a hidden area.
How to Estimate Time and Cost for a DIY Bleaching Project
Once you’ve determined the right bleach and treated stubborn stains, plan time and budget before you start work. Measure square footage and note wood type; porous woods need more applications and drying time.
Estimate prep: sanding, cleaning, and masking—each hour adds labor. Count supplies: bleach, neutralizer, brushes, gloves, rags, and sandpaper; buy a little extra.
Factor drying between coats (typically 2–24 hours) and final curing (several days). If you’re doing 50–200 sq ft, expect a weekend; larger areas need staged work or help.
Add a contingency (10–20%) for unexpected issues or replacements.
Protect Adjacent Surfaces and Landscaping When Bleaching Outdoors
When you’re bleaching wood outdoors, take steps to protect nearby surfaces and plants from splash, runoff, and fumes. You’ll limit damage and cleanup by prepping the area, isolating vegetation, and managing runoff. Follow these steps:
- Lay heavy-duty plastic or drop cloths over paved areas, furniture, and soil near the work zone.
- Water and temporarily cover delicate plants with breathable fabric or move potted specimens away.
- Create a shallow trench or absorbent barrier to catch runoff; divert it toward hardscape, not soil.
- Rinse tools and surfaces immediately; dispose of contaminated water per local rules.
When to Hire a Pro Instead of DIY Bleaching
If you’re dealing with large, historic, or structurally damaged wood, hire a pro rather than tackling bleaching yourself. Call a specialist when the job risks structural integrity, involves valuable or irreplaceable pieces, or requires commercial-scale bleaching.
Hire someone if you lack safety gear, respiratory protection, or experience with chemical neutralization and disposal. Bring in a pro for complex finishes, layered stains, or when matching adjacent treatment matters.
Professionals can assess hidden rot, recommend appropriate treatments, and guarantee permit or code compliance. If timelines, warranties, or insurance concerns matter, opting for a licensed contractor will save time and reduce risk.
Before‑and‑After: Realistic Outcomes for Household‑Bleached Wood
When you bleach wood at home, expect noticeable lightening but not a perfectly uniform color—knotty areas and previous stains can react differently.
You’ll also see the grain and texture become more pronounced as tannins and surface oils lift.
Keep in mind results can fade or yellow over time, so you’ll need occasional maintenance to preserve the look.
Color Change Expectations
Although bleach can dramatically lighten some woods, don’t expect uniform results across species or stains—grain, tannins, and previous finishes all affect the outcome. You’ll see varied shifts: some boards go pale and even, others turn uneven or slightly yellowed. Test a hidden area first and be ready to adjust expectations.
- Lightening range: from subtle softening to near-white, depending on wood and stain.
- Stain interaction: old dyes or varnishes may resist or blotch.
- Tannin reaction: high-tannin woods can brown or spot after bleaching.
- Multiple applications: can increase lightening but raise risk of uneven tones.
Grain And Texture Effects
Because bleach lifts surface color more than it changes the wood’s structure, you’ll notice the grain and texture becoming more pronounced—rays, pores, and growth rings often pop as surrounding tones lighten.
You’ll see contrast increase where denser latewood resists bleaching and softer earlywood lightens more. End grain and medullary rays can appear brighter, creating streaks or flares.
Hands-on sanding after bleaching accentuates these effects by removing lifted fibers and revealing clearer patterns. Test a scrap to predict your species’ response, and adjust application time for subtlety or drama.
Expect visual depth rather than a uniform, flat pale finish.
Longevity And Maintenance
If you want bleached wood to keep looking good over years of normal use, plan for a bit more care than unbleached pieces. You’ll notice lighter tones show stains and wear sooner, so protect surfaces and monitor finish integrity.
Maintain it by:
- Reapplying a clear protective finish every 1–3 years depending on traffic.
- Cleaning gently with pH-neutral cleaner; avoid harsh chemicals that reverse bleaching.
- Using coasters, pads, and felt feet to prevent moisture rings and scratches.
- Touching up small spots with diluted stain or toner matched to the bleached tone.
With attentive care, results stay predictable and attractive.
Eco‑Friendly and Low‑Odor Alternatives to Household Bleach
Looking for a gentler way to lighten and brighten wood without harsh bleach fumes? You can choose eco-friendly, low-odor options like hydrogen peroxide, oxalic acid, or a light vinegar solution depending on the stain or tannin issue.
Hydrogen peroxide lifts color with minimal smell and breaks down into water and oxygen.
Oxalic acid removes dark water stains and is biodegradable when neutralized—use gloves and rinse.
Diluted white vinegar can tame mildew but won’t deeply bleach.
Test each method on scrap or an inconspicuous area, work in ventilation, and dispose of solutions per local guidelines to protect yourself and the environment.
Printable Quick Safety Checklist Before You Start
Before you start bleaching wood, run through this short printable checklist so you don’t skip critical safety steps. Print or save it, post it near your workspace, and check each item before you begin.
- Wear PPE: chemical-resistant gloves, eye protection, long sleeves, and a respirator if indoors.
- Ventilation: open windows, run fans, or work outdoors to disperse fumes.
- Surface prep: remove finishes, clean debris, and test bleach on a hidden spot.
- Emergency plan: have water, baking soda (to neutralize spills), and emergency contacts handy.
Tick each box only when satisfied, then proceed.
Recommended Products and Further Resources
What products should you have on hand to bleach wood safely and effectively? Gather household bleach (sodium hypochlorite), distilled water for dilution, a plastic spray bottle or bucket, and a soft-bristle brush.
Wear nitrile gloves, chemical-resistant goggles, and an N95 or better respirator. Protect surrounding areas with plastic sheeting and use painter’s tape.
Have baking soda on hand to neutralize bleach and plenty of clean rags.
For tools, use plastic mixing sticks and stainless or plastic trays.
Consult manufacturer SDS for your bleach, OSHA guidelines, and reputable DIY sites or woodworking forums for technique variations and troubleshooting.
Frequently Asked Questions
Will Household Bleach Remove Dark Water Rings From Wood Furniture?
Yes — household bleach can lighten dark water rings, but it often won’t fully remove deep stains. Test first on hidden area, dilute carefully, apply briefly, then neutralize and refinish; persistent stains may need professional repair.
Can Bleaching Wood Affect Its Structural Strength Over Time?
Yes — bleaching wood can weaken it if you overuse strong bleach or soak it repeatedly; you’ll risk fiber damage, drying and brittleness over time, so dilute, limit exposure, rinse thoroughly, and test a scrap first.
Is It Safe to Bleach Antique or Valuable Wood Pieces?
You can, but you shouldn’t unless you’re sure the piece can tolerate it; antiques can weaken, lose patina, or lose value, so consult a conservator, test discreetly, and use the mildest treatment possible.
How Soon After Bleaching Can I Glue or Repair the Wood?
You can usually glue or repair the wood after 24–48 hours once it’s fully dry; longer if it felt damp. You should test a small area for adhesive bond before committing to the full repair.
Can Pets Safely Be in the House During/After a Bleaching Project?
You shouldn’t have pets in the house during bleaching; fumes can irritate them. After ventilating thoroughly and rinsing surfaces, wait several hours to a day before letting pets return, depending on smell and dryness.
Conclusion
You can use household bleach (sodium hypochlorite) to lighten wood in a pinch, but it’s best for surface stains, mold, or slight discoloration—not deep color changes. Wear gloves, eye protection, and ventilate well; test a small area first and neutralize afterward. For more dramatic or controlled bleaching, consider oxalic acid, hydrogen peroxide, or two-part systems. When you work carefully and choose the right method, you’ll get safer, more predictable results.