You can safely lighten wood furniture by cleaning and stripping to bare wood, testing bleach on a hidden spot, then choosing oxalic for tannins, sodium percarbonate for mild brightening, or a two‑part bleach for dramatic results. Apply evenly with PPE, rinse and neutralize thoroughly, let dry, then sand smooth and seal with a non‑yellowing finish. Deal with blotchiness by spot‑bleaching and tannin‑blocking primer. Keep following for step‑by‑step tips, safety, and finish choices.
Bleach Wood Furniture : What This Guide Covers

Before you start, know what this guide will cover so you can decide whether bleaching is right for your piece. You’ll learn when bleaching suits different woods, how it affects grain and finish, and what results to expect versus refinishing or painting.
I’ll outline safety precautions, necessary materials, and choices between oxalic acid, two-part wood bleach, and household options. You’ll get guidance on testing, neutralizing, and preparing surfaces for staining or sealing afterward.
This section won’t walk you through each step — it just frames goals, risks, and outcomes so you can choose the proper method for your furniture.
Quick Step-by-Step Overview (What You’ll Do)
Once you’ve picked the right bleach method for your wood and gathered safety gear, you’ll follow a clear sequence: clean and strip any finish, test a small area, apply the chosen bleach evenly, rinse and neutralize as required, let the wood dry fully, then sand and prep for stain or sealant.
You’ll proceed calmly, checking results at each step. Follow this compact plan:
- Clean and remove finish so bleach contacts bare wood.
- Test in an inconspicuous spot; note timing and effect.
- Apply bleach evenly; rinse and neutralize per product instructions.
- Dry completely, then sand and finish as desired.
When to Bleach vs. Sand or Refinish
After you’ve tested and bleached a small area and seen the results, decide whether bleaching, sanding, or a full refinish will best meet your goals.
If stains lighten and grain stays attractive, bleaching saves time and preserves detail.
Choose sanding when surface damage, deep scratches, or uneven finish remain after bleaching; sanding removes finish and levels defects but can lose carved details.
Refinish fully when structural repairs, veneer replacement, or a complete color change is needed.
Consider time, skill, and value: bleaching is least invasive, sanding is moderate, and a full refinish is most work but most transformative.
Which Bleach to Choose: Oxalic, Percarbonate, Two‑Part
If you’re fixing dark spots or water marks, oxalic acid is your go-to for targeted stain removal.
For overall lightening you can try oxygen-based percarbonate, but for deep, even bleaching you’ll need a two-part potassium permanganate/oxalic or lye-based system.
I’ll outline when each is appropriate and how to use them safely.
Oxalic For Stain Removal
Although oxalic acid isn’t as well-known as oxygen bleaches, it’s the go-to for removing dark iron, water, and tannin stains from wood because it targets those discolorations without stripping the wood’s natural light tones.
You’ll mix crystals with warm water, apply with a brush, let it work, then rinse and neutralize.
Take precautions: gloves, ventilation, and test an inconspicuous area first.
Expect gradual improvement; repeat if needed.
Consider these steps:
- Dissolve crystals per label.
- Apply to stained areas.
- Let sit 10–20 minutes.
- Rinse, neutralize, dry, and sand lightly if necessary.
Two-Part For Deep Bleaching
When you need to strip heavy, set-in discoloration or even dark finishes that single agents can’t touch, a two-part bleach is the tool of choice: it combines an oxidizer (usually sodium hypochlorite or percarbonate) with a reducing agent (often sodium hydroxide or ammonia-based) to break down pigments and lift color deep in the wood fibers.
You’ll mix parts per manufacturer instructions, apply evenly, and neutralize thoroughly after the reaction. Two-part bleaches are aggressive, so wear protection, work in ventilation, and test a scrap.
Use light sanding and conditioning afterward to restore uniform tone before refinishing.
How Wood Species (Oak, Pine, Walnut) Change Results

When you bleach oak, its open grain soaks and highlights the lighter areas while leaving darker grain lines visible.
Pine reacts more aggressively because it’s a softwood, so you’ll often get uneven lightening and raised grain that may need sanding.
Walnut’s naturally dark tone can shift unpredictably, sometimes turning muddy or showing greenish undertones depending on the bleach.
Oak’s Open Grain Effect
Because oak has a pronounced open grain, bleaching it produces a patchy, high-contrast look that’s very different from tighter-grained woods like maple or walnut. You’ll notice raised pores absorb stain and bleach unevenly, so plan for visible texture.
Consider these steps:
- Sand smooth, but keep pores open for uniform removal.
- Test bleach on an inconspicuous area to preview contrast.
- Use filler or pore sealer afterward if you want a smoother, even tone.
- Apply finish that balances sheen without emphasizing patched grain.
You’ll control the final appearance by testing, sealing, and choosing finishes that minimize contrast.
Pine’s Softwood Response
Although pine soaks up bleach more uniformly than open-grained hardwoods, its softwood fibers can raise and darken unevenly if you over-sand or use too-strong a solution. You’ll see lighter, yellowish tones then blotches where sapwood reacts differently. Work gently: test a hidden area, thin your solution, and sand lightly with the grain. Neutralize and dry fully to avoid tannin bleed. Expect quicker color change than oak, but more risk of patchiness. Stabilize knots and resin pockets before bleaching. Use finish choices to even tone afterward and preserve the softer surface.
| Test Area | Solution Strength | Expected Result |
|---|---|---|
| Hidden corner | Weak | Even lighten |
| Knot | Moderate | Darken risk |
| Sapwood | Weak | Yellow shift |
| Heartwood | Moderate | Subtle change |
| Sanded patch | Strong | Raised fibers |
Walnut’s Dark Tone Shift
If you want a predictable, rich result, know that walnut reacts to bleach by deepening its existing dark tones rather than simply lightening across the board. You’ll notice shifts in warmth and contrast; bleaching can reveal underlying sapwood that looks lighter against richer heartwood. Treat walnut gently and test small areas first.
- Test: try a discreet patch to gauge tone change.
- Dilute: use a mild bleach solution to avoid overreaction.
- Neutralize: rinse and neutralize promptly to stop chemical action.
- Finish: choose a compatible stain or oil to harmonize the new contrast.
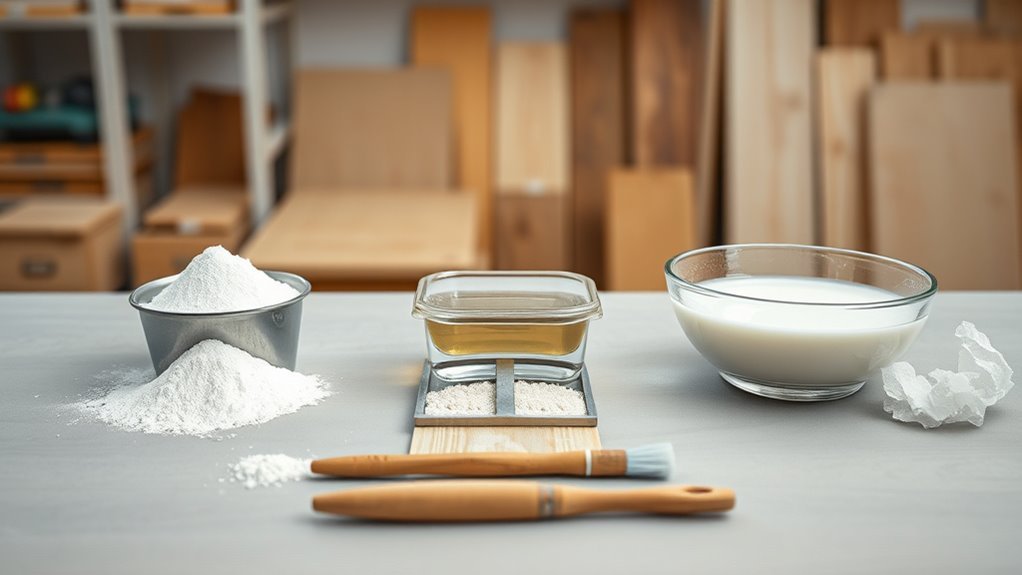
Tools & Materials Checklist for Bleaching
Before you start, gather everything you’ll need so the job stays safe, tidy, and efficient: commercial wood bleach (oxalic or two-part wood bleach), gloves, chemical-resistant goggles, a respirator rated for vapors, plastic sheeting or drop cloths, plastic mixing buckets, nonmetal stir sticks, natural-bristle brushes or foam brushes, clean cotton rags, a scrub pad or fine-grit sandpaper, a spray bottle for water, a neutralizer (per product instructions), and a waste container for used rags.
| Item | Purpose |
|---|---|
| Bleach kit | Lighten wood tone |
| PPE | Protect skin, eyes, lungs |
| Mixing tools | Measure and stir safely |
| Cleanup supplies | Neutralize and remove residue |
Collect extras: test scraps, replacement filters for your respirator, and tightly sealing containers for leftover solutions. Check labels for compatibility with your wood species and follow disposal rules for chemical waste.
Set Up and Protect Your Workspace and Floor
Now that you’ve gathered your bleach kit and PPE, prepare the room so chemicals and dust stay contained. Clear furniture, remove rugs, and close vents to prevent fumes spreading. Tape plastic sheeting over doorways and windows, and lay heavy-duty drop cloths on the floor. Keep a trash bag and cleaning supplies handy for spills.
- Mark a work zone with tape to avoid tracking.
- Protect floors with overlapping plastic and cardboard.
- Position a fan near a window to exhaust fumes outward.
- Keep a bucket of water and rags within reach for quick cleanup.
What to Wear: PPE and Why It Matters
You’ll want to suit up with basic personal protective equipment—gloves, long sleeves, and a respirator if the product’s fumes are strong.
Protect your skin by covering exposed areas and choose chemical-resistant gloves to avoid burns or irritation.
Wear safety goggles so splashes can’t reach your eyes.
Personal Protective Equipment
Why do PPE and proper clothing matter when you’re bleaching wood? You’ll protect yourself from fumes, spills, and damaged clothing while keeping the workspace safe. Choose gear that fits and breathes.
- Wear a long-sleeve shirt and pants to shield skin from splashes.
- Use disposable or dedicated gloves to prevent fabric contamination and chemical transfer.
- Put on a respirator rated for chemical vapors if ventilation is limited.
- Choose closed-toe, slip-resistant shoes to guard against spills and dropped tools.
Follow these basics so you stay safe, comfortable, and ready to work efficiently.
Skin And Eye Protection
Along with covering your clothing and breathing, you need to protect exposed skin and eyes from bleach splashes and vapors. Wear chemical-resistant gloves (nitrile or neoprene) that extend past your wrists, and consider a long-sleeve shirt or sleeve guards to avoid cuffs soaking through.
Use splash-proof safety goggles that seal around your eyes; regular glasses won’t protect against side splashes. If you’re working overhead or scrubbing, add a face shield for extra coverage.
Rinse immediately with plenty of water if contact occurs and seek medical help for persistent irritation. Proper PPE prevents burns, blindness, and prolonged skin damage.
How to Test a Small Area to Predict Final Color
Before you commit to bleaching the whole piece, test a hidden spot so you can see the true result on your wood. Choose an inconspicuous area, like the underside or inside a drawer, and follow these quick steps to predict color change accurately.
- Clean the spot gently to remove dust and oils.
- Apply the same bleach and concentration you’ll use on the rest.
- Rinse and neutralize per product instructions, then let dry fully.
- Observe in natural light over 24–48 hours to note final tone and grain contrast.
Use this trial to adjust strength or technique before proceeding.
Step 1 – Prep: Clean, Degrease, and Strip Finishes
Before you bleach, you’ve got to start with a clean, grease-free surface so the bleach can penetrate evenly. Use a gentle cleaner or TSP substitute to remove dirt and oils.
Then, sand or strip off any old varnish or lacquer until you reach bare wood. Proper prep guarantees the bleach will lighten the wood predictably and without patchy results.
Clean Surface Thoroughly
Once you’ve cleared the piece of hardware and loose dust, give the wood a thorough cleaning so the bleach can penetrate evenly. You’ll remove grease, grime, and oils that block whitening. Follow these steps before bleaching:
- Wipe with a soft cloth and warm, soapy water; rinse and dry.
- Apply a degreaser or trisodium phosphate substitute to stubborn spots; neutralize per directions.
- Sand lightly with fine-grit paper to open the grain, then remove dust with a tack cloth.
- Inspect for remaining residues; repeat cleaning where needed so the surface’s ready for even bleach absorption.
Remove Old Finish
Now you’ll remove the existing finish so the bleach can reach raw wood; strip varnish, lacquer, or polyurethane down to bare wood using a chemical stripper or careful sanding.
Work in a ventilated area, wear gloves and eye protection, and follow stripper instructions—apply, wait, then scrape with a plastic or wooden scraper to avoid gouging.
If sanding, start with 80–120 grit to remove coatings, then 150–220 grit to smooth.
Clean residue with mineral spirits or a recommended degreaser, then rinse and dry fully.
Inspect for remaining finish, repeating stripping or spot-sanding until the wood is uniformly bare and ready for bleaching.
Step 2 : Remove Tannins With Oxalic Acid
Wondering why your bleached wood still looks blotchy? You’re likely seeing tannin stains; oxalic acid removes them safely when you follow directions. Prepare in a well-ventilated area, wear gloves and eye protection, and test a hidden spot first.
Apply a mixed oxalic acid solution, let it work, then rinse thoroughly and let dry. Follow this 4-step rhythm:
- Mix per manufacturer ratio and dissolve completely.
- Brush onto tannin-stained areas, working with the grain.
- Wait the recommended time; don’t let it dry on the surface.
- Rinse fully, neutralize if advised, and dry before the next step.
Step 3 : Lighten With Sodium Percarbonate
After the oxalic acid has removed tannin stains and the wood is dry, lighten the color further with sodium percarbonate to achieve an even, pale base for finishing.
Mix percarbonate powder with warm water per product instructions, creating a clear solution.
Test a hidden area first.
Apply evenly with a brush or sponge, working along the grain, and keep the surface wet for the recommended dwell time.
Rinse thoroughly and neutralize if advised, then allow the wood to dry completely.
Repeat short treatments if needed, testing after each pass, until you reach a consistent, lighter tone ready for sanding and sealing.
Step 4 : Dramatic Lightening With Two‑Part Bleach
Now you’ll use a two‑part bleach for more dramatic lightening, so choose a product formulated for wood and follow the manufacturer’s mix ratios.
Wear gloves, eye protection, and a respirator and work with good ventilation to protect yourself.
When the color’s right, neutralize and rinse thoroughly to stop the reaction and prevent damage.
Choosing The Right Two-Part
When you need a dramatic, even foundation for refinishing, a two‑part wood bleach is the right tool because it can remove deep stains and dark tannins that single‑part bleaches won’t touch. You’ll pick one based on wood species, desired lift, and grain contrast.
Consider these points as you choose:
- Compatibility: ensure the formula suits oak, pine, or exotic species you’re working on.
- Strength: match concentration to how much color you need removed.
- Neutralizer: verify the recommended neutralizing agent and timing.
- Finish behavior: confirm how the wood accepts stains or dyes after bleaching.
Safety Gear And Ventilation
Because two‑part bleaches are chemically aggressive, you’ll need proper PPE and airflow before you mix a batch; don’t assume ordinary gloves or a ceiling fan are enough.
Wear chemical‑resistant gloves (nitrile or neoprene), splash‑proof goggles, and a respirator with acid/organic vapor cartridges.
Use long sleeves, pants, and closed shoes; consider a chemical apron if splashing’s likely.
Work outdoors or in a well‑ventilated area with cross‑ventilation and an exhaust fan rated for chemical fumes.
Keep a clear escape path, have baking soda or neutralizer nearby for spills, and store chemicals upright in labeled, sealed containers away from children and pets.
Neutralizing And Rinsing Properly
After the two‑part bleach has lifted the stain, you’ll need to stop the chemical reaction immediately and remove all residues so the wood can accept refinishing products. Neutralize with the manufacturer’s recommended solution, usually a diluted sodium bisulfite or baking soda rinse, then rinse with clean water. Don’t let neutralizer sit too long.
- Mix neutralizer per instructions and apply evenly.
- Rinse thoroughly with clean water, wiping with a soft cloth.
- Repeat neutralizing and rinsing until pH is neutral (use pH strips).
- Dry completely, sanding lightly if needed before staining or sealing.
Neutralize, Rinse, and Dry the Wood Properly
Once the bleach has done its job, you need to neutralize the chemical, rinse thoroughly, and dry the wood to prevent ongoing damage and uneven color.
Mix a neutralizer like hydrogen peroxide or a commercial wood neutralizer per instructions; avoid baking soda or ammonia mixes that can react unpredictably.
Apply evenly with a damp cloth, working section by section.
Rinse with clean water, blotting excess with lint-free towels.
Let the piece air-dry in a warm, ventilated area until completely dry—usually 24–48 hours.
Confirm no lingering chemical smell before proceeding to any finishing or staining steps.
Sanding and Feathering After Bleaching
With the wood fully dry and neutralized, you’ll start sanding to smooth raised grain and blend any lightened spots left by the bleach. Begin with a coarser grit, then refine progressively, keeping pressure even and following the grain. Gradually blend edges where bleaching caused abrupt changes so tones flow naturally.
With wood dry and neutral, sand progressively—coarse to fine—following the grain to blend lightened spots and smooth edges.
- Sand with 120 grit to remove roughness and major light spots.
- Switch to 180 grit to even the surface and soften feathered edges.
- Finish with 220 grit for a smooth, ready surface.
- Clean dust thoroughly before any further steps to guarantee adhesion and clarity.
Choose a Finish to Preserve the Bleached Look
Although bleaching opens up the grain and lightens the tone, you still need to seal and protect the wood so the look lasts—choose a finish that preserves color, resists yellowing, and matches the sheen you want.
Pick a water-based polyurethane or acrylic sealer to minimize ambering; apply thin, even coats and sand lightly between them.
For a more natural feel, use a waterborne penetrating oil finish that won’t darken appreciably, but expect less film protection.
Test your chosen finish on a scrap piece.
Maintain thin coats, follow manufacturer cure times, and avoid oil-based topcoats that can introduce warmth.
Troubleshoot Uneven Color and Persistent Tannins
If you’re seeing blotches, streaks, or brownish areas after bleaching, don’t panic—you can usually correct uneven color and stubborn tannin bleed with a few targeted steps.
Start by rinsing and neutralizing fully; leftover bleach or acid can reactivate uneven tones.
Sand lightly with fine grit to even the surface, then re-bleach small sections if needed.
Test all fixes on an inconspicuous spot.
- Neutralize with water and baking soda, then dry completely.
- Lightly sand high spots and feather edges.
- Spot-bleach darker streaks, rinse, and neutralize again.
- Seal with a tannin-blocking primer before finishing.
Match Bleached Pieces to Existing Décor
Once your bleached piece has fully dried and been sealed, compare its tone and sheen directly against the room’s key elements—walls, flooring, upholstery, and trim—to decide whether you need to warm, cool, or mute the finish so it visually belongs with the rest of your décor.
If it reads too stark, add a thin glaze or light stain to introduce warm undertones. Too yellowed, try a cool-toned wipe or diluted gray wash. Match sheen with a satin or matte topcoat.
Test adjustments on an inconspicuous spot, evaluate in natural and artificial light, and proceed in thin, reversible layers.
Safety, Waste Disposal, and Long‑Term Care Tips
Because bleaching uses strong chemicals and generates contaminated rinse water, you should set up safety gear and a clear disposal plan before you start work. Wear gloves, goggles, and a respirator; ventilate the area and keep pets and kids away. Neutralize and collect rinse water—don’t pour it down storm drains. Seal and label waste for proper hazardous disposal.
- Contain: work over trays and absorbents.
- Neutralize: follow product directions, then test pH.
- Dispose: use local hazardous-waste facilities.
- Maintain: reseal finishes, avoid harsh cleaners, reapply protective wax or poly periodically.
Frequently Asked Questions
Will Bleaching Remove Dark Water Stains Completely?
Sometimes it will: you can often lighten or remove dark water stains with bleach and careful sanding, but deep or set-in stains might persist; you’ll sometimes need multiple treatments, stain neutralizer, or wood replacement for full removal.
Can Bleached Wood Be Stained Darker Afterward?
Yes — you can stain bleached wood darker afterward. You’ll need to neutralize and thoroughly sand the surface, use a conditioner or dye stain for even absorption, and test first to guarantee the desired color outcome.
How Long Does Bleached Furniture Take to Cure Before Finishing?
Typically you’ll wait 24 to 72 hours for bleached furniture to dry, but you should let it cure 7 to 14 days for best adhesion. Test moisture and proceed when the wood feels completely dry to touch.
Will Bleaching Weaken Thin or Veneered Wood?
Yes, bleaching can weaken thin or veneered wood if you’re aggressive or over-bleach; it can lift glue, thin veneers, or dry fibers. Test a hidden spot, use milder agents, and don’t saturate the surface.
Can I Bleach Painted or Laminated Furniture Surfaces?
You generally can’t bleach painted or laminated furniture effectively; it’ll damage finishes or won’t penetrate laminate. You’d strip paint chemically or sand, and replace laminate. Test a hidden spot, wear gloves, and work in ventilation.
Conclusion
Bleaching wood furniture can transform old pieces into fresh, modern focal points when you follow the right steps and choose the proper bleach for your wood species. You’ve learned when to bleach instead of sand or refinish, how to pick and apply oxalic, percarbonate, or two-part bleaches, and how to finish and troubleshoot tannins and uneven color. With safety, proper disposal, and matching tips, you’ll preserve the bleached look for years.