You can weatherproof wood furniture quickly by cleaning, sanding rough spots, and filling cracks, then sealing end grain and joints to block water. Choose a finish for your climate—penetrating oil for natural grain or spar varnish/urethane for tougher surface protection—and use stainless or brass fasteners. Elevate pieces on risers, add drainage gaps, and recoat before water stops beading. Follow these basics now, and keep going to learn product choices, timing, and long‑term care.
Quick Weatherproofing Guide: Protect Wood Furniture In One Hour

If you’ve only got an hour, you can still give your outdoor wood furniture meaningful protection. Start by wiping surfaces to remove dust and debris, then sand any rough spots quickly with fine-grit paper.
Apply a penetrating oil or fast-dry outdoor sealant with a brush or rag, working along the grain and wiping excess. Focus on joints, end grain, and exposed edges where moisture attacks first.
Let the product penetrate for the recommended short cure time, then add a second thin coat if time allows.
Finish by tucking cushions away and covering the piece until the finish fully cures.
One-Hour Weatherproofing Checklist
You can get a weatherproofed piece of furniture in about an hour with focused steps. Start with quick surface prep—clean, sand any rough spots, and remove debris so finishes adhere.
Then apply a rapid protective finish like a fast-drying exterior varnish or oil to seal the wood.
Quick Surface Prep
Before you apply any finish, do a fast, focused surface check and prep so the weatherproofing will stick and perform.
Start by removing cushions and dust with a stiff brush, then wipe with a damp cloth to lift remaining grit.
Inspect for loose grain, old flaking finish, mold, or mildew.
Sand raised fibers lightly with 120–150 grit and scrape off peeling varnish.
Treat mold with diluted bleach or vinegar, rinse, and let dry.
Fill cracks or holes with exterior wood filler; sand smooth when set.
Confirm the surface is clean and fully dry before proceeding to finish.
Rapid Protective Finish
Ready to seal your outdoor wood in under an hour? You’ll grab a wipe, brush, and quick-dry sealer, then follow a tight checklist. Work in shade, clean dust, spot-sand rough areas, and apply one thin coat of exterior-grade, fast-curing sealer. Let it dry per label (usually 20–30 minutes), then inspect and touch up. Focus on edges and joints. This won’t replace full-season finishes but gives solid short-term protection.
| Task | Time |
|---|---|
| Clean surface | 5 min |
| Spot sand | 10 min |
| Apply sealer | 10 min |
| Dry | 30 min |
| Touch-up | 5 min |
Measure Sun, Rain, Humidity, And Temperature Swings At Your Spot
Check where sunlight hits and when so you can pick finishes and placement that won’t bleach or overheat the wood.
Track how often rain reaches the spot and map any splashes or runoff that could cause rot.
Note seasonal humidity swings and temperature extremes so you can choose materials and maintenance schedules that match your microclimate.
Shade And Sun Patterns
Since sun, rain, humidity, and temperature all affect how wood weathers, map the daily light and moisture patterns at your spot for a week or two to see when it gets direct sun, prolonged shade, or dampness after storms.
Note which hours bring harsh midday sun that can dry and fade finishes, and which parts stay shaded, trapping moisture and encouraging mildew.
Track temperature swings between day and night that stress wood and finish.
Use simple logs or photos; mark nearby obstructions like trees or buildings that cast shade.
This lets you choose placement, finish type, and maintenance frequency more precisely.
Rainfall Frequency Mapping
When you map rainfall frequency at your spot, you’re recording not just how often it rains but the intensity and timing of each event so you can match furniture choices and maintenance to real conditions.
Track daily events for a month, note duration and peak rates, and mark seasonal patterns on a simple calendar.
Use a rain gauge or local weather station data, and log roof runoff or pooling near seating.
Knowing how often heavy showers occur helps you pick sealants, drainage solutions, and quick-dry covers.
Update the map annually to spot shifts and adjust protection and maintenance schedules accordingly.
Seasonal Humidity Range
How much do humidity swings at your spot affect outdoor wood? You should track seasonal humidity ranges—daily lows, daytime peaks, and sudden shifts after storms—because wood expands and contracts with moisture.
Note average relative humidity by month, then identify extremes and rapid changes; those cause checking, warping, and finish failure. Choose wood species and finishes rated for your recorded range, allow for ventilation, and use flexible sealants where swings are large.
Store cushions and untreated pieces indoors during the most extreme months. Regularly reapply breathable finishes if you see repeated swelling or cracking tied to humidity cycles.
Can This Piece Stay Outside Long-Term? Durable Versus Seasonal Choices
If you want a piece to live outdoors year-round, focus on construction, finish, and wood species rather than just looks. You’ll assess joinery, sealants, and hardware: tight joints, marine-grade screws, and UV-resistant finishes extend life. Choose pieces built for exposure if you won’t move them each season. For seasonal use, lighter finishes and movable designs work well.
| Feature | Long-term | Seasonal |
|---|---|---|
| Joinery | Mortise-and-tenon | Screws/bolts |
| Finish | Varnish/epoxy | Oil/wax |
| Mobility | Fixed | Portable |
Plan maintenance: clean, recoat, and cover to protect investment.
Identify Your Wood Type For Outdoor Use (Teak, Cedar, Oak, Reclaimed)
Because different species handle moisture, rot, and UV in distinct ways, you should match the wood to your climate and maintenance habits before buying outdoor furniture.
Teak resists rot and needs little finish; oil occasionally to preserve color.
Cedar naturally repels insects and fares well in damp, cool areas but softens with heavy wear.
Oak is strong; white oak tolerates outdoor use better than red oak because of tighter grain—seal it regularly.
Reclaimed wood offers character and sustainability, but confirm its species and past treatments before trusting it outside.
Choose based on durability, appearance, and how much upkeep you’ll commit to.
Spot Signs Of Water Damage, Rot, And Pest Infestation
Want to know whether your outdoor wood needs attention? Inspect surfaces for dark stains, raised grain, or soft spots when you press—these often signal water damage.
Look along joints and underside areas for white or brown fuzzy growth indicating mildew or mold.
Probe suspicious areas with a screwdriver; if it sinks easily, you’ve likely got rot.
Check for small holes, fine sawdust, or tunnels in exposed ends—signs of wood-boring insects.
Watch for tight-fitting gaps caused by swelling or splitting from moisture fluctuations.
Document issues, photograph damage, and prioritize repairs before rot or pests spread further.
Gather Essential Tools And Safety Gear For Weatherproofing
Now that you’ve inspected for stains, soft spots, and insect activity, gather the right tools and safety gear before you start weatherproofing so you can work efficiently and protect yourself. You’ll need basics: sandpaper, brushes, rollers, drop cloths, scraper, and clamps. Protect yourself with gloves, goggles, a respirator, and knee pads. Keep cleanup supplies and a first-aid kit nearby. Plan workspace ventilation and lighting.
| Tools | Safety Gear |
|---|---|
| Sandpaper (various grits) | Nitrile gloves |
| Brushes & rollers | Safety goggles |
| Scraper & clamps | Respirator/mask |
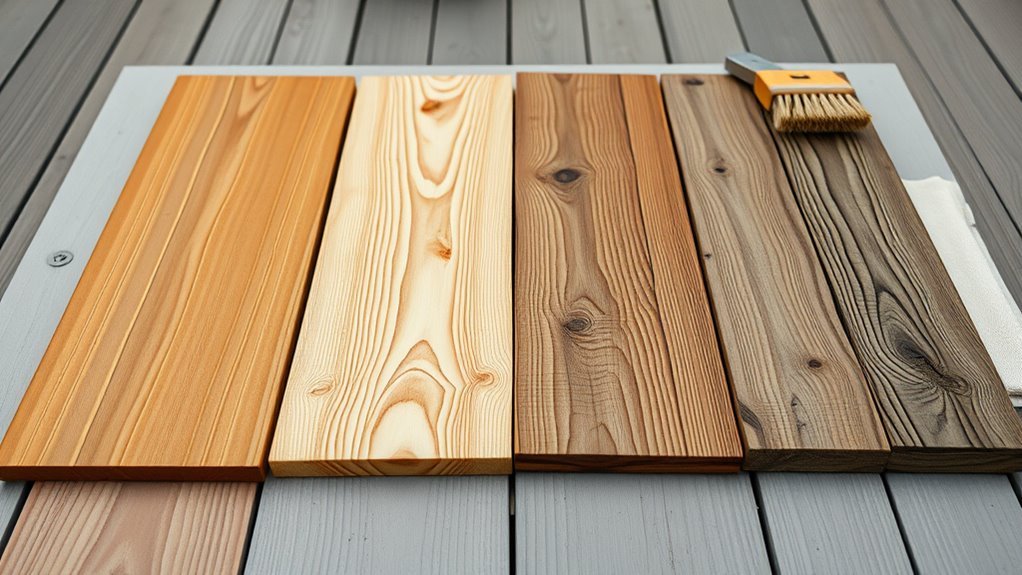
Choose The Right Finish: Oil, Varnish, Sealer, Or Paint
When choosing a finish, think about the level of protection, appearance, and maintenance you’re willing to commit to—each option (oil, varnish, sealer, or paint) balances those factors differently.
Oils soak in, enhance grain, and need periodic reapplication but won’t flake.
Varnishes form a clear, durable film that resists moisture and abrasion; expect occasional touch-ups.
Sealers block water and can be clear or tinted; they’re simple to apply but vary in longevity.
Paint offers the best color options and surface protection, though you’ll need proper prep and eventual repainting.
Match finish to use, exposure, and how hands-on you’ll be.
When To Pick Penetrating Oil Versus A Surface Film Finish
Decide based on the wood’s exposure and the look you want: use penetrating oil when you want natural grain, easy spot repairs, and moisture protection that soaks in.
Choose a surface film finish if you need a tougher barrier against heavy rain, UV, and abrasion.
We’ll compare durability, maintenance, and appearance so you can pick what’s best for your piece.
When To Use Penetrating Oil
If you want a low-maintenance, natural-looking finish that soaks into the wood instead of sitting on top, pick a penetrating oil. It preserves grain, reduces checking, and heals small surface damage without the film cracking or peeling that you get with paints or varnishes.
Use penetrating oil when the piece is hardwood or teak meant to age naturally, when you want breathable protection that won’t trap moisture, or when joints and moving parts need flexibility.
Choose it for furniture exposed to sun and moderate rain, or when periodic re-oiling is acceptable and you prefer easy spot repairs over full refinishes.
When To Choose Surface Film
You’ve seen why penetrating oils work well for hardwoods and pieces you want to age naturally, but there are plenty of situations where a surface film finish is the better choice. You’ll pick a film when you need strong UV, moisture, and abrasion resistance, or when you want to preserve color and make cleaning easy. Consider these scenarios:
- High-traffic pieces that face daily wear and spills.
- Softwoods prone to rapid weathering or staining.
- Painted or stained projects where you want a clear protective layer.
A film finish like spar varnish or marine polyurethane gives durable, long-lasting protection; apply thin coats and sand between them.
Best Sealants For Teak, Cedar, Oak, And Reclaimed Wood
When choosing a sealant for teak, cedar, oak, or reclaimed wood, match the product to the wood’s grain, porosity, and exposure.
For dense, oily teak choose penetrating oils or teak-specific sealers that soak in and replenish natural oils without film buildup.
Cedar benefits from thin-penetrating water repellents or hybrid oil-poly blends that reduce moisture uptake while preserving texture.
For open-grain oak use a low-viscosity penetrating sealer or tannin-blocking primer before topcoat to prevent bleed.
Reclaimed wood often needs a stabilizing epoxy or clear penetrating consolidant to fill checks, followed by breathable sealer to allow trapped moisture to escape.
UV-Protective Finishes: What They Do And When To Use Them
Sunlight breaks down wood fibers and fades finishes, so you’ll want to understand how UV damage works before choosing a finish. Different UV-protective finishes—clear UV blockers, tinted stains, and pigmented paints—offer varying levels of protection and aesthetics.
I’ll explain how to apply each type and what maintenance schedule keeps your outdoor pieces protected.
UV Damage Explained
How does ultraviolet light hurt outdoor wood, and how can UV-protective finishes help? You’ll see surface breakdown: lignin breaks down, color fades, and wood fibers weaken. UV-protective finishes slow that by absorbing or reflecting rays and blocking moisture entry, extending appearance and strength.
- Color loss — UV degrades pigments and lignin, causing graying.
- Surface erosion — fibers dry, splinter, and lose smoothness from repeated UV stress.
- Structural weakening — long-term exposure reduces mechanical integrity and increases cracking.
Apply protection proactively; recoat before significant fading or fiber damage appears to maintain longevity.
Types Of UV Finishes
Because different jobs need different protection, you’ll choose from a few main UV-finish types—clear sealers, tinted stains, film-forming varnishes (like spar varnish and marine polyurethane), and penetrating oils—each balancing UV blocking, moisture control, appearance, and maintenance frequency.
You’ll use clear sealers when you want natural grain with modest UV resistance and easy recoat.
Tinted stains add pigment to absorb UV and reduce fading while showing grain.
Film-forming varnishes give strong UV and moisture resistance with a glossy or satin layer.
Penetrating oils nourish fibers, repel water, and offer subtle UV protection with simple refreshes.
Application And Maintenance
When you apply a UV-protective finish, prep and timing matter: clean the wood, sand to an even profile, and work in dry, dust-free conditions so coatings bond properly. Choose a finish suited to exposure and wood species, then apply thin, even coats, allowing full drying between layers. Recoat when water beads instead of soaking in.
- Use oil-based stains for deeper penetration; reapply yearly.
- Use spar urethane for clear protection; touch up every 1–3 years.
- Use penetrating sealers for porous woods; monitor for graying.
Clean, inspect, and spot-sand before touching up to maintain protection.
Water Repellents And Waterproofing Treatments Explained
Although wood is naturally porous, you can dramatically reduce moisture damage by choosing the right water repellent or waterproofing treatment.
Pick products labeled “water repellent” for breathable protection that lets wood release moisture, or “waterproof” for a sealed barrier where breathability isn’t critical.
Oil-based penetrants (like tung or linseed blends) nourish and repel water; clear or tinted penetrating sealers preserve grain.
Film-forming finishes (spar varnish, exterior polyurethane) create a tough surface layer but need maintenance and sanding over time.
Apply thin, even coats, follow dry times, and reapply periodically after inspection to maintain protection.
Selecting Rust-Resistant Hardware And Fasteners For Outdoor Wood
When you build or repair outdoor wood furniture, pick stainless steel hardware to prevent staining and deterioration.
For the harshest conditions, use marine-grade fasteners that resist salt and moisture.
You can also extend life by applying corrosion-resistant coatings to vulnerable pieces.
Choose Stainless Steel Hardware
If you want outdoor wood to last, pick stainless steel hardware and fasteners that resist rust and corrosion. You’ll protect joints and keep appearance clean by choosing grades and finishes suited to exposure. Consider these factors when buying:
- Grade 304 for general exterior use; 316 for harsher, coastal environments.
- Choose matching finishes (polished, brushed) to prevent galvanic reactions and simplify maintenance.
- Prefer screws with deep threads and washers or lock nuts to maintain clamping under moisture cycles.
Install stainless with proper pilot holes and avoid mixing metals. You’ll get durable, low-maintenance connections that preserve your wood.
Use Marine-Grade Fasteners
Curious which fasteners will actually stand up to rain, salt spray, and sun? You’ll want marine-grade fasteners made from 316 stainless steel, silicon bronze, or solid brass—materials that resist pitting and galvanic corrosion.
Match fastener material to your wood and nearby metals to avoid electrochemical reactions. Use recessed or countersunk fasteners with silicone or marine sealant at holes to block moisture.
For joints under load, choose stainless lag screws or through-bolts with locking nuts. For trim, use bronze or brass screws.
Inspect hardware yearly and replace any pieces showing fretting, crevice corrosion, or compromised threads.
Apply Corrosion-Resistant Coatings
Because outdoor hardware faces constant moisture and UV exposure, you’ll want to add corrosion-resistant coatings to extend fastener life and protect surrounding wood. You should choose coatings that bond well to metal and resist salt, sweat, and sun.
Prep hardware by cleaning, de-rusting, and drying before coating. Apply thin, even layers and let full cure between coats to avoid trapping moisture. Recoat during regular maintenance or after damage.
Consider these coating types:
- Hot-dip galvanizing — thick zinc layer, very durable for structural parts.
- Zinc-rich primer + paint — good for painted finishes.
- Powder coating — tough, aesthetic, long-lasting.
How To Prep Wood: Cleaning, Sanding, And Degreasing
When you’re prepping wood for outdoor use, start by removing dirt, mildew, and old finishes so sealers and paints can bond properly. Scrub surfaces with a mild detergent or oxygen bleach solution, rinse thoroughly, and let the wood dry completely.
Sand smooth with progressive grits—start 80–100, finish 120–150—following the grain to avoid scratches. Wipe away dust with a tack cloth or vacuum.
Degrease oily spots using mineral spirits or a commercial degreaser; test in an inconspicuous area first. Allow solvents to evaporate fully before applying primer or finish to guarantee adhesion and even coverage.
Repair Small Damage: Filling Cracks, Tightening Joints, And Replacing Slats
Before you apply finishes, address minor structural issues so your furniture stays safe and looks finished. Inspect for hairline cracks, loose screws, or warped slats. Fix small splits with exterior wood filler or epoxy, then sand flush.
Tighten or replace corroded fasteners; use stainless steel or brass for durability. If a slat’s beyond repair, remove and fit a new one, matching grain and thickness.
- Fill cracks, sand, seal.
- Tighten joints, reinforce with glue or brackets.
- Replace slats, pre-drill, and fasten with weatherproof hardware.
Test stability before finishing.
Treating Existing Mildew, Mold, And Salt Stains
After you’ve repaired structural issues, tackle any mildew, mold, or salt stains so finishes will adhere and look right. Start by scrubbing with a stiff brush and a mild detergent solution to remove surface grime.
For mildew or mold, mix one part household bleach to three parts water or use a commercial mildew cleaner; apply carefully, wait 10–15 minutes, then rinse thoroughly.
For salt stains, rinse with fresh water and scrub; for stubborn deposits, use white vinegar diluted half-and-half, then rinse.
Let wood dry completely—ideally 48–72 hours—before sanding or applying any protective finish.
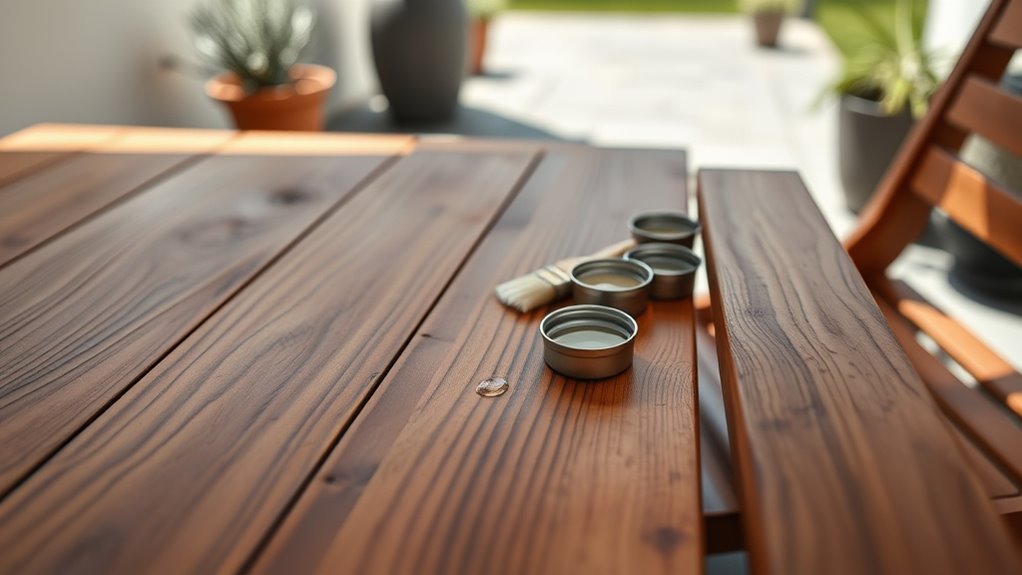
How To Apply Oil Finishes Step-By-Step
Once the wood is clean, dry, and sanded smooth, you’ll apply oil finishes in thin, even coats so the wood soaks them up and cures properly. Work in a dust-free, ventilated area. Use a lint-free cloth or natural-bristle brush, rubbing oil along the grain; wait 10–15 minutes, then wipe off excess to avoid tackiness.
Between coats, sand lightly with fine grit. Cure time varies—follow product instructions. Repeat until desired saturation.
- Apply thin coat, wait, wipe excess.
- Sand lightly between coats.
- Allow full cure before use.
How To Apply Varnish, Spar Urethane, Or Marine Finish
If oil finishes give wood depth and protection, varnish, spar urethane, or marine finishes add a tougher, longer-lasting barrier against sun, water, and abrasion.
Start by sanding smooth, remove dust, and make sure temperatures and humidity suit the product label. Stir—not shake—the finish to avoid bubbles.
Apply thin, even coats with a high-quality brush or foam applicator following grain direction. Allow proper dry times, lightly sand between coats with fine grit, and wipe residue.
Apply multiple coats for exposed edges and high-wear areas. Cure fully before use.
Maintain by inspecting annually and recoating when finish shows wear or chalking.
How To Paint Wood Furniture For Outdoor Use
Before you paint, you’ll want to strip or sand the old finish, repair any damage, and clean the surface so the paint will adhere properly.
Pick a high-quality exterior paint—acrylic latex is a strong, weather-resistant choice—and use a primer designed for outdoor wood.
With proper prep and the right paint, your furniture will hold up to sun, rain, and temperature changes.
Surface Preparation Steps
Because proper surface prep governs how long your outdoor paint will hold up, you’ll want to strip, clean, and sand carefully before applying any primer or topcoat. Work methodically: remove old finish with a chemical stripper or heat gun, then clean residue.
- Remove hardware and fill cracks with exterior wood filler; let cure.
- Sand progressively—start 80–100 grit, finish 150–180 grit—always with the grain.
- Wipe with tack cloth and allow wood to dry fully.
Check for mildew and treat with diluted bleach if needed. Confirm all dust and contaminants are gone so primer bonds uniformly.
Choosing Exterior Paint
Wondering which paint will actually stand up to sun, rain, and temperature swings on your outdoor wood furniture? Choose 100% acrylic exterior paint for durability, UV resistance, and flexibility; it adheres well and resists cracking.
For heavily exposed pieces, consider exterior-grade latex enamel for a harder, smoother finish. Pick formulations labeled “exterior” and “mildew-resistant.” Match sheen to use—satin or semi-gloss hides dirt and cleans easily.
Always prime with an exterior primer compatible with both the wood and paint type; this improves adhesion and longevity. Buy high-quality brushes or a sprayer for even coverage and fewer coats.
Best Techniques For Brushing, Spraying, And Wiping Finishes
When you’re finishing outdoor wood, choosing the right application method—brushing, spraying, or wiping—makes a big difference in durability and appearance. Each technique needs specific tools, motion, and timing to get a smooth, weatherproof coat.
You’ll prep by sanding and removing dust. Match tool to finish: brushes for thick oils/paints, sprayers for fast, even coats, wipes for penetrating oils and stain.
Control humidity and temperature while you work. Keep strokes consistent, avoid overworking, and maintain wet edges. Clean tools promptly to prevent defects and contamination.
- Brush: long, even strokes.
- Spray: overlap passes.
- Wipe: follow grain.
Drying And Curing Times For Outdoor Finishes
You’ll want to understand the difference between drying (surface tack-free) and curing (full hardness and durability) so you know when your piece can be handled or exposed.
Temperature, humidity, and air flow considerably change both timelines, so plan finish windows around local conditions.
Check touch, recoat, and full-cure times on the product label and test a small area before putting furniture into service.
Drying Vs. Curing
Although drying and curing both happen after you apply a finish, they’re different processes: drying is the solvent or water evaporating so the surface feels dry, while curing is the chemical change that builds long-term hardness and weather resistance.
And while a finish may feel dry in hours, full cure can take days to weeks depending on product and conditions. You’ll monitor both to know when to handle, stack, or expose furniture.
Typical guidance:
- Oil finishes: surface dry in hours; cure in days–weeks.
- Varnish/polyurethane: dry in hours; cure in 7–30 days.
- Epoxy: longer cure; won’t reach full strength quickly.
Environmental Influences
Because temperature, humidity, and airflow directly change how finishes release solvents and crosslink, you need to factor local conditions into drying and curing expectations for outdoor furniture.
Cooler temperatures slow solvent evaporation and chemical curing, so you’ll wait longer before exposing pieces to humidity or handling.
High humidity can trap solvents, extending tackiness and increasing dust attraction; low humidity speeds surface skinning but may hinder full cure.
Good airflow speeds solvent removal but avoid direct blasts that cause uneven film.
Consult product specs for ideal ranges, and plan projects during stable weather to guarantee finishes reach their desired hardness.
Touch And Recoat Times
When you’re planning finishes for outdoor wood, know that touch, recoat, and full-cure times differ widely by product and conditions, and following those windows is key to a durable result. You’ll check label times, but also watch temperature, humidity, and coat thickness. Faster touch time doesn’t mean safe handling; full cure can take days to weeks.
Plan tasks so coats aren’t trapped by dust or dew, and test adhesion before heavy use.
- Touch: typically minutes to hours—avoid contact until tack-free.
- Recoat: follow minimum/maximum windows to prevent failure.
- Full cure: allow specified days before load or exposure.
How To Seal End Grain And Joints For Maximum Protection
Before you apply finish to the whole piece, focus on sealing end grain and joints first, because those areas suck up moisture fastest and determine how long your outdoor furniture lasts.
Start by sanding end grain smooth, then brush on a generous coat of diluted sealer to penetrate deeply; follow with a full-strength topcoat once dry.
For joints, inject a waterproof wood glue or epoxy into gaps, clamp until cured, and wipe excess.
After assembly, run a bead of exterior-grade sealant along exposed seams.
Check for missed spots, recoat as needed, and let everything cure fully before exposing to weather.
Protect Wood From Ground Moisture And Splashback
Sealing end grain and joints greatly reduces water entry, but you also need to stop moisture that comes from the ground and from splashing rain. Protect lower wood where splash concentrates: apply extra coats of marine or exterior oil finish to legs and apron, and use a water-repellent preservative on undersides. Create a barrier between wood and wet surfaces to prevent wicking.
- Use moisture-resistant pads or rubber feet under legs.
- Attach a discreet metal or plastic kick strip at the base to deflect splash.
- Apply a bead of exterior-grade sealant where the skirt meets legs to block capillary paths.
Check annually and touch up.
Elevate And Ventilate Wood Furniture To Prevent Rot
If you want your outdoor wood to last, lift it off the ground and let air circulate underneath; keeping wood elevated and ventilated stops trapped moisture that leads to rot. Raise benches, planters, and tables on feet, blocks, or corrosion-resistant risers so damp soil and puddles don’t touch the wood.
Create airflow by spacing slats, leaving a gap between furniture and walls, and avoiding tight covers that trap humidity. Use breathable covers only when dry, and place furniture on gravel, pavers, or slatted decks to improve drainage.
Inspect undersides regularly and replace any swollen or soft components before decay spreads.
Spring Maintenance Checklist For Outdoor Wood
Start your spring checklist by inspecting each piece for cracks, loose joints, or insect damage so you can prioritize repairs.
Next, clean and brighten the wood with a gentle scrub and suitable cleaner to remove mildew and grime.
Finish by reapplying a protective finish or oil to restore water resistance and UV protection.
Inspect For Damage
Wondering how well your outdoor wood survived winter? Inspecting for damage prevents small issues from becoming costly repairs. Walk around each piece and look closely for cracks, loose joints, and rot. Use a screwdriver to probe suspicious soft spots and tap joints for stability. Note hardware corrosion and missing screws so you can replace them.
- Check surfaces for splitting or deep checks.
- Test structural joints and legs for wobble.
- Probe edges and undersides for soft, discolored wood.
Record findings and prioritize fixes before finishing work. Early detection saves time and preserves longevity.
Clean And Brighten
After you’ve logged damage and tightened loose parts, give your wood a thorough cleaning to restore its appearance and prep it for any repairs or refinishing.
Mix mild soap with warm water and scrub with a soft-bristled brush, following the grain to avoid scratching.
For mildew, use a solution of one-part bleach to three-parts water, rinse thoroughly, and let it dry in shade.
Remove stubborn grime with fine-grit sanding, wiping away dust with a tack cloth.
Rinse completely and allow full drying before proceeding.
Regular cleaning prevents buildup, reveals hidden issues, and keeps wood looking bright and healthy.
Reapply Protective Finish
When the wood’s surface looks dull or water no longer beads, it’s time to reapply a protective finish to restore resistance to moisture, UV, and wear. You’ll prep by cleaning and sanding lightly to remove old film and open the grain.
Choose a finish compatible with the wood and previous coating: oil, sealer, or spar varnish. Apply thin, even coats, allowing proper dry time and light sanding between layers for adhesion.
Maintain ventilation and follow safety guidelines.
- Strip or sand as needed.
- Select finish by exposure and wood type.
- Apply multiple thin coats, drying fully.
Fall Prep: How To Winterize Wood Furniture
As temperatures drop and storms pick up, you’ll want to winterize your wood furniture to prevent moisture damage, cracking, and mold growth. Start by cleaning surfaces—remove dirt, pollen, and mildew with mild soap and water, then let pieces dry fully in sun or a ventilated area.
Tighten loose joints and remove cushions or store them inside.
Apply a breathable water-repellent sealer if finish is worn; avoid non-breathable plastics that trap moisture.
Elevate furniture slightly off the ground and cover with fitted, breathable covers.
Check periodically during winter and ventilate after heavy precipitation to prevent trapped moisture.
Quick Spot Repairs To Extend Lifespan Between Renovations
While you wait for a full renovation, quick spot repairs can stop small issues from turning into costly damage and keep your wood furniture functional and attractive. You’ll want to act fast on scratches, loose joints, and small rot.
Act quickly with simple spot repairs—clean, fix scratches and joints, treat small rot—to keep wood furniture functional and attractive.
Clean the area, sand lightly, and use a matching touch-up marker or wood filler for scratches.
Tighten or reglue joints with exterior-grade adhesive and clamps.
For soft rot, remove compromised fibers, dry thoroughly, and apply epoxy consolidant.
Seal repairs with a compatible finish when cured.
- Clean and assess
- Repair and reinforce
- Seal and protect
How Often To Reapply Finishes By Wood Type And Exposure
Because exposure and wood species change how finishes wear, you should tailor reapplication schedules to both the material and the conditions it faces.
Hardwoods like teak and ipe resist weathering; inspect them yearly and reapply oil or penetrating sealer every 12–24 months if color or water beading fades.
Softwoods such as pine or cedar need more care; plan for recoat every 6–12 months in full sun or wet climates.
Painted surfaces often need touch-ups every 2–5 years depending on quality and exposure.
High-traffic pieces require more frequent checks.
Always clean and sand lightly before reestablishing to ensure adhesion.
Choose Covers And Shelters That Protect Wood
You’ll extend your wood’s life by using waterproof outdoor covers that seal out rain and moisture.
Pair covers with a protective pergola or awning to cut UV exposure and reduce weather wear.
Aim for breathable, well-fitted options that keep water out while preventing trapped humidity.
Waterproof Outdoor Covers
Looking for a simple way to shield your wood furniture from rain and sun? Use waterproof outdoor covers that fit snugly, breathe, and resist UV. Pick covers with taped seams and durable zippers to stop leaks and prolong life. Secure them so wind won’t flap or tear the fabric.
- Choose breathable, waterproof materials to prevent mold.
- Pick adjustable straps and elastic hems for a tight fit.
- Opt for covers with air vents to balance ventilation and protection.
When you remove covers, let furniture dry first. Store covers clean and dry to keep them effective.
Protective Pergolas And Awnings
Want a shelter that keeps your wood furniture dry and shaded while still looking good? Choose a pergola or awning that balances style with protection. Position it to block prevailing rain and harsh midday sun.
If you pick a pergola, add a polycarbonate roof or retractable canopy to shed water. Leave slatted designs for dappled shade where ventilation matters.
For awnings, select durable, UV-resistant fabric and corrosion-proof hardware. Anchor structures securely and guarantee proper slope for runoff.
Regularly inspect seals and fabric, re-tension or replace as needed. These shelters extend finish life and reduce maintenance on your outdoor wood pieces.
Store Wood Furniture Properly During Long Off-Seasons
When the season ends, protect your wood pieces by cleaning them thoroughly, letting them dry completely, and storing them in a cool, dry place away from direct moisture and sunlight.
You’ll prep each item: remove cushions, tighten fasteners, and apply a light coat of appropriate finish if needed. Then choose storage that prevents warping and pests.
- Use breathable covers or cotton sheets to block dust without trapping humidity.
- Elevate furniture off concrete with pallets to avoid damp transfer.
- Store in a ventilated area with stable temperature and low humidity to preserve joints and finish.
Eco-Friendly And Non-Toxic Weatherproofing Options
You can protect your outdoor wood without harsh chemicals by choosing natural oil finishes that penetrate and nourish the grain.
Plant-based sealers offer durable, water-resistant protection while keeping toxins out of your yard.
For color and extra UV defense, pick non-toxic paints formulated for exterior use so you get coverage without harmful solvents.
Natural Oil Finishes
Curious about a simple, eco-friendly way to weatherproof your outdoor wood? You can use natural oil finishes—like tung, linseed, or walnut—to protect grain, repel moisture, and preserve color without toxic fumes.
Apply thin coats, let each penetrate, then wipe excess; repeat until absorption slows. Maintain annually or when water beads less.
- Choose oil suited to exposure and wood species.
- Sand between coats for smooth penetration and even sheen.
- Reapply after heavy weather or wear; oils refresh rather than form a film.
You’ll keep furniture breathable, attractive, and kinder to the planet.
Plant-Based Sealers
If natural oils appeal for their low-toxicity and breathability, plant-based sealers take that green approach further by offering broader moisture and UV protection without petrochemicals. You’ll like that they penetrate, repel water, and age gracefully while staying biodegradable. Apply thin coats, sand between layers, and recoat yearly in harsh climates. Expect subtle color darkening, not opaque film. Choose formulas labeled linseed, tung, or soy blends with natural UV inhibitors.
| Sealer Type | Best Use | Dry Time |
|---|---|---|
| Raw linseed | Interiors/covered | 24–48h |
| Tung oil | Exterior pieces | 24–72h |
| Soy blend | Eco-conscious projects | 12–36h |
Non-Toxic Paints
Although traditional exterior paints often rely on harsh solvents and heavy metals, non-toxic paints give you durable, weatherproof coverage without those hazards. You’ll choose low-VOC, water-based formulations that resist UV, mildew, and moisture while staying safe for people and pets. Prep and primer matter: clean, sand, and apply a compatible primer to guarantee adhesion.
- Pick acrylic latex or plant-based paints for flexibility and breathability.
- Test adhesion on scrap and layer thin coats for even curing.
- Recoat as recommended and touch up scratches promptly to maintain protection.
You’ll protect wood sustainably without sacrificing performance.
Budget Tips: Inexpensive Ways To Make Furniture Last
When you’re working with a tight budget, small, regular actions can keep outdoor wood furniture looking and performing well for years. Start by cleaning with mild soap and water monthly to prevent grime and mold buildup.
Sand rough spots lightly and spot-seal with budget-friendly exterior varnish or tung oil instead of refinishing whole pieces.
Use breathable covers or move items under eaves during heavy weather.
Add felt pads or rubber feet to prevent ground moisture damage.
Rotate cushions and flip slats to equalize wear.
Check fasteners and tighten or replace rusty screws — a few dollars now prevents costly repairs later.
Common Mistakes That Ruin Weatherproofing Jobs
Because small mistakes compound fast, even a well-intended weatherproofing job can fail. You’ll wreck protection by skipping prep, using the wrong product, or rushing coats. Watch for these pitfalls and fix them before they cost time and money.
- Skipping sanding and cleaning: debris and old finish block adhesion, so coatings peel.
- Wrong product choice: interior varnish, oil that never cures, or mismatched sealer leaves you exposed.
- Applying thick coats or re-coating wet: runs, uneven cure, and trapped moisture cause failure.
Follow manufacturer directions, plan drying time, and inspect surfaces before sealing.
How To Test If A Finish Is Still Doing Its Job
If your outdoor furniture looks dull, feels rough, or water beads hesitate to form, it’s time to test whether the finish is still protecting the wood. Start with a visual inspection, then do a simple water test: place a few drops on different areas. If water beads, the finish repels moisture; if it soaks in, you need touch-up or recoat.
| Test | What to do | Result meaning |
|---|---|---|
| Visual | Check for dullness/cracks | Finish breaking down |
| Water | Drop test | Absorption = recoat |
| Touch | Rub with finger | Sticky = failing finish |
Record results and plan maintenance.
Restoring Weathered Or Gray Wood Back To Its Original Look
Once you’ve checked the finish and decided a recoat or repair won’t fix the faded, gray look, you can restore the wood’s original color with a few measured steps.
Strip remaining finish with a mild stripper or sand lightly with 120–150 grit, then move to 180–220 grit for smoothness.
Clean residue with a wood brightener or oxalic acid, rinse, and let dry fully.
Test a small area with your chosen stain or oil to match color.
Finish with exterior-grade oil or sealer to protect.
Follow this sequence:
- Strip/sand
- Brighten/clean
- Test stain, then seal
When To Refinish Versus When To Replace A Piece
When you’re evaluating a weathered piece, weigh the cost and effort of refinishing against the chair or table’s structural condition and sentimental or resale value.
Before refinishing, balance cost and effort against the piece’s structure and its sentimental or resale worth.
If joints are solid, wood isn’t rotted, and hardware functions, refinishing usually restores appearance and protection at lower cost.
Choose replacement when rot, insect damage, or warped framing undermines safety or repair costs exceed replacement.
Factor age, style, and whether the piece holds sentimental value—you’ll refinish antiques and replace mass-produced items more readily.
Also consider time and tools required; refinishing takes effort, so be honest about your skills and schedule before committing.
Protect Wood In Mixed-Material Furniture (Metal, Wicker, Cushions)
Because mixed-material outdoor pieces combine different lifespans and care needs, you’ll protect the wood best by coordinating maintenance with the metal, wicker, and cushions rather than treating each part in isolation.
Inspect joints and fasteners where materials meet; moisture and rust spread to wood. Clean surfaces with appropriate cleaners, then dry completely before sealing wood. Match finish flexibility to adjacent materials to avoid cracking.
- Tighten and grease metal fasteners to prevent corrosion stains.
- Repair or replace wicker strands to stop water trapping.
- Store cushions dry and ventilated to prevent mold that can affect wood.
Follow schedules for each material.
DIY Covers, Risers, And Simple Projects To Protect Wood Furniture
After you’ve synchronized care across metal, wicker, and cushions, give the wood extra protection with a few simple DIY solutions you can make or install in an afternoon.
After syncing care for metal, wicker, and cushions, add simple DIY wood protections to prevent moisture and wear.
Cut fitted canvas or PVC covers with Velcro tabs for breathability and easy removal.
Bolt small plastic or rubber risers under legs to lift furniture off damp ground and improve airflow.
Build a slatted wooden platform or pallet base to keep pieces elevated on patios.
Apply removable corner guards to prevent pooling at joints.
These quick projects reduce moisture, rot, and abrasion, prolonging your wood’s life with minimal tools and cost.
Recommended Products And Tools For Different Budgets
If you’re outfitting wood furniture for outdoor use, pick tools and products that match your budget and the level of protection you want. Start with essential cleaners, sandpaper, and brushes.
For seals, choose oil-based penetrating oils for budget options, sparing polyurethane for midrange, and marine varnish for high-end projects.
For tools, a hand sander and quality brushes suffice; upgrade to a random-orbit sander and a respirator if you’ll refinish often.
Consider stain plus sealer combos to save time.
Keep safety gear and outdoor-rated hardware on your list to extend results and simplify future maintenance.
- Budget: penetrating oil, sandpaper, brushes
- Midrange: stain/sealer, hand tools, respirator
- Premium: marine varnish, orbital sander, stainless hardware
Troubleshooting: Peeling, Bubbling, And Discoloration
Even with the right products and tools, finishes can fail—peeling, bubbling, and discoloration are the most common problems you’ll run into on outdoor wood.
Peeling usually means poor adhesion: strip loose finish, sand to bare wood, clean, prime, and apply thinner coats with proper drying time.
Bubbling signals trapped moisture or heat; remove the finish, let wood dry fully, repair any leaks or trapped moisture sources, then refinish in cooler, low-humidity conditions.
Discoloration often comes from UV, mildew, or tannin bleed; clean mildew with a mild bleach solution, use a stain blocker for tannins, and apply UV-resistant sealer.
Create A Maintenance Schedule You’ll Actually Follow
When you set a clear, simple maintenance schedule, your outdoor wood will last longer and look better with less hassle. Decide tasks, frequency, and season so upkeep feels doable. Use reminders and pair chores with other routines.
- Quarterly: wipe, inspect for cracks or finish wear, tighten hardware.
- Annually: deep clean, sand rough spots, reapply sealant or oil as needed.
- After storms: dry, remove debris, check for mold or shifting joints.
Keep supplies together and note results; you’ll spot trends and adjust timing. Small, regular effort prevents big repairs and preserves appearance.
Frequently Asked Questions
Can I Use Indoor Wood Glue for Outdoor Furniture Repairs?
You can, but you shouldn’t for outdoor furniture; indoor wood glue won’t resist moisture, temperature changes, or UV. Use exterior-grade waterproof adhesives like polyurethane or marine epoxy instead, and clamp per instructions for a durable, weatherproof bond.
Will Wood Finishes Affect Cushion Fabric Breathability?
Yes — finishes can affect cushion fabric breathability. If you apply heavy solvent or varnish near cushions, it’ll reduce airflow and trap moisture. You’ll want breathable, water-resistant finishes and maintain gap/ventilation so cushions can dry.
How Do Bees, Wasps, or Birds Impact Treated Wood?
They’ll still visit treated wood; bees and wasps may nest in crevices, birds can peck or scratch finishes, and prolonged exposure to nests or droppings can degrade coatings—so you’ll need regular inspection and targeted repairs.
Can Pressure-Treated Wood Be Finished Immediately After Purchase?
No, you shouldn’t finish pressure-treated wood immediately after purchase; you’ll need to let it dry for several weeks to months depending on moisture content, then sand and clean it before applying stain or sealer for proper adhesion.
Are Warranties Voided if I Alter Factory Finishes?
Usually, yes — altering factory finishes can void warranties unless the manufacturer explicitly permits it. Check the warranty terms, contact the maker, and get written approval before refinishing; otherwise you’ll likely lose coverage for finish-related claims.
Conclusion
You’ve got the essentials to keep wood furniture looking great outdoors. Measure sun, rain, humidity and temperature swings, decide if pieces should stay out long-term, and pick appropriate woods or finishes. Use risers, DIY covers, and the right sealers for your budget; troubleshoot peeling or discoloration quickly. Set a simple seasonal maintenance routine—clean, re-seal, and inspect—and you’ll protect your investment with minimal effort and steady results.