You’ll prep the wood by sanding smooth, wiping dust, and testing on scrap. Choose Unicorn Spit colors and thin coats, applying with synthetic brushes or foam for even coverage. Blend wet edges for ombré effects, let layers cure, then lightly sand between coats. Seal with a clear water-based finish or wax for protection and sheen. Work in a ventilated space and wear gloves; keep mixes small and labeled. Continue for tips on tools, tricks, and troubleshooting.
What Is Unicorn Spit and Why Use It on Wood?

Curious what “Unicorn Spit” actually is? You’re looking at a water-based, alcohol-reactive pigment gel designed for crafts and wood finishing. It blends like watercolor yet stains like dye, so you’ll get translucent color without heavy film build-up.
You’ll apply it directly or dilute it for washes, letting wood grain show through. It’s popular because it’s user-friendly, fast-drying, and offers vivid, blendable hues that resist cracking.
You’ll use it to tint furniture, accent cabinetry, or add ombré effects. Because it’s water-based, cleanup’s simple with soap and water before it cures.
What Makes Unicorn Spit Different From Regular Wood Stain?
Unicorn Spit is water-based, so you’ll notice it behaves and cleans up very differently from oil-based stains.
It’s also a hybrid of pigment and glaze, letting you build color and sheen rather than just tinting wood.
As you work, you’ll see more layering and blending options than with a traditional stain.
Water-Based Versus Oil-Based
While both water- and oil-based stains change a wood’s color and highlight grain, Unicorn Spit stands apart because it’s a water-based, low-odor pigment gel that blends and lifts differently than solvent stains. You’ll notice it dries faster, so you need quicker, deliberate strokes and prompt blending.
Cleanup is easier—warm water and soap—so you won’t need mineral spirits. Water-based formulas raise grain less and allow layering without long wait times, but they can lift existing finishes if overworked.
Because it’s forgiving, you can experiment with wiping, sponging, or layering to achieve vibrant, controlled effects on raw or sealed wood.
Pigment And Sheen Blend
How does Unicorn Spit’s pigment-and-sheen combo set it apart from regular wood stain? You’ll notice Unicorn Spit combines concentrated pigment with mica-based shimmer, so color and sparkle sit together rather than separate.
When you apply it, pigment tints the wood while mica particles reflect light, creating depth and a subtle pearlescent finish. You can layer sheerer washes for translucent color or heavier coats for bold coverage without losing shimmer.
Unlike standard stains that penetrate and mute grain, Unicorn Spit often sits atop the surface, letting you manipulate sheen, intensity, and finish for more creative effects.
What This Guide Covers and Who It’s For
Because this guide focuses on using Unicorn Spit as a pigment and finish on wood, you’ll get practical, step-by-step info on surface prep, application methods, sealing, and troubleshooting.
A practical, step-by-step guide to using Unicorn Spit as pigment and finish on wood.
You’ll learn when to sand, how to layer for color and sheen, and which sealers keep finishes durable.
This guide suits beginners who want creative, reliable results on furniture, signs, or small crafts.
You don’t need prior glazing experience—just basic tools and patience.
By the end you’ll know how to avoid common mistakes and fix issues quickly.
- Learn prep that prevents bleed and blotch
- Master layering for controlled sheen
- Seal for longevity and cleanup
Best Unicorn Spit Kits, Colors, and Sizes to Buy
When you pick Unicorn Spit kits, aim for a balance of pigment range and convenience—choose a set that gives you both pearlescent and matte tones so you can layer for depth and sheen.
Look for trusted brands with clear ingredient lists and consistent mixing ratios.
Buy a mid-size kit (8–12 colors) if you want variety without waste; larger kits suit frequent projects.
Include a few metallics and pastels for highlights and soft blends.
Get sample bottles or a starter pack if you’re testing techniques.
Choose bottle sizes that match project scale: small for accents, larger for full-surface work.
Best Wood Types for Unicorn Spit
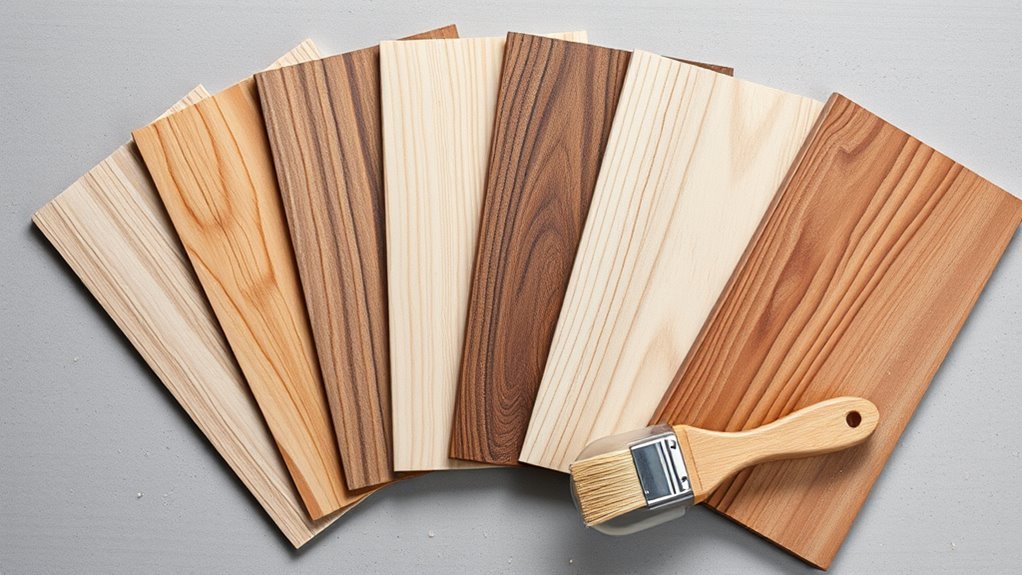
You’ll want to choose your wood based on whether you prefer softwoods or hardwoods, since they absorb Unicorn Spit differently and can affect color intensity.
Pay attention to grain patterns, because tight-grained woods give smoother, more uniform looks while open-grained woods soak up more pigment and create more texture.
Test on a scrap first to see how absorption and grain interact with the finish you want.
Softwoods vs. Hardwoods
Although both softwoods and hardwoods take Unicorn Spit well, your choice will affect color vibrancy, blending, and durability. You’ll pick softwood when you want brighter, more forgiving blends—pine and poplar accept layers quickly and sand easily.
Choose hardwoods like maple or oak when you want longevity and crisper detail; they can resist wear and hold edges. Prep and sealing choices still matter, but the wood type guides your finish and technique.
- Softwoods: brighter, easier sanding, great for practice
- Hardwoods: durable, clearer detail, better for functional pieces
- Project goal: match wood to desired look and use
Grain And Absorption
Because grain direction and pore size control how Unicorn Spit soaks in, pick woods with consistent grain and moderate porosity for the easiest results. You’ll get predictable color on maple, cherry, and birch because their tight, even grain resists blotching.
Oak and ash absorb more deeply through open pores, yielding stronger contrast but needing preconditioning or conditioner.
Softwoods like pine vary; knots and resin cause uneven uptake.
Always test a scrap or hidden area, sand progressively finer, and consider a pre-stain conditioner on open-grained boards.
Adjust application speed: slower for dense woods, quicker for porous ones to control saturation.
How Wood Grain and Porosity Affect Color Absorption
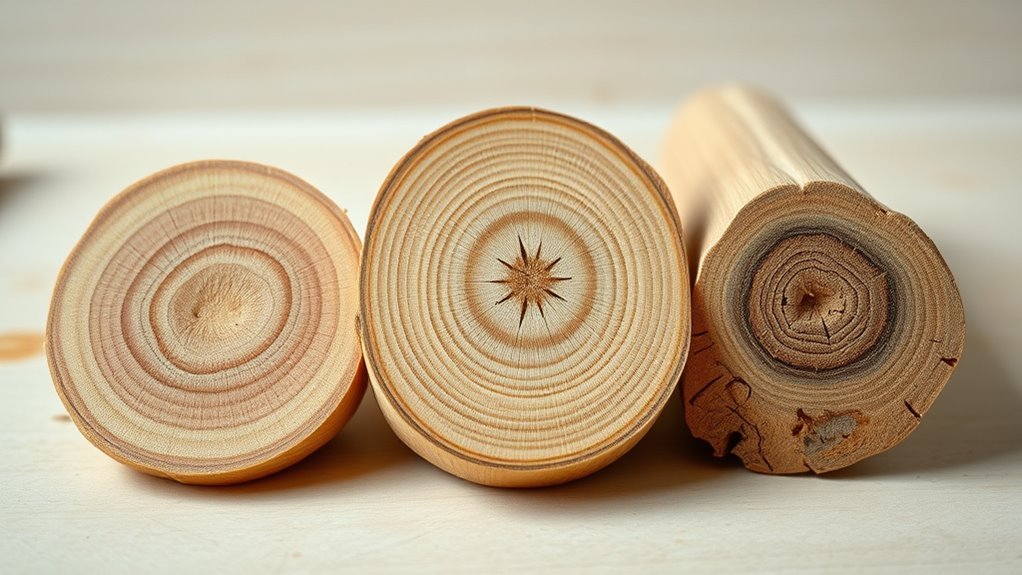
When you apply Unicorn Spit, the wood’s grain pattern and porosity determine how the colors soak in and show up. You’ll notice open-grain woods like oak pull color deep, creating rich, variegated tones, while tight-grain maple keeps pigments more surface-level and subtle.
Sanding grit and humidity change absorption, so test scraps first. Sealers alter result, but don’t mix safety setup here.
- Open-grain woods = deeper, uneven saturation
- Tight-grain woods = smoother, lighter color
- Variable porosity = blotching risk; precondition with conditioner
Adjust dilution and brushing to match the wood’s characteristics for predictable color.
Essential Safety Precautions and Workspace Setup
Before you start applying Unicorn Spit, put on gloves, a respirator or mask, and eye protection to protect your skin and lungs.
Work in a well-ventilated area or outdoors so fumes don’t build up, and keep a fan or open windows handy.
Store pigments and solvents in labeled, sealed containers away from heat and children or pets.
Personal Protective Equipment
How will you protect yourself while using Unicorn Spit on wood? You’ll wear appropriate PPE to limit skin contact and inhalation. Choose chemical-resistant gloves, eye protection, and a respirator if you’re spraying or sanding. Keep a change of clothes and a cleanup station handy so you don’t track stain residues.
- Nitrile gloves: prevent staining and irritation, dispose after use.
- Safety glasses or goggles: stop splashes from hitting eyes.
- NIOSH-rated respirator (if mist or dust): use cartridges suited for organic vapors.
Inspect gear before work, replace damaged items, and follow manufacturer instructions.
Well-Ventilated Workspace
Along with proper PPE, you’ll want to set up good airflow so fumes and overspray don’t build up. Work near open windows or in a garage with doors open; position fans to pull air from the workspace toward the outside.
If you’re indoors without windows, run a portable fan and, if possible, a window exhaust or air purifier with a VOC-rated filter. Keep the workspace uncluttered so air moves freely and vapors don’t concentrate.
Avoid still corners; don’t work under low ceilings. Take regular breaks outside to reduce inhalation exposure and monitor how you feel.
Safe Chemical Storage
When you store Unicorn Spit and other finishing products, keep containers tightly sealed, upright, and in a cool, well-ventilated area away from direct heat or sunlight. This prevents evaporation, pressure build-up, and accidental spills.
You should label containers with contents and date, separate flammables from oxidizers, and keep lids childproof. Store only what you need for projects and discard old finishes per local rules.
Check containers periodically for leaks or swelling. Keep a small spill kit and fire extinguisher nearby. Follow manufacturer MSDS guidance and local regulations.
- Label clearly
- Limit quantities
- Inspect regularly
Basic Tools and Minimal Supply List for Beginners
Before you start, gather a few essential tools so your first Unicorn Spit wood project goes smoothly: a few clean, lint-free brushes or foam applicators, high-quality sandpaper (120–220 grit), a tack cloth, painter’s tape, mixing sticks, disposable cups for thinning or mixing, and a small palette or tray for blending colors.
Add gloves, safety glasses, and a respirator if you’ll thin or work in enclosed spaces.
Keep paper towels and a damp cloth for quick cleanup.
Choose scrap wood for practice and a flat, stable work surface.
Store finishes upright and label containers to avoid mix-ups.
How to Choose the Right Brushes and Applicators
You’ll want to pick brushes with the right bristle type—synthetic for smooth Unicorn Spit blends and natural for textured or oil-based finishes.
Match applicator size to the piece you’re working on so you can control coverage without wasting product.
Choose handles that feel comfortable in your hand to reduce fatigue during detailed or long sessions.
Brush Bristle Types
Although brush choice might seem minor, picking the right bristle type directly affects how Unicorn Spit lays down, blends, and lasts on wood. You’ll want synthetic, natural, or mixed bristles depending on finish and control.
Synthetic bristles resist water-based pigments and keep shape. Natural hog holds more product for loose strokes. Mixed blends give balanced pickup and smoother strokes.
Match bristle firmness to your technique—softer for glazing, stiffer for texture. Clean and reshape bristles after use to maintain performance.
Consider these traits when selecting brushes:
- Synthetic: durability, fine edges
- Natural: absorbency, soft blending
- Mixed: versatility, controlled pickup
Applicator Sizes Guide
When you pick the right applicator size, you control coverage, detail, and blending with Unicorn Spit on wood. Choose small round or liner brushes (1–3 mm) for fine lines, lettering, and tight corners.
Use angled or small flat brushes (6–12 mm) for controlled strokes and edges. For broader areas, pick larger flat brushes or foam pads (20–50 mm) to lay down even washes quickly.
Mini sponges and detail brushes help with texture and highlights. Match applicator width to the area and desired effect, and switch sizes as you move from outlines to fills for cleaner results.
Handle Comfort Tips
Because you’ll be holding your brush for extended periods, pick handles that sit comfortably in your hand and match your working style. You want balance, grip, and fatigue prevention so your strokes stay steady and your detail stays sharp.
Try different shapes and materials before committing; comfort varies by project length and technique. Consider these quick rules when choosing brushes and applicators:
- Match handle thickness to your natural grip: thin for precision, thicker for long sessions.
- Prefer ergonomically shaped or cushioned handles to reduce wrist strain.
- Test weight and balance to ensure the brush feels like an extension of your hand.
Preparing Raw Wood: Sanding Grit and Sequence
If you’re starting with raw wood, begin by removing mill marks and uneven spots with a coarse grit—typically 80 to 100—then step through progressively finer grits (120, 150–180, finishing at 220) to create a smooth, uniform surface that accepts Unicorn Spit evenly. Work with the grain, keep sanding light at finer stages, and wipe dust between steps. Avoid over-sanding edges. Test a scrap to confirm absorption. The sequence builds smoothness and consistent color uptake.
| Stage | Grit | Purpose |
|---|---|---|
| 1 | 80–100 | Flatten roughness |
| 2 | 120–180 | Refine surface |
| 3 | 220 | Final smoothness |
How to Remove Old Finish and Clean the Surface
Before you apply Unicorn Spit, you’ll need to strip any old finish so the color can penetrate evenly. Use a chemical stripper or sanding.
Then clean the residue with mineral spirits or a tack cloth.
Finish by sanding through progressively finer grits to smooth the surface and remove any remaining finish.
Strip Old Finish
Once you’ve removed hardware and cleared the workspace, strip the old finish to expose clean wood that will accept Unicorn Spit evenly. Use a chemical stripper or heat gun per product instructions, working in small sections and ventilating the area.
Scrape softened finish with a plastic or metal scraper, taking care not to gouge the wood. Remove residue with mineral spirits or a recommended stripper cleaner, wiping along the grain.
Inspect for stubborn spots and repeat as needed.
- Be patient; rushing damages wood.
- Protect surrounding surfaces and yourself.
- Test a small area before full application.
Clean And Sand
Now that the old finish is off, clean and sand the surface so Unicorn Spit will adhere smoothly and look even.
Wipe the wood with a tack cloth or lint-free rag dampened with mineral spirits to remove dust, grease, and stripping residue. Let it dry fully.
Start sanding with 120-grit to level imperfections, then progress to 220-grit for a smooth tooth. Sand with the grain, not across it.
Remove sanding dust between grits using a vacuum and tack cloth.
Check for remaining finish or stain; repeat targeted sanding if needed.
A clean, smooth surface guarantees consistent absorption and vibrant color.
When to Use a Wood Conditioner and Why
If your project uses softwoods, blotchy-grained species, or any wood you plan to stain evenly, you should use a wood conditioner to prevent uneven absorption and streaking. You’ll apply it after sanding and before Unicorn Spit stains; it evens porosity so pigments sit uniformly.
Use it when working with pine, birch, maple, or reclaimed pieces with mixed grain. Don’t skip it if you want consistent color and predictable blending.
- It reduces blotches and lap marks.
- It extends open time for smoother color work.
- It improves finish adhesion and reduces the need for heavy touch-ups.
Testing Colors: How to Make Reliable Sample Swatches
Start by using the same species and grain orientation for all your swatches so the wood itself doesn’t skew color.
Use the same application method, brush or rag, stroke pattern, and coat thickness for each sample to keep results comparable.
Label each swatch with wood type and technique so you can reproduce the look on your project.
Choose Consistent Wood
Because wood soaks Unicorn Spit differently, pick boards that match in species, grain orientation, and finish so your swatches reflect true color differences rather than substrate variation. You’ll get honest comparisons when every sample starts from the same baseline.
Use offcuts from the same batch, avoid patches with knots or heavy sapwood, and sand each piece to the same grit. Label samples clearly and keep them flat while drying to prevent pooling.
- same species and cut
- identical sanding and sealing
- consistent lighting and viewing angle
Treat swatches as experiments: control what you can, record results, repeat when needed.
Standardize Application Technique
When you’re ready to test colors, apply Unicorn Spit the same way to every swatch so your results reflect the product, not your technique. Use identical brushes or foam applicators, the same stroke direction, and equal pressure. Measure drops or volume per swatch and record drying times.
Apply thin, even coats; wait the same interval before adding layers. Label each sample with stain mix, dilution, and number of coats. Photograph swatches under consistent light and angle. Note any sanding grit or sealer used.
Standardizing these variables gives reliable comparisons, so you can choose colors confidently.
How to Thin, Mix, and Layer Unicorn Spit for Smooth Blends
If you want smooth, seamless blends with Unicorn Spit, thin and mix it carefully so each layer flows and melds without streaks. Start with small water drops or a clear acrylic glazing medium, stirring until the pigment moves like heavy cream. Test on scrap wood, adjusting viscosity for brush or sponge application.
Work quickly in thin passes, letting each layer tack-dry before adding another to avoid lifting. Light sanding between coats gives tooth for the next glaze.
- Thin deliberately: less is more for control.
- Mix consistently: uniform color, predictable behavior.
- Layer patiently: build depth without overworking.
Simple Ombré Technique for Beginners
Start by sanding and cleaning your wood so the Unicorn Spit goes on smooth and even.
Next, layer and blend your colors from light to dark (or vice versa) using thin coats and a soft brush or sponge to get that gradual ombré.
Finish by sealing with a clear topcoat so the colors stay vibrant and resist wear.
Prep Your Surface
Before you apply Unicorn Spit, make sure the wood is clean, dry, and sanded smooth so the color goes on evenly and blends easily. Remove dust with a tack cloth, inspect for dents, and fill gaps with wood filler if needed.
Choose a sealed or bare surface depending on desired absorption; test a scrap piece first.
Lightly sand between steps to keep progressions crisp without overworking the grain.
- Clean: dust and oils ruin adhesion.
- Smooth: even texture prevents streaks.
- Test: preview color payoff and absorption on scrap wood.
Blend Color Layers
With your surface prepped and dry, you’re ready to blend layers and build a smooth ombré with Unicorn Spit. Choose two to three colors that blend seamlessly. Apply the darkest hue at one end with a soft brush or foam, then add midtones and the lightest at the opposite end.
While pigments are still wet, work quickly with long, overlapping strokes toward the center to soften edges. Use a dry, clean brush to feather and lift excess pigment for a seamless gradation.
Let layers dry between passes if needed, then repeat light glazes to deepen color without harsh lines.
Seal For Durability
Once your ombré is fully dry, protect it by applying a clear sealer designed for water-based pigments so the colors stay vibrant and resist wear. You’ll choose a finish (matte, satin, or gloss) to match the piece, test on scrap, then apply thin, even coats with a synthetic brush or foam pad.
Let each coat dry and lightly sand between layers for smoothness. Sealers lock color, add durability, and make cleaning easier.
Consider the environment and use—indoors needs less abrasion resistance than a table top.
- Protects color integrity
- Adds surface resilience
- Simplifies maintenance
Creating Smooth Gradients With Wet-on-Wet Blending
If you want silky, seamless color shifts on wood, wet-on-wet blending is the fastest way to get them. Work while Unicorn Spit stays wet: apply your first color, then immediately add the next adjacent hue.
Use a soft synthetic brush or foam to lightly drag the boundary, keeping strokes short and unidirectional so pigments merge without overworking. Tilt the board or mist sparingly to encourage flow, but avoid saturation that lifts grain.
Clean the brush between colors with a paper towel to prevent mud. Let the blend settle for a few minutes, then step back—adjust edges only if still tacky.
How to Do Controlled Streaks and Woodgrain Highlights
After you’ve laid in smooth wet-on-wet blends, introduce deliberate streaks to mimic wood grain and add highlights that read like natural texture.
Work with a damp brush, dragging thin lines of lighter Unicorn Spit along the wet base, then soften edges with a dry brush. Vary pressure to create knots and rings, and lift pigment where reflections would fall.
Seal test small areas first to predict spread. Use these techniques to control contrast and direction:
- Lightly feather streaks to suggest worn growth rings
- Concentrate pigment for faux knots and deeper veins
- Soften highlights toward edges for believable sheen
Practice small samples before larger pieces.
Easy Distressing and Vintage Wash Methods
When you want an aged, timeworn look without heavy sanding, use diluted Unicorn Spit as a vintage wash and selectively remove pigment to distress the surface. Working in small sections lets you control how much color stays in recesses and around edges.
Mix one part Unicorn Spit with two to three parts water for translucent coverage. Brush on, wipe immediately with a lint-free cloth or damp sponge to lift pigment where natural wear would occur.
Focus on corners, raised molding, and knots. Layer lightly, letting each coat dry before repeating.
Seal with a matte or satin topcoat to protect the finish.
Using Stencils and Masking With Unicorn Spit
Although stenciling with Unicorn Spit looks intricate, you’ll get crisp, repeatable patterns by prepping the surface, securing your stencil, and using the right amount of product. Too much spit causes bleeding, too little gives weak coverage. You’ll tape or use repositionable adhesive, test colors on scrap wood, and apply in thin layers with a soft brush or sponge. Remove the stencil while the paint’s tacky, not wet. Seal carefully once dry.
- Prep: sand, clean, and prime for even absorption
- Application: thin layers, dab don’t drag
- Removal: lift straight up to avoid smudges
Using Acrylics and Waxes With Unicorn Spit (Wood-Safe Methods)
Before you add acrylics or waxes over Unicorn Spit, you’ll want to prep and seal the wood so the stain doesn’t blotch or lift. Use a clear, compatible sealer between the Unicorn Spit and your acrylics.
Apply wax sparingly as a final protective layer. You’ll learn simple steps for sealing, painting with acrylics, and finishing with wax to keep your piece wood-safe and long-lasting.
Prep And Seal Wood
A good prep and seal routine will make Unicorn Spit colors adhere better and last longer on wood, so you’ll want to sand, clean, and select a compatible sealer before painting.
Start with 120–220 grit sanding to smooth rough grain, then remove dust with a tack cloth or damp rag.
Test a small area with your chosen sealer to ensure no color shift.
Use water-based acrylic-friendly sealers or clear waxes labeled for painted surfaces.
Let each coat dry fully and lightly sand between coats for grip.
- Sand progressively for smoothness and adhesion
- Clean thoroughly to avoid defects
- Test sealer compatibility first
Applying Acrylics And Waxes
Now that your wood is prepped and sealed, you can start layering Unicorn Spit with compatible acrylics and waxes to build depth and protection.
Begin by applying thin acrylic highlights or metallics after Unicorn Spit dries; use a soft brush or sponge to blend edges gently. Test colors on scrap to avoid reactions.
When satisfied, apply a water-based clear coat if you want extra durability before wax.
For wax, choose paste wax and apply sparingly with a lint-free cloth, buffing to the desired sheen. Allow full cure between layers and avoid solvent waxes that may disturb the finish.
How Long to Wait Between Layers for Best Adhesion?
When you’re layering Unicorn Spit, wait until each coat is tack-free but still slightly pliable so the next layer bonds without lifting. You’ll typically wait 20–60 minutes depending on humidity and thickness. Don’t rush; too-wet layers swell and streak, too-dry layers resist adhesion. Test with a gentle fingertip touch in an inconspicuous spot.
- Thinner coats dry faster and bond better.
- Warm, dry conditions shorten wait times; cool, humid ones lengthen them.
- Light sanding between fully cured sections improves mechanical grip.
Trust feel and visual cues over strict timers for consistent, durable results.
Color-Mixing Rules (Avoid Muddy Colors)
If you want vibrant results, mix sparingly and test often so colors stay clean instead of muddy. You’ll avoid brown or gray by limiting complementary blends—red with green, blue with orange, purple with yellow—unless you aim for neutral tones.
Start with small palette ratios: dominant color 70–80%, accent 20–30%. Add tiny amounts of darker pigments; they overpower quickly.
Use clear or translucent bases to preserve luminosity. Clean tools between colors to prevent unintended contamination.
Swatch on scrap wood and let it dry before committing. When in doubt, layer thin glazes rather than plunging into heavy mixed globs.
Fixing Uneven Coverage and Blotchy Spots
Keeping colors clean is only part of the job—you’ll also need to address uneven coverage and blotchy spots that can ruin a piece’s finish. Start by evaluating wetness; blotches often come from uneven liquid or overworking. Work quickly when damp, feathering edges with a damp brush or sponge to blend. If areas dry lighter, apply thin, even glaze layers rather than heavy strokes.
Address blotchy coverage by assessing wetness, blending edges while damp, and using thin, even glazes after drying.
- Prep: sand lightly between coats for uniform absorption.
- Application: keep layers thin and consistent; wipe excess promptly.
- Patience: allow full dry time before deciding on additional layers to avoid buildup.
How to Remove or Lighten a Mistake Without Ruining the Wood
First, you’ll assess the damage to see if the stain is surface-only or has soaked in.
Then you’ll test solvent options on an inconspicuous spot to find one that lifts color without harming the wood.
Finally, feather the edges with fine sandpaper and refinish the area to blend the repair.
Assess The Damage
When you spot a drip, smudge, or color that’s too bold, pause and evaluate how deep the pigment went and whether the wood’s finish is intact. You’ll want to judge stain penetration, finish type, and surrounding detail before acting.
Light surface marks need different care than saturated fibers. Note the finish—poly, lacquer, shellac—or raw wood; this guides removal options later. Photograph the area for reference and work from least to most aggressive methods.
Consider whether blending might be better than removal to preserve grain.
- Depth: surface haze vs. soaked fibers
- Finish: sealed or absorbent?
- Detail: edges, carved areas, surrounding color
Test Solvent Options
Before you apply anything full-strength, test small, incremental solvents on an inconspicuous spot to see how the Unicorn Spit and the finish react. Start with water, then try mineral spirits, denatured alcohol, or acetone on cotton swabs.
Work outward from the stain, blotting—don’t rub—to observe color lift and grain change. Wait between tests so the finish fully reveals effects.
Note which solvent softens the pigment without dulling or removing the clear coat. If none work, stop and consider a gentler approach.
Record successful solvents and dilution ratios for future touch-ups to avoid repeat mistakes.
Feather Sand And Refinish
If a color or edge looks wrong, feather-sand the area to blend the mistake into the surrounding finish so you can refinish without showing a hard line. Lightly sand with fine grit, working outward until the stain edge softens. Wipe dust, assess color, and repeat gently—don’t over-sand.
When blended, reapply a thin layer of Unicorn Spit or topcoat to match sheen.
- Sand gradually: patience preserves grain.
- Clean thoroughly: dust blocks adhesion.
- Test finish: small area confirms color.
Finish by sealing with your chosen topcoat, letting each coat dry fully before deciding if more blending is needed.
Sanding Between Layers: When and How Aggressively
Although sanding between coats isn’t always necessary, you’ll usually want to do light sanding to guarantee proper adhesion and a smooth finish.
Wait until each Unicorn Spit layer is fully dry, then use 220–320 grit for gentle scuffing. Focus on removing dust nibs, brush marks, or raised grain without cutting through color.
Allow each Unicorn Spit layer to fully dry, then gently scuff with 220–320 grit—remove nibs and marks without cutting color
For thicker or textured applications, start with 180 grit then follow with 320 to even the surface.
Wipe clean with a tack cloth after sanding.
Don’t over-sand; aggressive abrasion can dull vibrancy and create visible scratches that show through subsequent layers.
Sealing Unicorn Spit: Clear Coat, Wax, or Polyurethane?
When you’re ready to protect your Unicorn Spit finish, choosing the right sealer matters because it affects durability, sheen, and color depth. Clear coats and polyurethanes give strong, long-lasting protection and deepen colors.
Waxes offer a softer, low-build sheen and are easy to repair but are less protective. You’ll pick based on use: high-traffic pieces need tough poly, decorative items can use wax, and clear coats balance both.
Apply thin, even layers and test on scrap. Consider compatibility with Unicorn Spit’s water-based pigments and follow drying times.
- Polyurethane: maximum durability, slight ambering
- Clear coat: balanced protection, true colors
- Wax: easy repair, low protection
Applying Satin, Matte, and Glossy Topcoats Over Unicorn Spit
Because your choice of sheen changes how Unicorn Spit looks and performs, pick satin, matte, or glossy topcoats based on the piece’s function and the effect you want.
Satin softens color while keeping slight luster—good for furniture that sees use. Matte mutes shine, hiding surface flaws and giving a modern, velvety finish; it’s forgiving but less durable against scuffs. Gloss amplifies colors and depth, showing brushstrokes or texture, and offers the toughest surface resistance.
Always test on a scrap, apply thin even coats, sand lightly between coats with fine grit, and follow manufacturer cure times for best adhesion.
Caring for Finished Pieces: Cleaning and Wear Prevention
Want your Unicorn Spit finish to keep looking fresh? You’ll clean gently, protect from abrasion, and handle with care. Use a soft, damp cloth and mild soap; avoid harsh chemicals that dull sealers.
Place pads under objects to prevent scratches and use coasters for liquids. Keep pieces out of direct sunlight and extreme humidity to prevent fading and lifting.
- Clean with mild soap and soft cloths to maintain sheen
- Use pads, coasters, and felt to prevent scratches and dents
- Control light and humidity to avoid color shift and finish failure
Routine checks catch wear before it worsens.
Project Ideas: Signs, Furniture Accents, and Small Decor
Keeping your finished pieces looking great sets you up to get creative with projects that show off Unicorn Spit’s shimmer. You can craft personalized wooden signs—use stencils or freehand lettering, then highlight letters with metallic or iridescent blends.
Add subtle accents to furniture: paint drawer fronts, chair spindles, or table insets for a tasteful pop. Small decor works well too—ornaments, coasters, candle trays, and picture frames take color beautifully.
Mix matte and glossy topcoats to vary effect. Test colors on scraps, plan placement, and protect surfaces. These ideas let you experiment without committing to large-scale refinishings.
Step-by-Step Beginner Project: A Rainbow Ombré Sign
When you’re ready to make a simple yet striking piece, this rainbow ombré sign guides you through prepping the wood, blending Unicorn Spit colors, and sealing for lasting shimmer.
Sand smooth, wipe clean, and apply a basecoat. Choose three to five hues, dilute slightly for smoother transitions, and work wet-to-wet across the board. Blend with a soft brush or sponge, feathering each junction until seamless.
Let dry, sand lightly for texture, then protect with a clear water-based polyurethane. Finish by adding simple lettering or leave pure color—either choice showcases your finish and brightens any room.
- Intentional color flow
- Controlled experimentation
- Durable, wearable shine
Step-by-Step Beginner Project: Distressed Coffee Table Top
If you loved the bold ombré sign, you’ll find the distressed coffee table top lets you use Unicorn Spit for more rustic, lived-in charm.
Start by sanding the tabletop smooth, wiping dust, then apply a light base coat of chalk or milk paint.
Sand the tabletop smooth, wipe away dust, then lay down a light chalk or milk paint base.
Blend two Unicorn Spit shades with a disposable brush, working in small sections and wiping excess with a rag to create streaks.
After drying, sand edges and surface spots to reveal base color for that worn look.
Seal with a water-based satin poly or wax, buffing for soft sheen.
Enjoy your refreshed, shabby-chic centerpiece.
Troubleshooting Drying Issues: Temperature & Humidity
Because Unicorn Spit and its water-based sealers react strongly to ambient conditions, you’ll want to check temperature and humidity first when your finish isn’t drying properly. You can usually fix slow or tacky drying by adjusting the environment and technique. Measure conditions, then act.
- Increase airflow with fans; avoid direct blasts that dust the surface.
- Raise temperature moderately (ideally 65–75°F / 18–24°C); too hot can thin the finish.
- Lower humidity or use a dehumidifier; high moisture stalls curing and can cause cloudiness.
Retest between thin coats, and allow extra cure time in marginal conditions.
How to Store Leftover Unicorn Spit and Extend Shelf Life
Wondering how to keep leftover Unicorn Spit usable for as long as possible? Store jars tightly sealed to prevent air drying and skinning. Keep containers upright, clean the lid rim before closing, and use original bottles or airtight glass jars.
Refrigerate if you won’t use it within a few weeks; bring it back to room temperature and stir gently before use. Avoid contaminating the product—don’t dip dirty brushes directly into the jar.
Label with date opened. If texture or smell changes, discard. Small portions in insulated coolers for short trips help, but avoid freezing to prevent separation.
Budget Tips: Getting Pro Results With Minimal Supplies
When you’re working with limited supplies, smart choices and simple techniques will get you pro-looking results without breaking the bank. Prioritize quality basics: a small set of Unicorn Spit colors, inexpensive synthetic brushes, and 120–220 grit sandpaper. Prep thoroughly—clean and sand once—and you’ll spend less on fixes.
- Choose versatile colors that layer well to create depth.
- Use masking tape and stencils to fake intricate designs.
- Reuse jars and lids for mixing and storing tiny amounts.
Work in thin layers, let each dry, and blend sparingly. With patience and these tricks, your pieces will look polished and costly.
When to Advance: Techniques to Try After Your First Project
Now that you’ve completed a first piece, it’s a good time to push your skills with a few targeted techniques that build depth and control—try glazing for subtle color shifts, dry-brushing for texture, and resist methods (like wax or frisket) to preserve highlights.
Next, experiment with layering translucent coats to deepen color without muddying. Practice controlled blending along edges and use a fan or soft brush for smooth gradations.
Try adding metallics sparingly for accents. Test sanding between layers for a refined finish.
Keep notes on mixes, drying times, and tools so you can replicate successes and learn from mistakes.
Frequently Asked Questions
Can Unicorn Spit Be Used on Painted or Laminate Surfaces Safely?
Yes — you can use Unicorn Spit on painted or laminate surfaces, but you’ll want to test a small hidden area first, seal with a compatible clear coat afterward, and avoid prolonged scrubbing to prevent finish damage.
Will Unicorn Spit Alter the Structural Integrity of Softwoods Long-Term?
No, it won’t considerably alter softwoods’ structural integrity long-term if you use Unicorn Spit as directed; you’ll get surface staining and minor penetration but not weakening, provided the wood isn’t already rotted or chemically compromised.
Can Pets or Children Be Exposed to Surfaces Recently Finished With Unicorn Spit?
You shouldn’t let pets or children touch surfaces recently finished with Unicorn Spit; wait until the topcoat fully cures. Wipe spills, ventilate the area, and follow product cure times to avoid exposure to tacky or solvent-containing finishes.
Are There Environmental Disposal Rules for Leftover or Contaminated Unicorn Spit?
You should follow local hazardous-waste rules; don’t pour leftovers down drains or into soil. Seal contaminated rags or containers and take them to a household hazardous waste facility or disposal event—contact local authorities for specific guidance.
Does Unicorn Spit Affect Fire Resistance or Flammability of Finished Wood?
Unicorn Spit slightly increases surface flammability because it’s alcohol-based and leaves a film; you should assume treated wood burns more readily, so you’ll avoid using it on high-heat areas and topcoat with a fire-retardant finish.
Conclusion
Now that you know the basics, you’re ready to try Unicorn Spit on wood with confidence. Start small, pick a forgiving wood like poplar or pine, and test colors on scrap. Work in a well-ventilated space, watch temperature and humidity, and seal with poly for durability. Store leftovers airtight and chilled. As you gain skill, experiment with layering, glazing, and distressing to get bolder, professional-looking finishes. Have fun and be patient.