You can build a safe, lasting wood deck by planning purpose and layout, checking local codes and HOA rules, and setting a budget and timeline. Choose materials and corrosion‑resistant fasteners, prepare the site with proper drainage and footings, frame beams and joists to code, and install decking, stairs, railings, and lighting with correct spacing and flashing. Finish with sanding and protective coatings, then schedule regular inspections. Keep going and you’ll get step‑by‑step details to complete each stage.
Decide If a Wood Deck Fits Your Home and Lifestyle
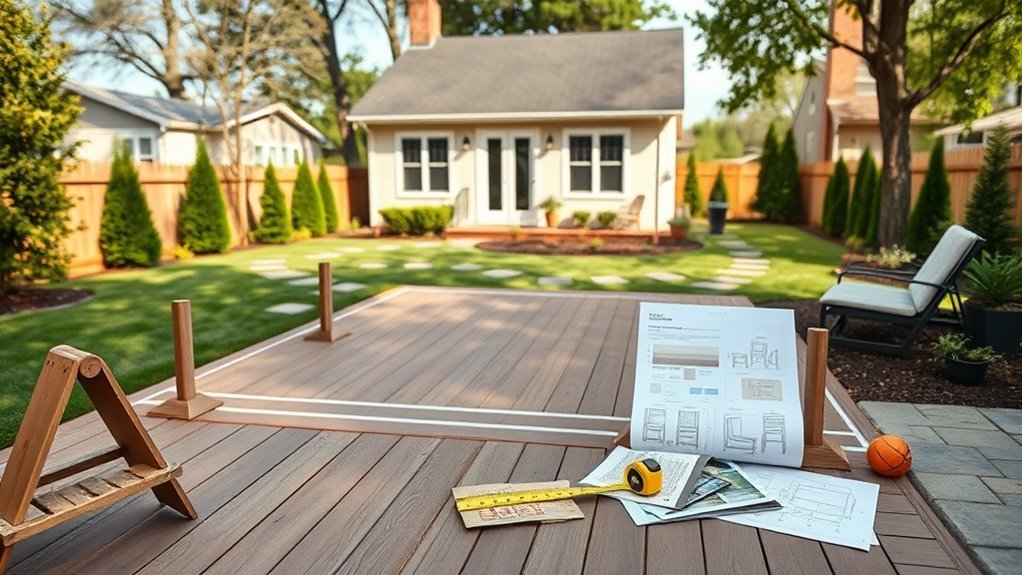
Before you commit, think about how you’ll actually use the deck: will it be a quiet spot for morning coffee, a dining area for family meals, or a play space for kids and pets?
Before you build, imagine daily use—coffee nook, family dining, or kid-and-pet play area—to guide size and layout
Consider traffic flow, sun exposure, privacy, and how the deck connects to indoor rooms.
Match size and layout to typical activities so you don’t overbuild or underdeliver.
Factor maintenance—staining, sealing, and repairs—and your willingness to do them.
Think resale value and neighborhood style: a well-chosen deck complements your home and lifestyle.
If it fits daily routines and upkeep capacity, it’s likely a smart addition.
Check Local Codes, Permits, and HOA Rules
Before you draw plans or buy materials, check local building codes, permit requirements, and any HOA rules that might affect your deck.
You’ll need to know setback, height, railing, and footing standards so your project meets safety and legal requirements.
Contact your city or county permitting office and your HOA early to avoid delays or costly changes.
Local Building Codes
When you start planning your deck, check local building codes, permit requirements, and any HOA rules so you don’t run into costly delays or forced changes. Local codes set minimum standards for safety and durability; you’ll need to follow load ratings, stair and railing dimensions, footing depths, and material restrictions.
Contact your municipal building department early, review published code tables, and ask about recent amendments. Keep records of conversations and referenced code sections. Consider hiring a plans examiner or inspector if you’re unsure.
- Verify structural load and span tables
- Confirm footing depth for frost lines
- Check railing and stair dimensions
- Ask about approved materials
HOA And Permit Rules
Although municipal permits set the legal baseline, your HOA can add rules that affect deck size, materials, color, and placement, so check its covenants and approval process early.
You’ll need to compare local building codes with HOA restrictions and prioritize the stricter requirement.
Submit plans, materials lists, and drawings to the HOA and obtain written approval before applying for permits.
Expect review timelines, possible design revisions, and neighbor notification requirements.
Keep documentation of approvals and permits on file.
If conflicts arise, consult the HOA board or a local building official to resolve discrepancies before you start construction.
Set a Realistic Deck Budget and Timeline
If you want your deck project to finish on time and on budget, start by listing essentials (size, materials, foundation, railings) and getting at least two price estimates for each major line item so you know where you can save or must spend.
Decide non-negotiables and flexible areas, then allocate contingency (usually 10–20%). Create a phased timeline with permit lead times and weather buffers.
Track purchases and labor in a simple spreadsheet, update weekly, and adjust scope if costs climb.
- Compare material lifespans vs. upfront cost
- Include fasteners, finishes, and hardware
- Factor inspection fees
- Plan for delivery windows
Choose Deck Size, Shape, and Location
How big do you want your deck to feel and how will you use it day to day? Think about seating, dining, grilling, and traffic flow; sketch zones and measure furniture to set minimum dimensions.
Match shape to yard contours and house access—rectangular, L-shaped, or multi-level—to maximize views and privacy. Consider sun patterns, prevailing winds, and existing trees so you place the deck where you’ll be comfortable most hours.
Match your deck’s shape to the yard and house—rectangular, L-shaped, or multi-level—to optimize views, privacy, and comfort.
Check property lines, setback rules, and drainage to avoid legal or water issues. Plan for safe stairs and *passages* to lawn or patio.
Make size and placement support your lifestyle and maintenance capacity.
Choose Decking: Wood Species and Alternatives
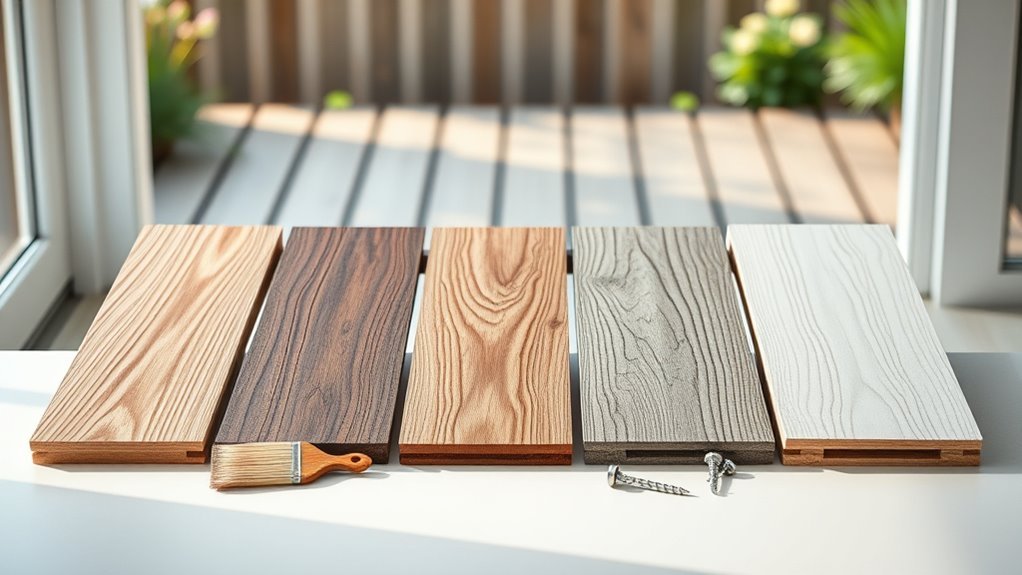
With size, shape, and location decided, pick decking that fits your budget, style, and maintenance willingness—your choice will set the look, lifespan, and care routine for the whole project.
You’ll weigh natural woods like cedar, redwood, and pressure-treated pine against hardwoods such as ipe or mahogany and low-maintenance composites.
Consider durability, slip resistance, color, and environmental impact.
Maintenance needs vary: oiling and staining for woods, simple cleaning for composites.
Factor initial cost versus long-term upkeep and local climate.
Inspect samples in sunlight and touch before buying.
- Cedar: rot-resistant, moderate maintenance
- Ipe: extremely durable, costly
- Composite: low upkeep, uniform look
- Pressure-treated pine: budget-friendly, requires care
Select Fasteners, Hardware, and Corrosion Resistance
Why choose the right fasteners and hardware now? You’ll prevent premature failure and staining by matching fastener material to decking species and environment.
For pressure-treated or tropical hardwoods use hot-dipped galvanized or stainless steel; coastal locations demand 316 stainless.
Pick coated deck screws or hidden fasteners rated for exterior use.
Use stainless or galvanized connectors, joist hangers, and post anchors specified for your lumber and load.
Avoid mixing dissimilar metals that cause galvanic corrosion.
Apply compatible sealants where metals contact treated wood.
Inspect labels for ASTM or ISO corrosion ratings and follow manufacturer torque and spacing guidelines for longevity.
Essential Tools and Safety Gear
Now that you’ve picked materials and hardware that resist corrosion, gather the right tools and safety gear before you start cutting or fastening. You’ll need reliable saws, drills, and levels, plus clamps and measuring tools to keep cuts true.
Protect yourself: gloves, eye and ear protection, dust mask, and sturdy boots reduce risk. Inspect tools, replace damaged bits, and keep blades sharp to prevent kickback.
Protect yourself — gloves, eye/ear protection, dust mask, sturdy boots. Inspect tools, replace damaged bits, and keep blades sharp.
Plan tool layout for efficient workflow and clear trip hazards. Use appropriate ladders or scaffolding and never work alone when lifting heavy joists.
Respect power tool instructions and maintain situational awareness.
- Circular saw
- Cordless drill/impact
- Safety glasses and hearing protection
- Work gloves and steel-toe boots
Read Site Plans and Draw a Deck Layout
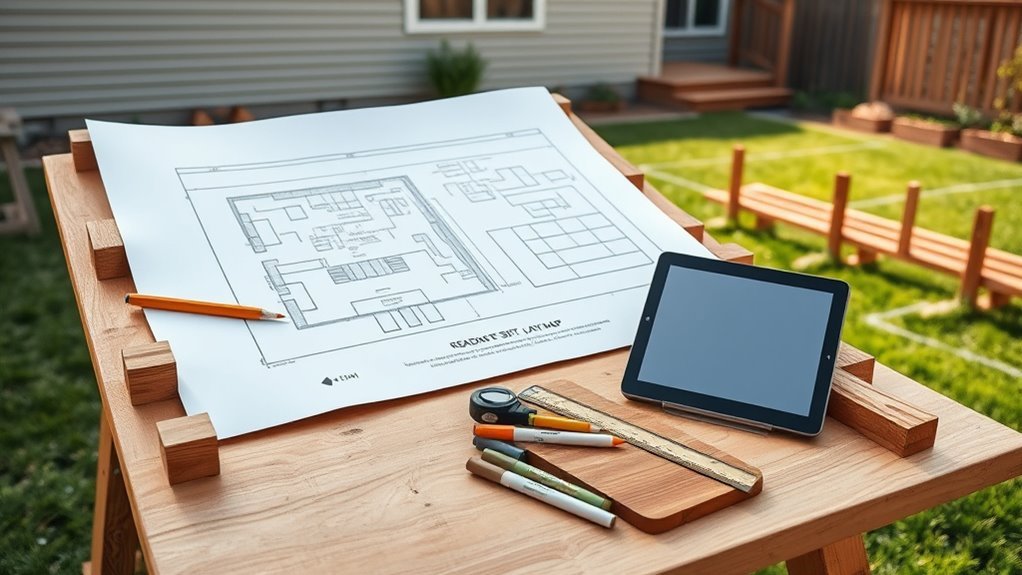
Before you cut a single board, study the site plans and walk the property so you know exactly how the deck will sit, how it ties to the house, and where utilities or drainage constraints lie.
Review dimensions, setbacks, load requirements, and any easements on the plans.
Sketch a scaled layout showing joist direction, beam locations, stair placement, and railing runs.
Note elevations, door thresholds, and grade changes so your deck aligns and drains properly.
Confirm material quantities from your drawing.
Keep the plan accessible during construction and update it if changes occur to avoid mistakes and delays.
Mark the Footprint and Measure for Accuracy
Start by staking out the deck outline so you can see exactly where posts and beams will sit.
Measure each side and use a tape to confirm dimensions against your plans.
Check corner squareness with the 3-4-5 method so your layout stays true.
Determine Deck Outline
How will you translate your plans into a precise, on-ground footprint? You’ll stake and snap lines to outline edges, confirm dimensions with a reliable tape, and transfer offsets from your plan to the ground. Work methodically so posts, joists, and stairs align with desired layout. Keep notes on any adjustments and re-measure before digging.
- Place batter boards and string at planned perimeter to visualize shape and circulation.
- Measure diagonals for rough squareness without final corner checks.
- Mark beam, ledger, and post centerlines for accurate excavation and footing placement.
- Label stake points to avoid layout confusion during construction.
Check Corner Squareness
Once your batter boards and strings are in place, check corner squareness by measuring opposing diagonals and comparing their lengths; if the diagonals match (within your chosen tolerance), your footprint is square. You’ll measure corner-to-corner with a tape, note differences, and adjust corner stakes until diagonals agree. Use the 3-4-5 rule for quick checks on right angles if needed. Confirm all four corners after adjustments. Record measurements and tolerances to avoid rework.
| Item | Notes |
|---|---|
| Diagonal A | Measure corner 1–3 |
| Diagonal B | Measure corner 2–4 |
| Tolerance | Acceptable variance |
| Adjustment | Move stakes as needed |
Prepare the Ground and Fix Drainage Problems
Before you lay any joists or footings, clear and level the deck area and fix drainage so water won’t pool under the structure. Remove vegetation, roots, and debris, then grade the soil to slope away from your house at least 1/8 to 1/4 inch per foot. Compact the base and add gravel where needed to improve runoff.
Before building, clear, level, and grade the deck area so water slopes away—compact soil and add gravel for proper drainage.
Install a shallow swale or french drain if water collects, and protect nearby downspouts.
- Mark low spots and regrade toward a safe outlet
- Lay landscape fabric beneath gravel to limit erosion
- Make certain access for future inspections
- Divert roof runoff away from the deck
Concrete Footings vs. Pier Blocks: How to Choose
When you’re deciding between concrete footings and pier blocks, weigh site conditions, load requirements, and local code — concrete footings give you deeper frost protection and greater load-bearing capacity, while pier blocks are faster and cheaper for small, low decks on well-drained sites. Choose concrete for heavier structures, poor drainage, or strict codes; pick pier blocks for quick, temporary, or low-rise builds. Consider cost, labor, and longevity. Consult local regulations before you start.
| Option | Best Use | Drawback |
|---|---|---|
| Concrete | Heavy decks, frost zones | More labor |
| Pier block | Small decks, dry sites | Less frost protection |
| Hybrid | Moderate needs | Requires planning |
Digging and Pouring Deck Footings Step‑by‑Step
Although digging and pouring footings can feel intimidating, you’ll get reliable results by following a clear, step‑by‑step approach. Mark layout lines, call utilities, and check local code for depth and diameter. Dig holes to frost‑depth with straight sides, remove loose soil, and tamp the base. Place rebar or post anchors per plan, set sonotubes if used, and brace forms so they stay plumb.
Follow a clear step‑by‑step approach: mark, dig to frost depth, set rebar or anchors, brace forms, and pour.
Mix concrete to the specified slump, pour steadily, and consolidate with a rod or vibrator. Finish tops slightly crowned for drainage and cure per manufacturer before loading.
- Verify measurements and spacing precisely
- Use level and plumb checks
- Protect fresh concrete from freeze or rain
- Record inspections and curing times
Install the Ledger Board Safely Against the House
Before you fasten the ledger, verify its exact location so it lines up with your joists and sits at the right height against the house.
Make sure you’ve inspected the house siding, installed proper flashing, and applied any required waterproofing to prevent water intrusion.
Tighten bolts and check seals as you go so the connection stays secure and watertight.
Verify Ledger Location
Where exactly will your ledger sit against the house? Verify height, alignment, and attachment points before fastening so joists will be level and clear of siding.
Measure from a fixed reference, mock up the ledger, and confirm rim joist condition.
Check for obstructions and proper clearance for decking thickness.
- Measure horizontally and vertically from a known datum to ensure consistent joist height.
- Confirm the ledger aligns with door thresholds and stair locations for seamless transitions.
- Inspect wall sheathing and framing where fasteners will penetrate.
- Temporarily clamp the ledger and recheck level and spacing before drilling or lagging.
Flashing And Waterproofing
How will you keep water from getting behind the ledger and into the house? You’ll flash and waterproof the ledger properly.
Start by removing siding where the ledger sits. Slip a continuous metal or PVC flashing behind the house wrap, and bend it over the ledger.
Apply a self-adhesive membrane over the top edge and under the siding.
Counter-flash over the membrane so water sheds outward.
Seal seams with compatible sealant and use corrosion-resistant fasteners.
Guarantee flashing laps correctly and extends past the ledger ends.
Test by running water; fix any leaks before attaching joists or decking.
Set Posts Plumb and Square
Ready to get your posts perfectly vertical and aligned? You’ll set each post in its hole, check footing depth, and temporarily brace before final backfill. Use a carpenter’s level and plumb bob or laser to confirm verticality, then measure corner-to-corner diagonals to square the layout. Fasten temporary bracing so posts won’t shift while concrete cures.
- Verify post tops are consistent in height with a string line.
- Shim or pack under posts to correct minor height differences before anchoring.
- Re-check plumb after each pour and after concrete sets.
- Cut and treat exposed post ends before final assembly.
Lay Beams and Calculate Beam Spans
Now you’ll lay out the beams, marking their positions so the load is distributed evenly.
Calculate each beam span based on joist direction, beam size, and local code to determine where support posts go.
Then set and secure the support posts at those locations to carry the beams safely.
Beam Layout Planning
Where will your beams run and how far will they need to span? You’ll sketch beam lines, note support locations, and align them with joists and footings.
Plan for decking direction, load paths, and access around obstacles. Mark beam centers and clearance to structures, leaving room for flashing and ventilation. Coordinate with local codes and any ledger connections.
- Orient beams to minimize long unsupported spans and simplify joist layout
- Locate posts on stable soil or concrete footings, keeping spacing consistent
- Account for stairs, rail posts, and openings when laying beams
- Verify clearances for grading and drainage
Calculating Beam Spans
How far can a beam safely span between supports? You’ll base spans on beam size, lumber species, joist direction, deck load, and local code.
Check span tables for selected beam (double or triple 2x) and grade; they give max distances for given loads.
Account for cantilevers, tributary width from joists, and spacing of joists feeding the beam.
Use conservative choices: larger section or closer supports if uncertain.
For long spans consider glulam or engineered beams.
Always verify with local code requirements and, for unusual loads or spans near limits, consult a structural engineer before proceeding.
Installing Support Posts
With your beam spans confirmed and beams laid out, it’s time to set the support posts that will carry those loads to the footings. You’ll transfer beam locations to footings, plumb posts, and temporarily brace them before fastening beams.
Check heights so beams run level between posts and account for bearing plates or post caps.
- Mark post centers from beam layout and dig to footing depth.
- Cut posts to final length after setting on cured concrete or anchors.
- Use a level and diagonal braces to keep posts plumb during fastening.
- Attach beams with approved metal connectors and stainless fasteners.
Install Deck Joists and Blocking
Ready to lay the backbone of your deck? Position joists perpendicular to rim beams, spacing them per plans—commonly 16″ on center for standard decking.
Use joist hangers or ledger connections, ensuring each joist sits level and is nailed or screwed with structural fasteners. Check alignment frequently with a chalk line.
Cut joists to fit snugly, allowing proper end gaps for drainage.
Install blocking between joists at mid-span and near stairs or heavy load areas to prevent twisting and distribute loads. Toenail or screw blocking securely.
Recheck measurements and level before moving to the next stage of framing.
Add Rim Joists, Flashing, and Under‑Deck Ventilation
Once you’ve squared and secured the field joists, attach the rim joists to close the perimeter and create a solid frame edge; they tie the joist ends together, resist racking, and provide a nailing surface for decking. Install corrosion‑resistant fasteners, guarantee tight joints, and sister any weakened ends.
Apply continuous flashing where the deck meets the ledger and along rim joists to prevent water intrusion.
Provide under‑deck ventilation by spacing joists correctly and installing vents or a drainage/airflow system to keep framing dry and reduce mold.
- Use metal flashing with sealant at ledgers
- Stagger vents for crossflow
- Fasten rim joists with structural screws
- Seal cut ends with preservative
Choose Board Orientation and Decking Patterns
After you’ve secured the frame and addressed flashing and ventilation, decide how you want the deck boards to run, since orientation affects appearance, strength, and drainage.
Run boards perpendicular to joists for maximum support and a standard look, or parallel for a modern, elongated effect if joists are spaced accordingly.
Consider diagonal or herringbone patterns to add visual interest—these need more cuts and planning but transform plain decks.
Factor in water runoff: slope boards slightly away from the house and align gaps with drainage paths.
Visualize shifts at steps, rail posts, and abutting surfaces to guarantee consistent flow and clean sightlines.
Cut, Lay, and Space Decking Boards Correctly
When you cut and lay decking boards, follow the chosen board orientation so grain and load run where they’ll perform best.
Make straight, square cuts and stagger end joints for strength and appearance.
Keep gap spacing consistent with a spacer to allow for wood expansion and proper drainage.
Proper Board Orientation
How will your deck look and perform if you don’t cut, lay, and space the boards correctly? You’ll want boards oriented so grain sheds water toward joists, ends land on joists, and boards run perpendicular to joists for strength.
Rotate boards to alternate heart and bark sides for balanced cupping. Stagger end joints across adjacent boards to avoid a weak seam line. Consider board crown: install crown up to minimize visible sag when loaded.
- Align boards so growth rings face outward for consistent wear
- Place board ends over joists, not mid-span
- Alternate board grain to reduce warping
- Maintain visual symmetry across the deck
Consistent Gap Spacing
Correct board orientation sets you up for a stable deck, but spacing between boards determines drainage, expansion room, and appearance—so you’ll want consistent gaps every run.
Measure board width and plan gaps—typically 1/8″ to 1/4″ for treated lumber, larger for hardwoods or composites.
Use spacers or a scrap jig to maintain uniform spacing as you fasten boards.
Stagger end joints and cut boards square for tight, even seams.
Allow extra gap at walls and rail posts for swelling.
Check spacing periodically with a straightedge; adjust as needed before final fastening to guarantee a neat, functional surface.
Fastening Methods: Clips, Face Screws, and Adhesives
Although each fastening method has its strengths, choosing the right one depends on your deck’s material, appearance goals, and expected loads. You’ll pick hidden stainless clips for a clean surface and good ventilation, face screws for strength and easier future repairs, or construction adhesives to reduce squeaks and add bond where mechanical fasteners aren’t ideal.
Choose fasteners by deck material, look, and loads—hidden clips for clean ventilation, screws for strength, adhesives to quiet movement.
Combine methods when necessary—clips plus adhesives or face screws at ends. Consider corrosion resistance, span loads, and board movement. Inspect fasteners periodically and replace damaged ones. Use recommended spacing and torque to avoid splitting or overdriving.
- Hidden stainless clips for aesthetics
- Face screws for strength
- Adhesives to reduce movement
- Combine methods for reliability
Build Stairs: Stringers, Treads, Rise/Run Rules
Now you’ll lay out the stringers, marking the rise and run so each step is uniform and safe.
Measure and transfer your total height into consistent riser heights, then calculate tread depths that meet code and feel comfortable underfoot.
Cut the stringers precisely and fit treads snugly to avoid gaps or uneven steps.
Stringer Layout Basics
Wondering how to lay out stair stringers so your deck stairs are safe and comfortable? You’ll mark stringer positions from the deck rim to the landing, account for total rise, and space stringers to support tread width. Use consistent rise increments and plumb lines to keep runs aligned. Cut notches accurately and test-fit before final fastenings.
- Measure total rise, divide by number of rises for consistency.
- Snap a chalk line to align multiple stringers.
- Leave proper overhang for top and bottom connections.
- Check stringer spacing against tread material load requirements.
Tread/Riser Measurements
When you plan stair treads and risers, precise measurements make the stairs safe and comfortable: calculate a uniform riser height, set a consistent tread depth that meets code and your desired finish, and confirm the rise-to-run ratio produces a comfortable stride.
Measure total rise, divide by preferred riser height to get equal risers, and adjust slightly so riser heights are consistent.
Choose tread depth to accommodate foot placement and nosing, typically 10–11 inches for outdoor decks.
Mark and cut stringers using the same dimensions, verify fit with a mock-up, and recheck before final installation to guarantee safe, even steps.
Design and Install Railings and Balusters Safely
Because railings and balusters both protect people and define your deck’s look, you should design and install them with safety and code compliance as your top priorities. Measure guardrail height, spacing, and load requirements per local code.
Design railings and balusters first for safety and code compliance—measure heights, spacing, and load requirements carefully.
Choose materials that resist moisture and decay, and fasten posts to structure for lateral strength. Pre-drill and use corrosion-resistant hardware.
Check baluster spacing to prevent falls and consider picket orientation for aesthetics.
- Verify local code for guard height and load ratings
- Use pressure-treated or rot-resistant wood and stainless hardware
- Secure posts to joists or blocking, not just decking
- Space balusters to prevent a 4″ sphere passing through
Add Lighting, Benches, and Built‑In Features
Think about where lighting will go so you get even illumination without glare, and plan outlets or conduit for safe wiring and power access.
Consider built-in bench layouts that double as storage or planter boxes and fit the flow of your deck.
We’ll cover placement tips, bench ideas, and basic wiring needs so you can integrate these features smartly.
Lighting Placement Tips
As you plan lighting placement, aim to blend safety, functionality, and ambiance so each fixture feels intentional rather than tacked on. You’ll position step and railing lights to prevent trips, highlight traffic paths, and illuminate seating areas without glare. Use low-voltage or LED fixtures for efficiency, and place switches or smart controls near entry points.
Space fixtures to provide even light, test at night, and adjust for shadows. Conceal wiring under boards or in channels to keep the deck tidy.
- Use warm-color LEDs for a welcoming tone
- Mount step lights at riser edges
- Add post caps for perimeter glow
- Zone lights with separate controls
Built‑In Bench Ideas
Want seating that looks custom and saves space? Build benches into your deck perimeter or along railings to maximize room and define zones. Choose materials that match decking for a seamless look; leave gaps for drainage and expansion.
Incorporate storage beneath seats with hinged tops or pull-out drawers to hide cushions and tools. Use varied bench heights and L-shaped or corner units to encourage conversation.
Add backrests or planters as integrated accents. Finish with weatherproof paint or stain and stainless fasteners. Think about airflow and cleaning access so your built-in benches stay comfortable and durable for years.
Wiring And Power Access
How will you bring power and lighting into your deck without cluttering the space? Plan conduit routes, locate a GFCI outdoor circuit, and position fixtures to highlight paths and seating.
Integrate outlets into posts or bench ends, and hide wiring under fascia or inside joists. Choose low‑voltage LED lighting to reduce load and simplify connections.
Coordinate switches, timers, or smart controls for convenience.
- Recessed post cap lights for subtle perimeter glow
- Bench-mounted USB outlets for charging devices
- Weatherproof receptacles near grilling and bar areas
- Junction boxes accessible from below for maintenance
Sanding, Cleaning, and Prepping Wood for Finish
Before you apply any finish, get the wood smooth, clean, and dry so the coating can adhere evenly and last.
Sand boards with a belt or orbital sander, starting with 80–100 grit, then 120–150 for a uniform surface. Sand along the grain and remove splinters and raised fibers.
Sweep and vacuum debris, then wash with a deck cleaner or diluted oxygen bleach to remove mildew, tannins, and dirt.
Rinse thoroughly and let the deck dry 24–48 hours.
Inspect for nails or fasteners that need countersinking or replacement.
Mask nearby plants and metal to prevent cleaner damage.
Choose and Apply Sealant, Stain, or Paint
Once your deck’s dry and sanded, pick a finish that matches your goals—waterproofing, color, or long-term protection—and follow the product’s prep and application instructions closely. You’ll choose between clear sealant, penetrating stain, solid stain, or exterior paint. Test a small area for look and absorption. Work with recommended temperatures, apply evenly with brush or roller, and back-brush where needed. Allow full cure before foot traffic.
- Use compatible products for your wood species.
- Stir, don’t shake, to avoid bubbles.
- Maintain wet edges to prevent lap marks.
- Apply thin coats; multiple thin beats one thick.
Common Mistakes to Avoid and Inspection Checkpoints
After finishing the finish, you’ll want to inspect the deck and watch for common mistakes that undermine its appearance and longevity. Check for loose fasteners, inadequate drainage, uneven boards, and missed sealing spots. Tighten, replace, and sand as needed. Look for early rot at posts and joists; catch it before it spreads. Ensure gaps are correct and flashing is intact around ledger connections.
| Issue | Checkpoint | Fix |
|---|---|---|
| Loose screws | Wobble or squeak | Retighten or replace |
| Poor drainage | Standing water | Regrade or add gaps |
| Flashing failure | Rust or gaps | Reseal/replace |
| Rot signs | Soft wood | Repair/replace |
Deck Maintenance Schedule and Seasonal Tasks
Because your deck faces weather year-round, a simple seasonal maintenance schedule keeps small issues from becoming expensive repairs. Check for loose boards, rusted fasteners, and drainage problems each spring. Sweep and wash surfaces in late spring. Sand and re-seal worn areas in summer. Clear leaves and snow in fall and winter to prevent moisture damage. Keep records of dates and tasks so you spot recurring issues early.
- Spring: inspect fasteners, joists, and railing stability.
- Summer: power wash, sand splinters, apply sealer.
- Fall: clean gutters, remove debris, tighten hardware.
- Winter: clear snow, avoid de-icers that corrode.
Estimate Final Costs and When to Hire a Pro
When you tally materials, labor, permits, and contingency, you’ll get a realistic final cost for the deck—one that lets you decide whether to DIY or hire a pro. Estimate material costs, add permit fees, and multiply labor hours by local rates. If complexity, slope, or electrical work appear, lean toward hiring a licensed contractor. Compare quotes, check references, and factor warranties. Set a 10–20% contingency for surprises.
| Item | Typical Cost Range | Notes |
|---|---|---|
| Materials | $800–$6,000 | Wood type varies |
| Labor | $500–$5,000 | Depends on size |
| Permits | $50–$500 | Local rules apply |
| Contingency | 10–20% | Unexpected issues |
Troubleshooting Common Deck Problems
Not sure why your deck’s squeaking, cupping, or staining? You can diagnose and fix common issues quickly.
Inspect fasteners, gaps, and drainage; tighten loose screws, replace rusted nails with coated screws, and restore proper spacing. Sand cupped boards and improve ventilation beneath the deck.
Check fasteners, correct spacing and drainage; tighten or replace hardware, sand cupped boards, and improve underside ventilation.
Clean and reseal stained areas after removing mildew with a deck cleaner. For rot, remove affected boards and check joists. If structural members are compromised, call a pro.
- Squeaks: tighten or replace fasteners, add shims where needed
- Cupping: sand, improve airflow, ensure proper installation
- Stains: clean, bleach, reseal
- Rot: cut out, replace, reinforce
Frequently Asked Questions
Can I Build a Deck Over an Existing Patio or Concrete Slab?
Yes, you can build a deck over an existing patio or concrete slab, but you’ll need proper framing, blocking, drainage, and footings or pedestals, plus local permits and inspections to guarantee structural safety and moisture control.
How Do I Soundproof a Deck for Lower Noise Transmission?
You can reduce deck noise by adding mass and damping: fasten acoustic underlayment, use rubber isolation pads under joists, install dense decking, fill gaps with sealant, and hang sound-absorbing panels beneath the deck.
Can I Install a Rooftop Deck on a Flat Garage?
Yes, you can install a rooftop deck on a flat garage if the structure can support the load, waterproofing’s applied, drainage’s planned, and local permits allow it; consult an engineer, obtain permits, and use proper flashing and membranes.
What Plants or Landscaping Work Well Under a Raised Deck?
Shade-tolerant groundcovers, ferns, hostas, astilbes, and woodland perennials work well under a raised deck. You’ll also use gravel, mulch, or pavers for drainage, and choose native shade plants for low maintenance.
Are There Insurance Implications for Adding a Large Deck?
Yes — you’ll need to notify your insurer, as adding a large deck can change property value, increase liability, and affect coverage. They’ll advise on endorsements, higher limits, or inspections; don’t assume existing policy suffices.
Conclusion
Building a wood deck can transform your outdoor life, but success comes from planning and upkeep. Start by confirming codes and permits, pick the right size, location, and decking material, and set a realistic budget and timeline. Avoid common construction mistakes, inspect connections and drainage, and keep a seasonal maintenance routine. If costs or complexity climb, hire a pro. With care and regular checks, your deck will stay safe, attractive, and functional for years.