You can build a sturdy wood bench in a weekend with basic tools, a clear plan, and simple joinery. Decide its purpose—seating, storage, or decorative—measure your space, and pick dimensions that suit users. Choose a durable wood, make a cut list, and use pocket holes, screws, or dowels to assemble a square frame, attach a slatted or solid top, sand, and finish for protection. Follow straightforward steps below to get detailed plans, materials, and tips.
Quick Overview: What You’ll Finish in One Weekend (Tools, Materials, Time)
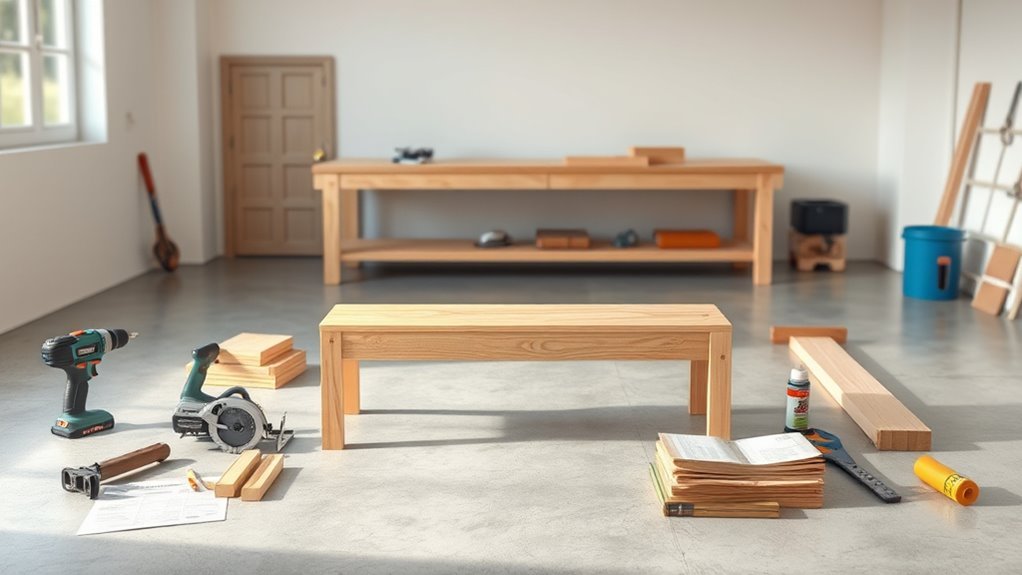
If you’ve got a weekend free and basic shop space, you can build a sturdy wood bench with just a handful of tools and materials. You’ll end up with a 48–60-inch bench, simple frame, solid seat planks, and basic joinery that’s both stable and attractive.
Plan for about 6–8 hours active work across two days. Gather a circular saw or miter saw, drill/driver, countersink bit, sander, clamps, tape measure, square, and safety gear.
Materials: dimensional lumber (2x4s and 1x6s or 2x6s), exterior screws, wood glue, exterior finish or paint, and wood filler.
Choose Bench Purpose and Location
Decide what you’ll use the bench for—seating, storage, or a decorative accent—since that affects size and strength. Think about whether it needs to withstand weather or will stay inside, as materials and finish will change.
Finally, pick a spot that’s easy to access and complements traffic flow so the bench gets used.
Purpose And Function
Because your bench’s purpose shapes its size, materials, and placement, start by picturing how you’ll use it and where it should live. Decide if it’ll seat people, hold plants, serve as a storage surface, or act as a decorative accent. Match strength, height, and finish to that role. Consider frequency of use and required durability.
Think about ergonomics for seating and load capacity for storage. Plan features like backrests, cushions, or compartments only if they serve the intended function.
- Seating: prioritize comfort, height, and sturdiness.
- Storage: focus on accessible compartments and weight limits.
- Display: emphasize proportions and finish.
Indoor Versus Outdoor
Wondering whether your bench belongs inside or out? Decide based on use, materials, and maintenance.
If you want a cozy entryway seat, choose indoor hardwoods or plywood, smooth finishes, and fabrics that match decor.
For mudrooms or dining nooks, pick moisture-resistant joinery and easy-to-clean surfaces.
If you plan outdoor use, pick rot-resistant woods like cedar or pressure-treated lumber, galvanized or stainless fasteners, and exterior-grade finishes.
Outdoor benches need slatted tops or slight gaps for drainage and periodic resealing.
Consider how often you’ll maintain it and how exposure will affect appearance and longevity before you build.
Placement And Accessibility
Where will your bench get the most use? Pick a purpose—seating, storage, or decor—then choose a spot that supports it. You’ll want sightlines, traffic flow, and shelter in mind.
Place near entryways for shoes, windows for reading, or patios for gatherings. Guarantee height and depth suit users and allow clear pathways.
- Entryway: quick seating, storage beneath, close to doors.
- Window nook: comfortable height, natural light, cozy textiles.
- Patio: weatherproof materials, anchor to level surface, leave clearance for movement.
Measure Your Space and Pick Bench Dimensions
Before you cut any wood, measure the area where the bench will sit so your dimensions fit the space and flow with surrounding furniture. Measure wall length, clearance for walkways, and distance from other pieces.
Decide bench length by allowing 18–24 inches per person if seating is meant. Choose seat depth around 14–18 inches for comfort and height between 16–18 inches for standard use; adjust for specific users if needed.
Note base or leg projection so doors and drawers clear. Sketch dimensions, label measurements, and double-check before buying lumber to avoid waste and guarantee a proper fit.
Decide Bench Style: Rustic, Modern, Farmhouse, Mid‑Century
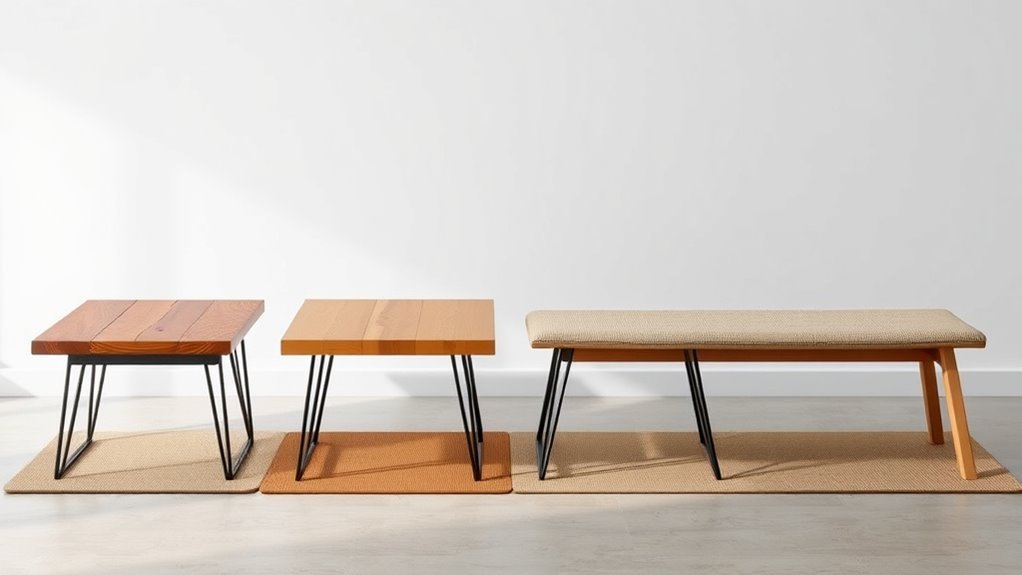
When choosing a style, think about the room’s overall look and how the bench will be used so it complements both form and function. You’ll pick a silhouette that fits—chunky and reclaimed for rustic, clean lines and minimal hardware for modern, shaker details and cozy accents for farmhouse, or tapered legs and teak tones for mid‑century.
Consider traffic, seating needs, and nearby furniture to keep proportions right. Finish choices and hardware will underline the style.
Factor in traffic flow, seating needs, and nearby furniture; finishes and hardware will reinforce your chosen style.
Use this quick checklist to lock your direction:
- Purpose: entrance seating, dining accompaniment, or decorative.
- Scale: length, height, and visual weight.
- Detail: joinery, legs, and finishes.
Choose the Right Wood for a Durable Wood Bench
Now that you’ve locked in a style and proportions, pick a wood that matches both the look and how the bench will be used. Consider strength, stability, and exposure: indoor seating can favor finer grain and finish, while outdoor pieces need rot resistance and low maintenance. Balance budget with longevity, and check board straightness to avoid twist. Match joinery to wood hardness, and plan for finish penetration. Test a small scrap for staining and sanding. Use the table below to compare key traits quickly and guide your final choice.
| Trait | Why it matters |
|---|---|
| Strength | Supports weight |
| Stability | Resists warping |
| Durability | Survives use |
Pine vs Cedar vs Hardwoods: Pros, Costs, and Uses
When picking lumber, you’ll notice pine is the cheapest and easiest to work with for quick bench projects.
Cedar resists rot and insects, making it a smart choice for outdoor benches.
Hardwoods offer the best long-term durability and a more refined look.
We’ll compare their costs and typical uses so you can pick what fits your budget and purpose.
Pine: Affordable, Easy Workability
Although it’s softer than many hardwoods, pine gives you big advantages: it’s affordable, easy to cut and shape, and forgiving for beginners, so you’ll spend less time fighting the wood and more time building your bench.
You’ll find pine at any lumberyard, and its straight grain takes screws, nails, and glue well. Sanding smooth is quick, and you can paint or stain to match your space.
Watch for knots that can split; predrill near them. For indoor or covered benches, pine delivers excellent value and straightforward workability without demanding advanced tools.
- Cost-effective material choice
- Beginner-friendly handling
- Simple finishing options
Cedar vs Hardwoods: Durability, Cost
If you want a bench that resists rot and weather with minimal maintenance, cedar’s natural oils and tight grain make it a strong choice for outdoor use.
While hardwoods like oak or teak trade higher cost for superior long-term durability and load-bearing strength. You’ll find cedar lightweight, easy to cut, and reasonably priced, but softer and prone to dents.
Hardwoods cost more, weigh more, and demand sharper tools, yet they resist wear, take finishes beautifully, and support heavier loads for years.
Choose cedar for low-maintenance outdoor seating and hardwoods for high-traffic benches where longevity and strength justify the expense.
Create Your Cut List and Calculate Material Quantities
Before you cut a single board, sketch a clear cut list that breaks the bench into parts—seat slats, aprons, legs, and supports—and shows each part’s dimensions and quantity so you can buy and rip lumber efficiently.
Measure overall bench length and height, then divide into component lengths.
Note grain direction and edge allowances for joinery.
Calculate board feet for each species and add 10% for waste and mistakes.
Label each cut with finish side and sanding order.
Confirm tool blade widths to adjust measurements.
Finally, cross-check quantities against standard board sizes to minimize offcuts.
- Reduce waste
- Simplify shopping
- Speed cutting
Set a Realistic Budget and 5 Ways to Save
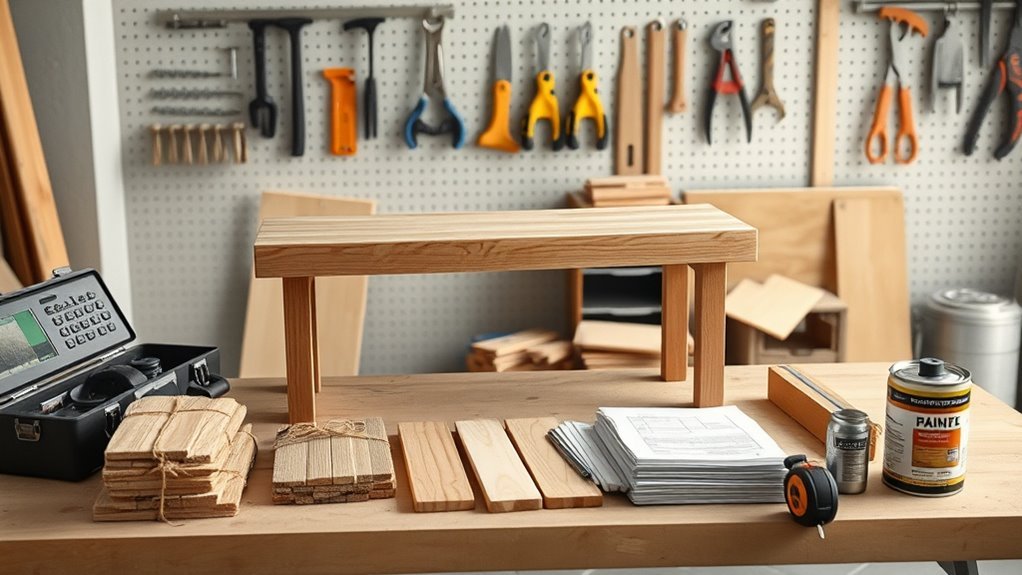
Set a clear spending limit before you buy anything so the project stays on track. Prioritize essential materials like sturdy legs and a solid top, and skip decorative extras until after the bench is functional.
Use cost-saving techniques—shop salvaged wood, compare prices, and consolidate trips—to stretch your budget.
Set A Clear Limit
How much are you willing to spend on this bench project? Set a firm cap before you buy anything. A clear limit keeps choices focused, prevents scope creep, and helps you decide between upgrades or basics.
Track expenses as you go and stop when you hit the cap unless you reallocate funds intentionally. Use these checkpoints to evaluate trade-offs and avoid impulse upgrades.
- List must-haves vs nice-to-haves.
- Set a contingency (small percentage) and stick to it.
- Pause before extra purchases to reassess value vs cost.
Prioritize Essential Materials
While you can get tempted by fancy extras, start by listing only the materials you absolutely need for a sturdy bench—lumber, fasteners, glue, finish, and basic hardware—and estimate realistic costs for those items first.
Tally board dimensions, type (pine, oak), screws or bolts, exterior or interior finish, and any brackets.
Add small allowances for sandpaper and brushes.
Compare local lumberyard and big-box prices, and note delivery or waste-cut charges.
Factor taxes and a modest contingency (5–10%).
With that focused list, you’ll set a practical budget that covers essentials without surprise expenses.
Use Cost-Saving Techniques
Now that you’ve pinned down the must-have materials and costs, it’s time to plan a realistic budget and shave expenses where it won’t hurt the bench’s strength or appearance. Decide your top priorities: structural lumber, fasteners, and finish. Allocate a contingency (5–10%) for mistakes.
Save smartly by buying reclaimed wood, using offcuts, and choosing affordable but durable finishes. Rent or borrow specialty tools instead of buying. Buy screws and hardware in bulk. Track every purchase so you don’t overspend, and compare local prices with online deals before buying.
- Reclaimed or offcut lumber
- Rent tools, borrow when possible
- Bulk fasteners and price-compare
Essential Tools for a Beginner Wood Bench Build
Before you cut your first board, gather a few reliable tools that’ll make the build safer and faster. You’ll need a tape measure, carpenter’s square, pencil, and a handsaw or circular saw for straight cuts.
Before cutting your first board, gather reliable tools—tape measure, square, pencil, and a handsaw or circular saw.
A cordless drill with drill and driver bits speeds assembly; include wood screws and a countersink bit.
Use clamps to hold pieces while you drill and glue.
A try square or combination square helps with accurate joinery.
Sanding requires medium and fine sandpaper plus a sanding block.
Finally, wear safety glasses, hearing protection, and a dust mask to protect yourself during the project.
Optional Tools That Speed the Job
You can speed the build with a few optional tools that make clamping, cutting, and cleanup faster. Quick-action clamps and specialty clamp types cut setup time.
Cordless drills and saws give mobility and speed.
Simple dust-collection add-ons keep your workspace cleaner and safer.
I’ll cover when each is worth the extra cost and how to use them effectively.
Quick-Action Clamp Types
Looking to speed up glue-ups and hold parts steady without fumbling with screw threads? You’ll appreciate quick-action clamps: they grab instantly, release fast, and let you reposition work without losing pressure. Use them for assembling frame pieces, holding stretchers while you mark, or keeping glue joints aligned.
Pick styles that match task size and force needs.
- Bar clamps — long reach for bench aprons and top glue-ups.
- Trigger clamps — one-handed operation for fast, repeatable pressure.
- Spring clamps — handy for small temporary holds and jigs.
Cordless Power Options
Quick-action clamps speed glue-ups, but cordless power tools can shave hours off your bench build and keep joints true with less effort. You’ll want a compact drill/driver for pilot holes and pocket screws, choosing brushless motors for longer runtime and less heat.
An impact driver handles lag screws quickly; use the right bits to prevent cam-out.
A compact circular saw or track saw lets you break down stock cleanly without hauling to a table saw.
A battery-powered random-orbit sander smooths surfaces fast.
Keep extra batteries charged and match voltages across tools to avoid adapters and downtime.
Dust Collection Add-Ons
Want cleaner work and less time sweeping? You’ll speed assembly and finish with simple dust collection add-ons that hook to tools or your shop vac. They keep joints clear, blades sharp, and finishes cleaner so you get better fits and less rework.
- Hose adapters: Match tool ports to your shop vac for effective extraction.
- Portable dust extractors: Lightweight units you can move to sanding or cutting stations.
- Dust collection hoods and shrouds: Attach to routers, circular saws, and sanders to capture debris at the source.
Install, test airflow, and maintain filters for consistent performance.
Safety Gear and Safe Workshop Setup
Before you cut or clamp anything down, get your safety gear on and prepare your workspace. Put on eye protection, hearing protection, dust mask or respirator, and snug gloves when handling rough lumber. Wear close-fitting clothing and sturdy shoes. Keep a first-aid kit, fire extinguisher, and clear pathway nearby.
Arrange good lighting and ventilation; position tools on stable surfaces and secure workpieces with clamps. Unplug or switch off tools before adjusting blades or bits. Store sharp tools safely and keep flammables away from heat sources.
Inspect cords, blades, and guards regularly to prevent accidents and guarantee reliable operation.
Simple Design: Plank Top With Apron Legs
If you’re new to bench-building, a plank top with apron legs is a straightforward, sturdy layout that gets you a functional workspace without complicated joinery. You’ll cut a solid top from one or multiple planks, glue or screw them flat, then attach aprons under the top to tie legs together and prevent racking.
Aprons hide fasteners and transfer weight to robust legs, so pick 1×3–1×4 stock. Square, level assembly matters more than fancy details. Finish with sanding and a protective coat.
Choose 1×3–1×4 aprons to hide fasteners and transfer weight; focus on square assembly and a protective finish.
- Stability: apron length and fastening prevent wobble.
- Simplicity: basic tools suffice.
- Scalability: size adapts to need.
Easy Variations: Slatted Top, Storage Bench, Backrest
You can switch to a slatted top to improve airflow and shed water if the bench will live outdoors.
Adding built-in storage under the seat gives you hidden space for cushions, shoes, or tools without changing the bench’s footprint.
Let’s look at simple ways to cut the slats and add a hinged lid or drawers.
Slatted Top Benefits
While a solid top can be simple, a slatted top gives you airflow, faster drying after rain, and a lighter visual profile—qualities that make it ideal for outdoor benches, storage lids, or when you plan to add a backrest without bulk.
You’ll find slats reduce puddling, lower rot risk, and make the bench feel less heavy in a small space. Spacing and material matter: cedar or treated pine with 1/8″–1/4″ gaps work well.
You can also vary slat width for style or comfort without complicating construction.
- Durability: dries faster, resists decay
- Style: airy, customizable look
- Comfort: conforms visually without extra weight
Built-In Storage Options
Those same slatted-top ideas carry over neatly when you want storage built into a bench: leave gaps for airflow in a lid, use slats as a removable top, or run continuous slats that hinge up for access.
You’ll choose a simple box base or include internal dividers for organization.
Add gas hinges for smooth opening or a piano hinge for strength.
Consider a backrest that doubles as a shallow shelf or cubby for keys and phones.
Seal the interior for damp items, and use catches to keep the lid closed.
Measure for clearance so cushions or coats fit without binding.
Cutting Plan and Measurements (Step‑by‑Step)
Before you pick up the saw, lay out a clear cutting plan with exact measurements for every piece so you can cut efficiently and avoid mistakes.
Measure twice, note each part (legs, seat slats, stretcher), and write final lengths on your plan.
Account for blade kerf, material thickness, and any end grain joins.
Group identical cuts to save setup time and reduce errors.
Keep a cutting list near your workbench and cross off pieces as you cut.
- Legs: final height plus tenon allowance
- Seat slats: width, length, and spacing gaps
- Stretchers: length minus joinery overlap
How to Lay Out and Mark Boards Accurately
When you’re ready to mark boards, work systematically: square an end with a combination square, transfer measurements from your cutting list, and lay out all related marks before cutting so you can double-check dimensions and grain direction.
Use a sharp pencil or marking knife for thin, precise lines and mark the waste side clearly. Label each piece with its part name and orientation to avoid confusion.
Scribe cut lines across the face and edge to maintain accuracy when cutting. Check diagonals for squareness on rectangular assemblies.
Re-measure critical distances twice and pause before cutting to confirm everything aligns.
Joinery for Beginners: Screws, Pocket Holes, Dowels
If you’re new to joinery, start with simple, reliable methods—screws, pocket holes, and dowels—each suited to different needs for strength, appearance, and speed. You’ll choose screws for quick, strong joints; pocket holes when faces must stay clean; and dowels for concealed alignment.
Pre-drill and use glue with dowels, clamp until set, and countersink screws to avoid splits. Pocket-hole jigs speed repeatable work and hide fasteners.
Match fastener length to material thickness and test fit before final assembly. Practice on scrap to gain confidence and consistency before committing to your bench parts.
- Screws: fast, strong
- Pocket holes: neat, repeatable
- Dowels: invisible, aligned
Build the Frame: Assemble the Apron and Legs
Once you’ve cut your apron pieces and legs to size, lay them out and dry-fit the frame to check alignment and fit before gluing or fastening.
Square corners by measuring diagonals or use a carpenter’s square.
Clamp the apron to the legs, ensuring top edges are flush and consistent.
If you’re using pocket holes or screws, predrill and countersink to avoid splitting.
For glue joints, apply even glue, assemble, then clamp firmly until set.
Check for level and adjust shims if needed.
Remove excess glue while it’s wet, then recheck squareness before the glue fully cures.
Attach the Seat: Spacing and Fastenings
Position the seat boards so their edges line up flush and the grain runs consistently across the bench.
Leave even gaps (usually 1/8″–1/4″) for wood movement, and measure a couple of spots to keep spacing uniform.
Use corrosion-resistant screws or carriage bolts placed near the apron and through-bolted where strength matters, spacing fasteners evenly for secure attachment.
Seat Board Alignment
While you set the seat planks in place, keep a consistent gap and secure fastening method in mind to guarantee a flat, comfortable surface that lasts. Align each board by eye and use a straightedge to confirm a continuous plane before fastening. Clamp boards to prevent shifting, then predrill to avoid splits. Countersink screws so tops stay smooth and tuck washers under screw heads when needed.
- Measure: verify board edges are flush with frame and adjacent boards.
- Clamp: hold boards steady while you predrill and screw.
- Check: re-run a straightedge and adjust before final tightening.
Gap Spacing Guidelines
Because wood expands and contracts with humidity, you’ll want consistent gaps between seat planks to prevent buckling and to allow water to drain.
Aim for 1/8″ to 1/4″ gaps for hardwoods and 3/16″ to 1/4″ for softwoods; adjust slightly larger in wet climates.
Use spacers or a dedicated jig to maintain uniform spacing while you fasten.
Keep gaps even end-to-end and check alignment before final tightening.
Don’t over-widen gaps—large openings collect debris and may pinch splinters.
Sand plank edges smooth so gaps stay clean, and periodically inspect gaps for seasonal movement.
Fastener Types & Placement
Now that you’ve set consistent gaps between planks, choose fasteners and their placement to hold the seat securely without restricting wood movement. You’ll use screws or hidden fasteners depending on appearance and longevity. Countersink exterior-grade screws, leave short gaps to allow expansion, and avoid nailing through end grain.
- Use stainless or coated deck screws, 1¼–1½” into slats, spaced every 12–16″ across joists for even hold.
- Employ figure-eight or Z-clips for floating attachments that let boards expand while keeping a clean top.
- Pre-drill near ends and stagger fasteners to prevent splitting and concentrate load.
Add Reinforcement: Stretchers and Corner Blocks
Once the frame is assembled, add stretchers and corner blocks to lock everything solidly in place.
Once the frame is built, install stretchers and corner blocks to lock the assembly solidly in place.
Cut stretchers to fit between legs, mounting them low for stability or higher for a footrest. Use glue and pocket screws or carriage bolts through predrilled holes; countersink fasteners so they sit flush.
For corner blocks, trim triangles to fit tightly into each corner, glue them, and screw from the outside into the block for shear strength.
Check squareness before glue cures.
Reinforcements prevent racking and distribute weight across legs.
Test the frame under load and tighten any fasteners that shift during assembly.
Sanding Tips for a Smooth, Professional Finish
After you’ve reinforced the frame and confirmed everything sits square, turn your attention to sanding—the step that makes a bench look and feel professional. You’ll smooth edges, remove tool marks, and prep for finish.
Move progressively from 80–100 grit to 150–180, finishing with 220 grit for a sleek surface. Sand with the grain, keep even pressure, and check frequently for low spots. Use a sanding block or orbital sander for flats and folded sandpaper for curves.
Clean dust between grits with a tack cloth so each step reveals true progress.
- Start coarse, end fine.
- Sand with the grain.
- Clean between grits.
Fill Gaps and Hide Screw Heads Effectively
If you want a seamless, professional-looking bench, fill gaps and hide screw heads before finishing so your stain or paint lays down evenly.
Start by dry-fitting pieces to identify gaps. Use wood glue to close joints, clamp until set, then remove squeeze-out.
For visible cracks or countersunk screws, apply matching wood filler or colored epoxy, pressing firmly and overfilling slightly. Let cure fully, then sand flush with surrounding wood using progressive grits.
For painted projects, use lightweight spackling for a smooth surface. Clean dust with a tack cloth before proceeding.
Proper filling keeps grain and hardware concealed for a clean result.
Choose Finishes: Paint, Stain, Oil, Exterior Sealer
When choosing a finish for your bench, think about where it will live and how you’ll use it—paint hides flaws and lets you pick any color, stain highlights grain and keeps a natural look, oils penetrate for a hand-rubbed feel, and exterior sealers stand up to weather.
Decide durability, maintenance, and appearance before buying.
Consider durability, upkeep, and look before choosing a finish so your bench performs and pleases.
Exterior sealers and marine finishes work for outdoors; oil or wax suits indoor, tactile pieces; paint offers color and coverage but needs proper prep.
Match finish to wood species and expected wear.
Consider drying time and recoat needs so your bench stays attractive and functional.
- Durability
- Maintenance
- Appearance
Finishing Process for Long‑Lasting Results
Ready to get a durable, attractive finish? You’ll sand smooth, remove dust, apply thin coats, and let proper dry times build protection. Lightly sand between coats, wipe clean, and follow product instructions. For longevity, use quality brushes or applicators and avoid heavy buildup. Test finish on scrap wood first.
| Step | Action |
|---|---|
| 1 | Sand to 120–220 grit |
| 2 | Clean surface thoroughly |
| 3 | Apply thin, even coats |
| 4 | Sand between coats; cure fully |
Finish in a dust-free area and handle cured bench gently during full cure period.
Weatherproofing an Outdoor Wood Bench
When you plan an outdoor bench, pick a naturally durable wood like cedar or teak to resist rot and insects.
Then seal every surface with a weatherproof finish—exterior-grade oil, varnish, or a spar urethane—to block moisture and UV.
Reapply the finish periodically and check for wear so the bench lasts for years.
Choose Durable Wood
Pick a wood that naturally resists rot and insect damage so your outdoor bench lasts with minimal upkeep. You’ll choose species based on exposure, budget, and appearance.
Hardwoods like teak and ipe endure moisture and pests; cedar and redwood balance cost and resistance. Avoid soft, untreated pine unless it’s raised off ground and regularly maintained.
- Teak or ipe: supreme durability, higher cost, minimal movement.
- Cedar or redwood: good resistance, attractive grain, moderate price.
- Pressure-treated lumber: affordable, insect-resistant, choose low-warp grades and proper fasteners.
Apply Protective Finish
Want your bench to stay beautiful through rain and sun? Start by sanding smooth, removing dust, and checking joints.
Choose an exterior-grade finish: spar urethane, marine varnish, or penetrating oil with UV inhibitors.
Apply thin, even coats with a good brush, following grain direction. Let each coat dry fully, lightly scuff between coats, and wipe off dust.
Pay special attention to end grain and underside—these absorb moisture fastest.
For maximum protection, apply three to four coats and reseal annually or after harsh seasons.
Store bench off damp ground and consider a breathable cover for extended outdoor life.
Add Cushions or Upholstery for Comfort
Looking for a quick way to make your bench comfy? You’ll add cushions or upholstery to boost comfort and style without altering structure.
Pick foam density for meant use: firmer for seating, softer for lounging.
Choose durable, stain-resistant fabric and finish edges with piping or welt for longevity.
Attach cushions with Velcro or ties so you can remove and clean them.
If upholstering directly, wrap foam in batting for smoothness and staple fabric underneath the seat.
Consider tufting or buttons for visual interest, but keep proportions balanced to maintain bench functionality and flow.
- Choose foam density
- Select durable fabric
- Use removable attachments
Customize Dimensions for Storage or Narrow Spaces
Measure the exact space where the bench will sit so your design fits snugly without blocking doors or walkways.
Decide whether you want hidden storage like a lift-up seat, open cubbies, or drawers and plan the internal dimensions accordingly.
Finally, adjust seat height for comfort and accessibility based on who’ll use the bench and any storage needs underneath.
Measure Available Space
Before you cut any boards, take exact measurements of the spot where the bench will live so the final piece fits the space and any nearby obstacles. Measure width, depth, and height at multiple points; note baseboards, trim, radiators, doors, and window sills. Sketch the footprint to scale and mark clearance for walking paths and door swings. Double-check with a level for sloped floors and record the narrowest clearances.
- Measure twice: width, depth, height—record both max and min.
- Check obstacles: trim, vents, outlets, doors.
- Plan clearances for movement and alignment.
Choose Storage Options
Now that you’ve confirmed the bench will fit the space, decide how much storage you need and how it will affect the bench’s dimensions. Pick between open cubbies, drawers, or a lift-top box—each changes depth and front clearance.
For narrow halls, choose shallow cubbies (8–10″) or vertical shelving under the seat. If storing shoes, allow taller cubby height and ventilation.
Drawers need glide space and slightly reduced internal height. Measure doorways and walk paths so drawers or lids can open fully.
Sketch side and front views with dimensions, then adjust leg placement and support to accommodate the chosen storage.
Adjust Seat Height
Adjust the seat height to match who’ll use the bench and what you’ll store underneath—lower for kids and boot storage, higher for adults or to create extra vertical clearance for drawers or taller cubbies. You’ll measure desired seat elevation from the floor to the top surface, then subtract cushion thickness if you add one.
Account for legroom and ease of sitting; test with a temporary spacer. For narrow spaces, consider thinner seat boards and recessed legs to keep overall footprint small without lowering comfort. Use sturdy supports and adjustable feet to level on uneven floors.
- Measure, mock up, test
- Account for storage height
- Add levelers for precision
Modify the Design for Higher Weight Capacity
If you need the bench to hold more weight, reinforce the frame and choose stronger materials so it’ll stay safe and stable under heavier loads.
Use hardwoods like oak or maple, or opt for thicker dimensional lumber.
Add extra legs or a center support beam to distribute load evenly.
Increase apron thickness and use metal corner brackets or through-bolts at joints for greater shear strength.
Consider a stretcher between legs and glue plus screw connections rather than nails.
Test load capacity gradually and seal wood to prevent moisture weakening.
These changes boost durability without complicating construction.
Troubleshooting Common Build Problems and Fixes
Expect wood to move with humidity, so you’ll want to check for cupping or gaps and allow for seasonal movement.
If the seat’s uneven, you can plane, shim, or refasten slats to restore a flat surface.
For loose joints, tighten or replace fasteners and add glue or brackets where needed.
Wood Movement Issues
Wondering why your bench gaps, warps, or squeaks over time? You’ll learn that wood expands and contracts with humidity, fasteners can bind, and finishes affect moisture exchange.
Anticipate movement when you lay out boards and choose grain orientation. Use floating panels or elongated holes for screws so pieces can shift without stress. Seal all surfaces evenly to slow moisture change.
Check joinery annually and tighten only when needed; overtightening induces splitting. If a board cups, let it acclimate in place with controlled humidity before replacing.
Plan for movement up front to avoid repairs later.
- Allow movement
- Use flexible fastenings
- Seal evenly
Uneven Seat Fixes
After you’ve planned for wood movement and flexible fastenings, address an uneven seat by first finding which boards or supports are out of plane and why. Tap across boards to locate hollow spots, use a straightedge to spot gaps, and check rails and stretcher alignment.
Remove or loosen offending boards; replane high spots or sand low ones. Shim between seat and frame where slight gaps occur, then glue and clamp only if movement allowances remain.
For warped boards, replace or flatten with heat and moisture methods. Re-check fastener tightness and final seat flatness before finishing to guarantee comfort.
Loose Joint Repairs
How do you tell when a joint needs attention? You’ll notice wobble, visible gaps, or creaks when pressure’s applied. Don’t ignore these signs — they’ll worsen.
Start by tightening visible fasteners, then test stability. If wobble persists, disassemble the joint where possible, clean old glue, and re-glue with clamps for proper cure.
For stripped screw holes, use a wooden toothpick or dowel with glue to rebuild the hole before re-screwing. For mortise-and-tenon or loose dowels, add glue and clamp; consider epoxy for compromised wood.
- Inspect: find looseness sources.
- Repair: clean and re-glue.
- Reinforce: fill, dowel, or epoxy.
Quick Repairs and Maintenance Tips
If you catch loose screws, wobbly legs, or flaking finish early, you can fix them quickly and keep the bench sturdy for years. Tighten hardware, replace stripped screws with slightly larger or longer ones, and add washers for grip.
Re-glue and clamp minor joint gaps; use wood filler for small cracks. Sand rough spots, remove dirt, then apply a matching finish or outdoor sealant to protect against moisture.
Check feet and add caps to prevent rot. Inspect seasonally, clean spills promptly, and store under cover or use a fitted tarp to extend the bench’s life.
How to Transport and Install Your Finished Bench
Before you move your bench, assess its weight and size so you know whether you can lift it safely or need help.
Pick a transport method—car, truck bed, or moving straps—and protect the finish with blankets or moving pads.
When you arrive, secure the bench in place and anchor or level it as needed for safe, long-lasting use.
Assess Bench Weight
Wondering whether you can carry the finished bench solo or need help? You’ll estimate weight by material, dimensions, and hardware. Lift a test section or calculate board weights; don’t guess. Check floor and doorway limits before moving.
- Measure and multiply board volumes by wood density to get a reliable weight estimate.
- Weigh a comparable scrap piece, scale to full bench, and add hardware weight.
- Factor maneuvering: include angled lifts, steps, and partner help if estimate exceeds your comfortable lift (about 25–35% of your max safe lift for one person).
Choose Transport Method
When you’re ready to move the bench, pick a transport method that matches its weight, size, and the route to its final spot. Use dollies for smooth floors, straps for long carries, and helpers for awkward turns. Protect surfaces with pads and wrap exposed joints. Measure doorways and tight spots first, then plan the path to avoid stairs or narrow halls. If it’s heavy, split the load or use a furniture slider. Keep tools and fasteners handy in case minor adjustments are needed en route.
| Method | Best for |
|---|---|
| Dolly | Smooth, level floors |
| Helpers/Straps | Stairs, awkward turns |
Secure And Install
Now that you’ve planned the route and chosen a transport method, it’s time to secure and install the bench in its final spot. Lift with helpers, use straps and moving blankets, and keep the bench upright to prevent stress on joints.
Position it, check level, and adjust with shims. Anchor if outdoors or in high-traffic areas.
- Fasten: use appropriate anchors, screws, or brackets for the surface and bench material.
- Level: confirm even seating and stability with a spirit level; trim or shim as needed.
- Test: sit, rock, and inspect joints; retighten hardware after initial use.
Cost and Time Breakdown by Stage
Breaking the project into clear stages lets you see where your time and money actually go, so you can plan and adjust as needed.
List stages: planning and measuring (30–60 minutes; minimal cost), material purchase (30–90 minutes; lumber, screws, ~$40–$120), cutting and prepping (1–2 hours; blade wear, sandpaper ~$5–$15), assembly (1–3 hours; fasteners, glue ~$5–$20), finishing (1–2 hours plus drying; stain/paint, sealer ~$10–$40), and installation (30–60 minutes).
Expect total time 4–9 hours across one or two days and total cost roughly $60–$200 depending on wood quality and finish choices.
Eco‑Friendly Materials and Waste‑Reduction Ideas
Because you’ll likely be handling cutting, finishing, and disposal, choosing eco-friendly materials and reducing waste makes your bench project greener and often cheaper. Use reclaimed or FSC-certified lumber to avoid new logging, and pick low-VOC finishes to protect indoor air. Plan cuts to minimize offcuts and save usable scraps for bracing or shelves.
- Source salvaged wood or locally milled boards to cut transport emissions and costs.
- Choose water-based stains and natural oils; they’re safer and easier to touch up.
- Design for modularity so parts can be repaired or repurposed, extending the bench’s life.
Printable Tools and Materials Checklist
Want a straightforward way to keep the build on track? Use a printable checklist you can carry to the garage.
Include categories: lumber (dimensions, type, quantity), fasteners (screws, bolts, wood glue), hardware (brackets, hinges if needed), finishing (sandpaper grits, stain, sealer, brushes), measuring and marking (tape measure, square, pencil), cutting and shaping (saw, jigsaw, chisels), assembly tools (drill, drivers, clamps, mallet), safety gear (gloves, goggles, mask), and extras (wood filler, touch-up markers).
Leave space to tick off items and note sizes or substitutions. Print it, laminate if desired, and check items before you start.
Weekend Project Timeline: Step‑by‑Step Schedule
With your checklist ready and tools gathered, map out a weekend timeline to keep the bench build efficient and stress-free.
With your checklist set and tools ready, map a relaxed weekend timeline to keep the bench build efficient and stress-free.
Day 1: morning, cut and label parts; midday, sand and pre-drill; afternoon, dry-fit components.
Day 2: morning, glue and clamp assemblies; midday, attach legs and braces; afternoon, final sanding and finish coat.
Pace tasks so you don’t rush glue times or finishes. Keep supplies, clamps, and clean-up gear handy. If weather impacts drying, swap in indoor steps.
Follow this order to stay focused, meet cure times, and finish a sturdy bench by Sunday evening.
- Prepare
- Assemble
- Finish
Photos, Measurements, and Plans for Three Example Builds
When you pick one of the three example builds below, you’ll get photos, precise measurements, and printable plans so you can follow each step without guessing.
Each build includes clear, labeled photos showing joinery, fastener placement, and finish samples.
You’ll find cut lists with board dimensions, recommended lumber types, and hardware counts.
Plans include step-by-step assembly diagrams and a materials checklist you can print and take to the shop.
Measurements use common units and include tolerances for snug fits.
Follow the plans exactly for the pictured results, or use them as a reliable template for minor personalization.
Scale Variations: Two‑Seater and Dining Bench Versions
If you plan to adapt the basic bench for different uses, scaling it up or down is straightforward and mostly affects seat length, leg spacing, and support placement.
You’ll decide between a compact two-seater (about 36–42 inches) and a longer dining bench (60–72 inches).
Adjust leg count and spacing to prevent sag: shorter needs two sets, longer benefits from a center support.
Keep seat depth and height consistent for comfort.
Choose similar joinery and fasteners; increase glue/fastener counts for longer spans.
Test stability before finishing.
- Two-seater: compact, two leg sets.
- Dining: longer, center support.
- Comfort: consistent seat dimensions.
Where to Find Plans, Hardware Kits, and Community Help
Now that you’ve settled on size and support for your bench, you’ll want reliable plans, the right hardware, and a community to answer questions.
Start with reputable plan sources: woodworking books, maker websites, and downloadable PDF plans from trusted blogs.
Choose hardware kits that match your design—bolt-through leg kits, threaded inserts, and pocket-hole connectors—and buy from established suppliers to avoid fit issues.
Join forums and local woodworking groups to get advice, clamp tips, and problem-solving help; Reddit, Facebook groups, and local maker spaces work well.
Save links, part numbers, and community posts so you can reference them during the build.
Final Checklist: Finish, Install, and Enjoy Your Wood Bench
Before you bring your bench into service, walk through a concise final checklist to make sure the finish, hardware, and placement are all right.
Inspect the finish for even coverage and sand any rough spots; cure times matter, so don’t rush seating.
Tighten bolts, recheck joinery, and add thread locker or glue where needed to prevent loosening.
Choose placement considering level ground, exposure, and traffic flow; use pads to protect flooring.
Test weight and stability gently before regular use.
Finally, enjoy your work and schedule periodic checks—simple maintenance keeps the bench safe and looking great.
Frequently Asked Questions
Can I Build a Matching Table Using the Same Plans and Materials?
Yes — you can. You’ll adapt the dimensions and add longer top boards and extra leg supports, keeping the same materials and joinery. You’ll follow the bench’s construction principles while scaling proportions for a table.
How Do I Dismantle the Bench for Moving Through Narrow Doorways?
You’ll disassemble the bench by removing screws or bolts, labeling parts, and packing hardware in labeled bags. Take off the seat, legs, and supports in order, keeping parts protected so you can reassemble easily later.
Are There Legal or Copyright Issues Using Published Bench Plans?
Generally, you won’t face legal trouble using published bench plans for personal use, but you shouldn’t repost or sell them verbatim; if plans are copyrighted, you’ll need permission for commercial use or to publish substantial reproductions.
What Woodworking Skills Should My Child Learn Alongside This Project?
They should learn measuring, marking, and safe tool use, basic saw and drill techniques, sanding and finishing, simple joinery like butt and pocket joints, clamp handling, and reading plans; you’ll supervise and reinforce safety and patience throughout.
Can I Add Electrical Charging Ports or Hidden Compartments?
Yes — you can add charging ports and hidden compartments, but you’ll plan wiring access, ventilation, and secure mounting, use safe low-voltage components, and avoid compromising structural joints; test fit and consult an electrician for permanent or complex installations.
Conclusion
You’ve got everything you need to build a beautiful wood bench this weekend. Measure your space, pick a style and durable wood, and follow the photos and plans for a simple two‑seater or dining version. Grab the right tools and hardware, finish the surface, and install it where it’ll be used most. With a bit of time and care, you’ll enjoy a sturdy, custom bench that fits your home and lasts for years.