You can build a simple sofa table in a weekend using basic tools, affordable lumber, and straightforward joinery. Measure your sofa, pick a length slightly shorter than the couch, and cut a slim top, four legs, aprons, and a lower shelf. Join with pocket screws or dowels, sand smooth, then stain or paint and seal. Add felt pads and optional drawer or shelf for storage. Keep going to learn step-by-step tips and troubleshooting.
Quick Build Overview: What You’ll Make and Main Steps
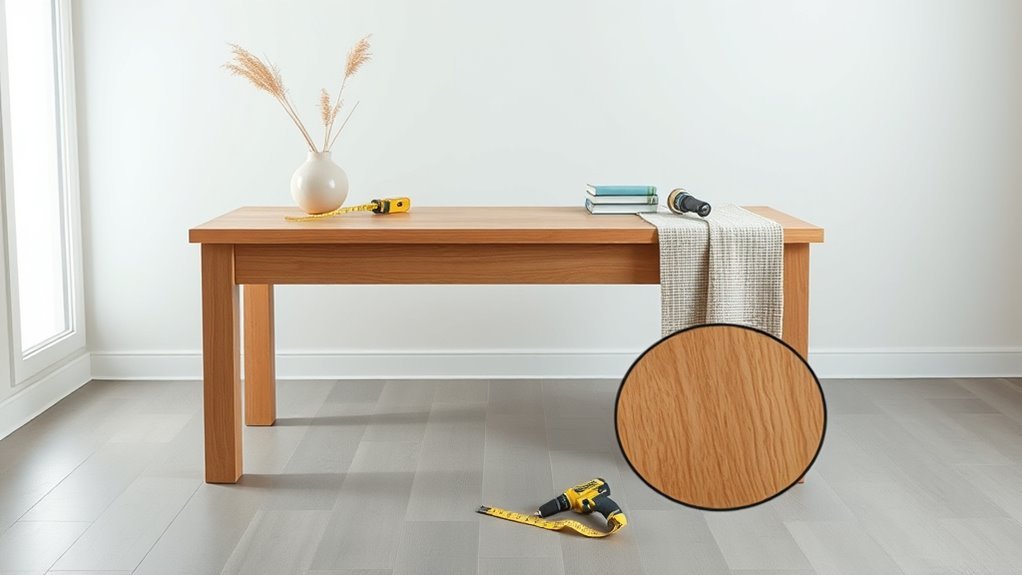
Before you start, know exactly what you’re building: a simple, sturdy sofa table with a slim top, four square legs, and a lower shelf for books or decor.
Before you begin, picture a simple, sturdy sofa table: slim top, square legs, and a handy lower shelf.
You’ll cut lumber to size, assemble a rectangular top, build matching legs, and fit a lower shelf at a comfortable height.
You’ll join parts with pocket screws or biscuits, reinforce corners with glue and clamps, and sand surfaces smooth.
Then you’ll apply stain or paint and seal for durability.
Finally, you’ll attach felt pads to the feet and position the table behind your sofa, ready for lamps and storage.
Choose the Right Sofa Table Size and Style for Your Space
When planning your sofa table, measure the back of your sofa and the room so the table’s length, depth, and height fit the space and traffic flow.
Aim for a table slightly shorter than the sofa width—typically 2–6 inches less—so it looks balanced.
Depth usually ranges 10–18 inches; choose narrower for narrow walkways.
Height should match or sit an inch below the sofa’s arm for easy reach.
Pick a style that complements your decor: slim modern, rustic with visible grain, or streamlined mid-century.
Consider storage needs—shelves or drawers—while keeping proportions harmonious with surrounding furniture.
Set a Realistic Budget and Time Estimate for This Sofa Table
Start by listing each material and its cost so you know where your money goes.
Estimate the hours you’ll spend on cutting, assembly, and finishing, and convert that to a labor value if you’d pay someone.
Add a contingency (10–20%) to cover mistakes, delays, or unexpected supplies.
Materials Cost Breakdown
Although exact prices vary by region and supplier, you can expect the materials for a simple sofa table to cost between $80 and $200; this covers lumber, fasteners, wood glue, sandpaper, finish, and basic hardware.
Estimate: hardwood or pine boards $40–$120, screws and brackets $5–$15, wood glue and fillers $5–$15, sandpaper and abrasives $5–$10, stain or paint plus sealer $15–$30, optional hairpin legs or decorative hardware $10–$40.
Buy slightly more lumber to allow for mistakes.
Compare prices at big-box stores, local suppliers, and reclaimed-wood sources to stretch your budget without sacrificing quality.
Labor Time Estimate
How long will this project take you from unloaded lumber to finished table? Expect about 6–10 hours of focused work over a weekend.
Plan 1–2 hours for cutting and dry-fitting parts.
2–3 hours for joinery and glue-ups (allowing clamp time).
1–2 hours for sanding and prepping surfaces.
And 1–3 hours for finishing coats and assembly, accounting for drying between light coats.
If you’re inexperienced, add an extra 25–50% for learning and setup.
Block calendar time, gather tools beforehand, and work in uninterrupted segments to stay efficient.
Track actual times to refine future estimates.
Contingency And Overruns
Your time and cost estimates from the previous section give a baseline, but you should budget extra for overruns and unexpected issues. Add a contingency of 10–20% for materials and 15–30% for labor if you’re learning or working solo.
Factor wasted cuts, mismeasured pieces, finish touch-ups, and tool rental or replacement. Pad your schedule by a few hours per complex step and a day for drying or curing finishes.
Track actual spend and time as you go; adjust remaining tasks to stay on budget. If you finish early, keep the surplus for upgrades or future projects.
Choose Wood: Pine, Oak, Plywood – Cost, Look, and Durability
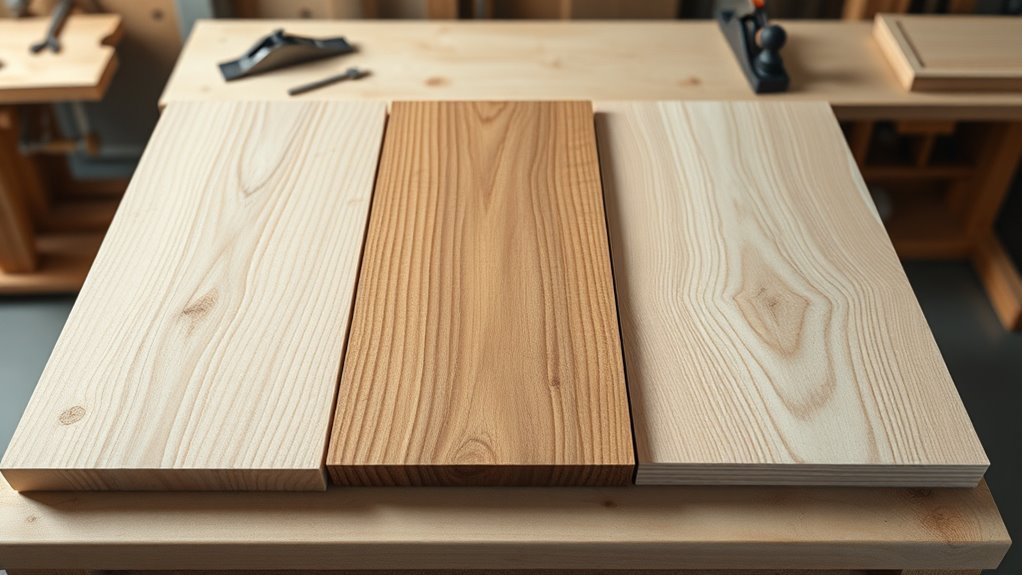
Picking the right wood will determine your sofa table’s cost, appearance, and how well it holds up over time, so think about pine for affordability and a rustic look, oak for strength and a classic grain, or plywood when you need stability and a budget-friendly veneered finish.
Picking the right wood shapes your sofa table’s cost, look, and longevity—pine for rustic budget, oak for strength, plywood for stability.
You’ll choose based on budget, style, and expected wear; pine dents easier but sands and paints well, oak resists damage and shows beautiful grain, plywood stays flat and is cost-effective for large panels.
Consider finish compatibility, joinery strength, and weight when deciding.
- Pine: cheap, lightweight, easy to work
- Oak: durable, attractive grain, heavier
- Plywood: stable, cost-efficient panels
- Finish: paint vs. clear coat impacts look
- Wear: consider traffic and maintenance
Essential Tools You Need (Basic and Optional)
Before you cut a single board, make sure you’ve got the right tools on hand—this saves time, avoids mistakes, and keeps the project safe.
At minimum, you’ll need a tape measure, pencil, square, circular saw or miter saw, drill with bits, wood screws, clamps, and sandpaper.
A pocket hole jig or router helps join pieces neatly but isn’t required.
Optional items include a finish brush or rag, wood glue, countersink bit, workbench or sawhorses, and a random orbital sander for smooth results.
Wear safety glasses and hearing protection, and keep a clean, well-lit workspace.
Cut List & Dimensions (Standard Sofa Table)
Now that you’ve got your tools ready, let’s lay out the cut list and exact dimensions for a standard sofa table so you can buy and cut materials confidently.
You’ll get recommended lumber sizes, a clear cutting dimensions chart for each part, and a checklist of necessary hardware and fasteners.
Follow these specs and you’ll avoid costly mistakes at the saw and on assembly.
Materials And Lumber Sizes
Which pieces do you need and in what sizes to build a standard sofa table? You’ll pick lumber and hardware that match the cut list so assembly is straightforward and stable.
Use kiln-dried hardwood or good-quality pine and standard hardware (screws, pocket-hole plugs, wood glue, finish).
Measure twice, buy a little extra for mistakes, and keep boards straight.
- Top: 1 piece, ~48″ x 12″ x 3/4″
- Aprons: 2 pieces, ~44″ x 3″ x 3/4″
- End stretchers: 2 pieces, ~11″ x 3″ x 3/4″
- Legs: 4 pieces, ~28″ x 2″ x 2″
- Lower shelf: 1 piece, ~44″ x 10″ x 3/4″
Cutting Dimensions Chart
With your materials picked and boards checked for straightness, it’s time to lay out a clear cutting dimensions chart so you can cut quickly and accurately. You’ll use precise lengths for top, aprons, legs, and shelf. Mark each board, label pieces, and group cuts by width to reduce waste. Double-check measurements before cutting and note grain direction for visible faces. Use the table below as a quick reference; adjust lengths if you changed overall table size.
| Part | Cut Dimensions |
|---|---|
| Top | 48″ x 12″ |
| Legs | 4 @ 28″ |
| Aprons | 2 @ 40″, 2 @ 8″ |
Hardware And Fasteners
Although the woodwork sets the shape, the right hardware and fasteners determine the table’s strength and longevity. Here’s a concise cut list and sizing guide so you’ll grab the correct screws, bolts, and brackets before assembly.
You’ll need fasteners matched to 3/4″ plywood and 1x oak parts: choose corrosion-resistant finishes, use correct lengths to avoid protrusion, and pick washers where load spreads.
Follow this cut list for a standard sofa table and plan fastening points to prevent splitting.
- 1¼” #8 wood screws — 40 pcs (top and apron)
- 2″ #10 wood screws — 8 pcs (legs to apron)
- 3/8″ x 2″ carriage bolts — 4 pcs (leg through-bolts)
- 3/8″ washers and nuts — 8 each
- 1″ corner brackets — 4 pcs (under top)
Simple Joinery Options for Beginners
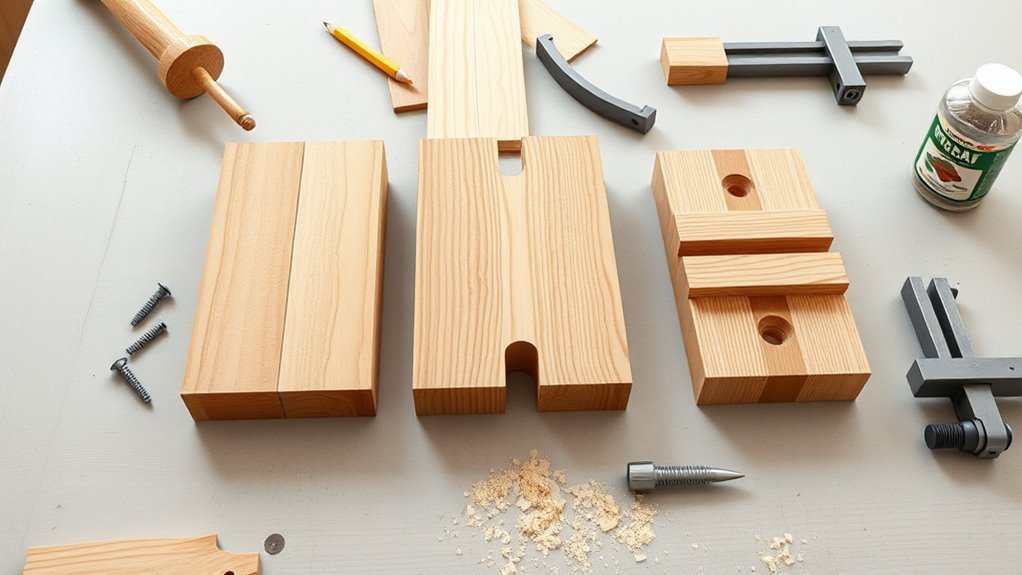
Because strong joints keep your sofa table square and durable, you’ll want to pick simple methods that match your tools and skill level.
Use pocket-hole screws for quick, hidden joints at aprons and legs; they’re forgiving and repeatable.
Try dowel joints with a jig or marking for neat edge-to-edge connections; they add alignment without complex cutting.
Butt joints reinforced with screws and glue work if you accept visible fasteners or cover them with plugs.
For shelf supports, dadoes or rabbet cuts give positive location and strength while staying straightforward.
Choose one method and practice on scrap before assembling.
Prep and Square Lumber Safely
Before you cut, measure twice so your pieces fit the plan without wasting wood.
Use squares and a test assembly to confirm everything sits true, and check edges and faces for flatness.
Always handle tools with proper guards, secure workpieces, and wear eye and hearing protection.
Measure Twice, Cut Once
When you’re getting ready to cut, measure each board carefully and square every end so your pieces fit together true; mistakes here are the ones you’ll regret at assembly. You’ll work faster and cleaner if you mark with a sharp pencil, use a reliable tape, and confirm lengths against your plan.
Clamp boards before cutting, and scribe lines so saw teeth don’t wander. Keep blades sharp and guards in place to stay safe.
- Use a good set of measuring tools.
- Mark cut lines on the face you’ll see.
- Double-check measurements before clamping.
- Cut with steady, controlled feed.
- Label parts immediately.
Check For Square
Now that your parts are cut and labeled, check each joint and corner for square so assembly goes smoothly. Use a reliable carpenter’s square or the 3-4-5 method: measure three units one way, four perpendicular, and five between those points to confirm a right triangle.
Lay mating pieces flat, clamp gently, and verify edges align without gaps. Adjust with a plane or sander for tight fits; re-cut any offending ends. Mark corrected pieces clearly.
Repeat checks after glue-up tack clamps cure to catch shifts. Consistent squareness now prevents warped assemblies and saves time later.
Safe Tool Handling
Because a careless move can ruin lumber or injure you, always set up and inspect your tools and stock before cutting or squaring anything. You’ll check blades, fences, and clamps, confirm sharpness, and secure boards to prevent kickback. Wear eye and hearing protection, and keep hands away from cutting paths.
Use push sticks and a stop block for repeatable, safe cuts. Work methodically, test on scrap, and never rush a setup.
- Inspect blade teeth and alignment
- Confirm fence and miter gauge square
- Clamp stock firmly to prevent movement
- Use push sticks and featherboards
- Wear safety glasses and hearing protection
Build the Frame: Step-by-Step Assembly
Before you lay out the boards, double-check your measurements and cut list so each piece fits precisely; accurate prep makes assembly faster and stronger.
Double-check measurements and cuts before laying boards—accurate prep ensures faster, stronger assembly and a better final fit
Position legs and rails on a flat surface, clamp corners square, and mark pocket hole or dowel locations. Pre-drill holes to prevent splitting, then apply glue to joints.
Fasten rails to legs with screws or dowels, keeping assemblies square as glue sets. Add stretchers between leg pairs for rigidity, checking diagonals for equal measurements.
Sand visible joints flush. Flip the frame and verify level and squareness before moving on to attaching the tabletop.
Attaching the Sofa Table Top: Methods and Alignment Tips
When you set the tabletop on the frame, take time to align it precisely and choose a secure fastening method that still allows wood movement. A tight fit without seasonal give will cause cracks or warped boards. You’ll position clamps, check overhangs, and mark centrelines.
Use fasteners that permit lateral movement—figure-eight brackets, elongated slots, or wood buttons—and avoid rigid glue-only bonds. Pre-drill to prevent splitting. Test siting before final tightening.
- Align edges with a straightedge and measure corners
- Use fasteners that allow expansion
- Pre-drill and countersink screw holes
- Leave slight gaps at ends for movement
- Recheck alignment after fastening
Add Legs and Stretchers for Strength and Stability
You’ll pick leg materials that match your style and load needs, like solid hardwood for durability or metal for a slimmer profile.
Attach legs with sturdy joinery—mortise-and-tenon, threaded inserts, or heavy-duty brackets—to prevent wobble.
Add cross stretchers between the legs to lock the frame square and boost long-term stability.
Choosing Leg Materials
Although the tabletop often gets the most attention, the legs and stretchers are what actually keep your sofa table steady, so pick materials that balance strength, weight, and appearance.
You’ll want legs that match your style, support the load, and won’t wobble over time. Consider durability, ease of machining, finish options, and how stretchers tie the system together.
Measure load paths and choose materials that resist splitting and compressive wear. Lighter woods need thicker profiles; metals can be slim.
Here are common choices to compare quickly:
- Solid hardwood (oak, maple)
- Pine or poplar (economical)
- Steel or iron
- Aluminum (light)
- Turned wood legs
Attaching Legs Securely
Because the legs transfer most of the load to the floor, secure joinery and tight-fitting stretchers are essential to keep your sofa table from wobbling or sagging.
Start by marking leg positions square to the apron, then drill pilot holes to prevent splitting.
Use glue plus screws or dowels for each leg joint, clamping until the glue sets.
Check squareness and level before final fastening.
Fit stretchers snugly between legs to resist racking; dry-fit, adjust, then glue and fasten.
Finally, rotate the table and press firmly to confirm stability, tightening any fasteners if you detect movement.
Adding Cross Stretchers
When you add cross stretchers, they lock the legs together and cut down wobble so the table stays rigid under weight and use. You’ll measure between legs, cut stretcher pieces to fit, and mark mounting points low enough to clear feet. Use glue and screws or joinery for lasting strength.
Square the frame, clamp, then fasten each stretcher. Sand and finish to match the table.
- Measure twice, cut once for tight joins
- Choose stretcher thickness for proportion and strength
- Pre-drill to prevent splitting
- Clamp while glue cures for exact alignment
- Check for level before final fastening
Edge Profiles: How to Shape the Tabletop
How do you want the table to feel and look? Decide between sharp, eased, or decorative edges—each changes style and safety.
Use a router with a straight, round-over, or ogee bit for clean, repeatable profiles. Clamp the top and rout with grain direction to prevent tear-out.
For softer results, pass a block plane or sanding block along the edge, keeping consistent angles.
If you’re joining a breadboard end, leave allowance for movement.
Test bits and depth on scrap before touching the tabletop.
Keep steady feed speed, check bit sharpness, and wear eye and hearing protection.
Sand, Fill, and Prepare the Surface
Before you apply finish, get the surface right. You’ll sand progressively: start coarse to remove mill marks, move to medium, then fine grit for smoothness. Clean dust between passes and inspect for dents or gaps.
Use wood filler sparingly; press it in, let it cure, then sand flush. Round any sharp edges left from routing so finish adheres evenly. Check joints for gaps and tighten fasteners if needed.
Finally, wipe with a tack cloth and let the wood dry fully before finishing.
- Sand with increasing grit
- Remove dust between steps
- Fill holes, sand flush
- Smooth routed edges
- Inspect and tighten joints
How to Finish It: Stain, Paint, Oil, and Clear Coats (With Application Steps)
Although you’ve prepped the surface thoroughly, choosing the right finish and applying it correctly will protect the wood and define the table’s final look.
Decide stain for color grain enhancement, paint for opaque coverage, oil for natural warmth, or clear coat for durability. Test on scrap.
Decide stain to enhance grain, paint for opaque coverage, oil for warmth, or clear coat for durable protection—test first.
Apply stain with a cloth, wipe excess, let dry; paint with thin coats and light sanding between; rub oil on, wipe off excess, cure fully; brush or spray clear coats, sanding 220–320 grit between coats.
Work in a ventilated area, follow manufacturer dry times, and remove dust before each coat for a smooth, lasting finish.
Simple Customizations for a Sofa Table: Shelf, Drawer, and Hardware Ideas
If you want to make the table truly yours, simple add-ons like a lower shelf, a shallow drawer, or swapped-out hardware can change both function and style without a full redesign.
You can add a floating shelf for baskets, fit a shallow drawer for remotes, or swap knobs and pulls to suit your decor. Choose soft-close slides for smooth use, or open cubbies for display.
Mix metal hardware finishes with wood tones for contrast. Keep modifications reversible so you can change later.
- Floating lower shelf for storage
- Shallow drawer for small items
- Open cubbies for display
- Replaceable knobs and pulls
- Soft-close drawer slides
Common Problems, Fixes, and Care to Keep Your Sofa Table Looking New
Adding a shelf, drawer, or new hardware will boost your table’s utility, but everyday use still exposes it to scuffs, spills, and loose fittings—so you’ll want a simple maintenance plan.
Wipe spills immediately with a damp cloth; avoid harsh cleaners.
Tighten screws and hinges monthly to prevent wobble.
For scratches, use matching wood filler or a touch-up marker; sand lightly and refinish if needed.
Use felt pads under decor and coasters for drinks to prevent rings.
Reapply protective finish every couple of years, especially for high-traffic surfaces.
Inspect joints periodically and repair glue bonds before gaps widen.
Frequently Asked Questions
Can I Build This With Reclaimed Wood or Pallets?
Yes — you can build it with reclaimed wood or pallets, but you’ll need to clean, de-nail, and flatten boards, check for rot and contamination, and reinforce joints; plan carefully for thickness, stability, and finish before assembly.
Is This Design Safe for Pets and Small Children?
Yes, it can be safe for pets and small children if you anchor it to the wall, round or sand sharp edges, use non-toxic finishes, guarantee stable legs and low center of gravity, and avoid small removable parts.
How Do I Transport and Move a Finished Sofa Table?
You’ll lift with helpers, using gloves and furniture sliders under legs, then carry upright to avoid stress. Use a dolly for long moves, secure with straps, protect corners with blankets, and take tight turns slowly.
Can I Adapt This Into a Console for Electronics With Cable Management?
Yes — you can adapt it into an electronics console with cable management. Add a rear cable access panel, grommets, internal power strip mounting, ventilation cutouts, and removable panels so you’ll hide cables, cool devices, and maintain easy access.
What Is the Best Way to Repair Water Rings or Burns Later?
For water rings or burns, you’ll sand lightly, apply wood cleaner or bleach for stains, use wood filler for pits, then restain and seal with polyurethane or varnish—match finish sheen and let cure fully before regular use.
Conclusion
You’ve got everything you need to build a stylish, useful sofa table that fits your space and budget. Pick the right size and wood, gather basic tools, and follow the simple steps to sand, assemble, and finish. Don’t forget optional touches like a shelf, drawer, or new hardware to personalize it. Expect small hiccups—plan fixes and care for wood finishes—and enjoy a custom piece you made yourself that’ll last for years.