You can build a dresser by honestly evaluating your skills, planning size and layout, and choosing appropriate materials like 3/4″ plywood or solid wood for faces and 1/2″ for backs. Measure twice, cut precisely, and pick joinery—dados for strength or pocket holes for speed. Assemble carcass square, install slides, sand through grits, and apply finish and hardware. Follow safety, anchor to the wall, and keep a budget and timeline; keep going to learn detailed steps and tips.
Decide If This Dresser Project Matches Your Skill Level

Before you start, honestly assess your skills and tools so you don’t bite off more than you can chew. You’ll gauge carpentry basics: measuring, cutting, joinery, and finishing.
Be realistic about power tool experience and planning; complex joinery or veneer work can wait.
Match the project to your time, workspace, and budget—don’t assume fixes are cheap or quick.
If you’ve built cabinets or simple furniture, you’ll likely manage a basic dresser; if you’re new, try a practice box or simpler project first.
Plan for help when lifting heavy panels or handling unfamiliar tools to stay safe and efficient.
Pick Dresser Size and Drawer Configuration
First, measure the room and mark the dresser footprint so you know what’ll fit without crowding doors or walkways.
Then decide how many drawers you want based on storage needs and the look you’re after.
Finally, pick specific drawer heights and widths—taller drawers for bulky items, shallow ones for socks and shirts.
Measure Available Room Space
When you measure the room, focus on both footprint and clearance so the dresser fits comfortably and functions well; measure wall length, floor space, and door swing.
Note baseboard, radiator, vents, and window heights that affect placement. Measure available depth so drawers open fully without hitting walls or a bed; allow 2–3 inches behind for wiring or baseboard.
Check ceiling height if you plan tall pieces or stacked units. Mark the intended location and sketch dimensions to scale.
Confirm traffic flow and visual balance with adjacent furniture. Record measurements precisely before finalizing your dresser’s overall width, depth, and height.
Choose Drawer Count
Now that you’ve pinned down the space the dresser will occupy, decide how many drawers you need and how they’ll be arranged to fit both the room and your storage habits.
Think about what you’ll store: bulkier items may need fewer, taller drawers; lots of small items call for more, shallower ones.
Consider visual balance—an odd number of drawers can be pleasing, while pairs create symmetry.
Account for drawer hardware, clearance for openings, and how often you’ll access each drawer.
Sketch a few configurations and pick the one that maximizes usable storage while matching the room’s scale and style.
Determine Drawer Sizes
How wide and deep should each drawer be to hold what you need and fit the dresser’s footprint? You’ll measure the dresser interior, subtract clearance for slides, and decide drawer height by function: small for socks, medium for shirts, deep for bulky items. Balance aesthetics and storage.
- Measure: verify interior width, depth, and slide thickness.
- Prioritize: assign heights to item types for daily ease.
- Test: mock up with cardboard to confirm reach and capacity.
Choose consistent spacing or varied heights for visual interest. Adjust until every drawer feels purposeful and fits the room.
Set Your Dresser Budget for Tools and Supplies
Before you cut a single board, decide how much you’ll spend on tools and supplies so your project doesn’t stall or balloon in cost.
Before the first cut, set a tools-and-supplies budget so your build won’t stall or spiral in cost.
List essentials: measuring tools, saw blades, sandpaper, screws, wood glue, finish, and protective gear.
Check what you already own to avoid duplicate purchases.
Price-shop online and locally for deals, factoring shipping and taxes.
Allocate a small contingency (10–15%) for mistakes or replacements.
If you need power tools, consider renting or borrowing to save money.
Track expenses as you go so you can adjust scope or finish choices without compromising the build.
Choose Materials: Plywood, Solid Wood, or MDF
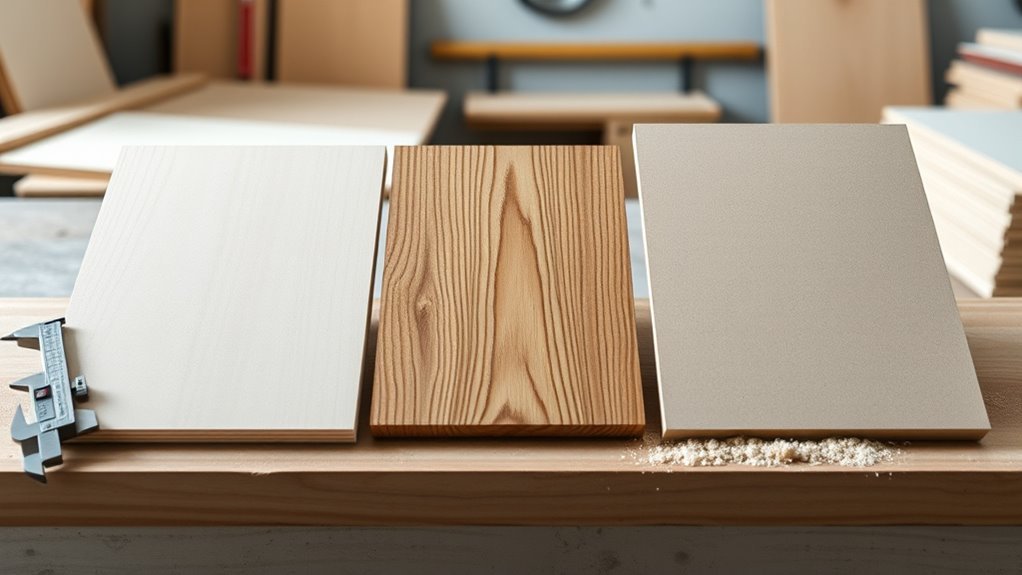
Although choice of material might seem like a small decision, it determines your dresser’s strength, weight, appearance, and cost—so pick with purpose. You’ll want materials that match how you’ll use and finish the piece.
Plywood is stable, affordable, and works great with veneers.
Solid wood brings warmth and can be repaired.
MDF paints smoothly and is budget-friendly but heavier.
Consider moisture exposure and hardware attachment.
Trust your skill level and aesthetic goals.
Make a shortlist and visualize the finished dresser before buying.
- Plywood: practical
- Solid wood: soulful
- MDF: economical
Select Lumber Grade and Panel Thickness
Once you’ve picked the material, decide on lumber grade and panel thickness to match strength, appearance, and joinery needs. For visible parts choose higher grades with minimal knots and consistent grain; for carcasses and drawer boxes use utility-grade or cabinet-grade plywood for stability and cost-effectiveness.
Thickness matters: 3/4″ (18mm) is standard for frames and drawer fronts, 1/2″ (12mm) for backs and drawer bottoms in many designs, and 1/4″ (6mm) for lightweight drawer backs or veneers. Match thickness to joinery—dovetails, dados, and screws require sufficient edge thickness—and keep consistency to simplify assembly and finish.
Calculate Material Quantities and Make a Cut List
Start by measuring each panel and part you’ll need, noting exact dimensions for sides, shelves, drawer boxes, and face frames.
Then calculate total sheet and board footage so you know how many sheets of plywood and linear feet of lumber to buy.
Finally, create a cut list that groups parts to optimize board yields and minimize waste.
Measure Panel And Parts
How will you turn your dresser design into a practical list of parts and panel sizes? You’ll measure each component precisely: sides, top, bottom, shelves, drawer boxes, face frames. Record length, width, thickness, and grain direction. Note hardware locations and reveal allowances.
Convert dimensions into panel cuts and individual parts, labeling each with quantity and purpose. Double-check measurements before finalizing the list.
Use this short checklist to capture essentials:
- Measure every part twice to avoid mistakes.
- Label panels with grain and edge orientation.
- Total quantities and note leftover allowances.
This disciplined list keeps cuts accurate and builds confidence.
Optimize Board Yields
Curious how to get the most parts from each sheet or board? Plan cuts before you buy. Lay out panels, drawer fronts, sides, and dividers on paper or software, noting grain direction and usable widths.
Account for saw kerf, defects, and edge trim. Group repeated parts to minimize waste and choose sheet orientation that fits the largest pieces first.
Tally material by board type and size, then create a clear cut list with dimensions, quantities, and cutting order. Bring the list to the store or shop; you’ll save money, reduce waste, and speed up assembly with parts ready.
Gather Essential Tools for Building a Dresser
Before you cut a single board, gather the essential tools you’ll need so the job goes smoothly and safely. You’ll want reliable measuring, cutting, and fastening basics: a tape measure, square, pencil, clamps, hand saw, chisel, drill driver, screw bits, hammer, and safety gear like goggles and ear protection.
Keep consumables—sandpaper, wood glue, screws—close. Lay tools out in order of use to avoid stops and mistakes. A tidy workspace keeps you calm and focused.
Remember to inspect blades and bits; dull tools cost time and risk. You’ll feel confident and efficient when everything’s ready.
- Measure precisely.
- Secure firmly.
- Protect yourself.
Optional Power Tools to Speed the Build

A few well-chosen power tools can cut build time and improve accuracy when you’re making a dresser. A circular saw speeds rip and crosscuts; a track or straightedge keeps cuts square.
A random-orbit sander saves hours sanding panels and edges smooth. A cordless drill/driver with clutch drills pilot holes and drives screws faster than a screwdriver. A jigsaw handles curved cutouts for toe kicks or openings.
A router with a flush-trim bit cleans edges and creates decorative profiles. If you plan many projects, a table saw and plunge router add precision and repeatability, but they’re optional for a single dresser.
Choose Joinery: Butt Joints, Dados, or Pocket Holes
Now you’ll pick the joinery method that fits your dresser’s needs by weighing strengths and weaknesses of butt joints, dados, and pocket holes.
Consider what tools and techniques each requires—simple clamps and glue for butts, a router or table saw for dados, and a pocket-hole jig for screws.
Your choice will affect assembly speed, long-term durability, and the finish you’ll be able to achieve.
Strengths And Weaknesses
While each joinery method will hold your dresser together, they offer different trade-offs in strength, speed, and skill required. You’ll pick based on durability, appearance, and how confident you feel.
Butt joints are quick and forgiving but rely heavily on glue and fasteners, so they’ll feel less robust over time.
Dados lock shelves and dividers, giving strong, precise support for weight-bearing parts.
Pocket holes speed assembly and hide hardware, though they concentrate stress in fastened points.
Consider longevity versus convenience and how much load drawers and shelves must bear.
- Fear of failure
- Pride in craft
- Relief in reliability
Tools And Techniques
When you decide which joinery to use, think about how the dresser will be used and how much time you want to spend building it.
Butt joints are fastest and need only a saw, drill, clamps, and glue; reinforce with screws or biscuits for more strength.
Dados cut with a router or table saw give strong, square drawer supports and shelf seats but take setup time.
Pocket holes are quick, hide hardware, and work well for face frames; you’ll need a pocket jig and drill.
Match joinery to load, appearance, and your tool comfort—prioritize strength where drawers and top bear weight.
Choose Drawer Slides and Hardware for Your Dresser
Because the right slides and hardware determine how your dresser feels and performs, pick components that match your design, load needs, and skill level.
Choose between side-mount, under-mount, or center-mount slides for smooth operation and capacity.
Match slide length to drawer depth, and consider soft-close for a refined touch.
Pick pulls or knobs that complement style and are comfortable to grip.
Use quality screws and mounting brackets to prevent sagging.
- Side-mount: sturdy, visible, reliable
- Undermount: sleek, adjustable, premium
- Soft-close: satisfying, protective, polished
Test fit before final assembly.
Measure and Mark Accurately Before Cutting
Before you cut, you’ll measure twice and mark once to avoid costly mistakes.
Use reliable tools—tape measure, combination square, and a sharp pencil—to transfer exact dimensions.
Make clear, consistent marks for your saw and clamp reference points so each cut is precise.
Accurate Measuring Techniques
How will you get clean, square cuts every time? You’ll rely on accurate measuring techniques that remove guesswork. Measure twice, measure with the same tool, and consider blade kerf.
Use a reliable tape measure or combination square, hold it steady, and read from the same edge. Note dimensions on wood with a light pencil, then verify against plan.
Account for material thickness and saw width before cutting. Clamp a stop block for repeatable lengths.
Trust these habits to save time, reduce waste, and keep joints tight—small steps that make your dresser feel professional and sturdy.
- Measure twice
- Verify once
- Trust the tools
Marking For Precise Cuts
When you mark stock carefully, your saw cuts will land exactly where you want them. Use a reliable ruler or combination square and a sharp pencil or marking knife for thin, clear lines.
Measure twice, mark once: verify dimensions and orientation, then transfer marks to both faces if necessary to avoid twist. For repeatable parts, make a simple stop block and mark every piece from the same edge.
Include cut lines and reference faces, and note grain direction. Clamp stock before scribing to keep movement minimal.
Clean, consistent marks cut scrapless and save time during assembly.
Cut Panels and Rails Per the Cut List
Ready to cut? You’ve marked everything precisely, so now you’ll focus on panels and rails per the cut list. Set your fence, confirm blade height, and clamp workpieces. Cut slowly, keeping steady pressure and watching grain direction to avoid tear-out.
- Follow the cut list exactly — accuracy builds confidence.
- Use stop blocks for repeatable rail lengths — consistency calms nerves.
- Label each piece immediately — organization prevents mistakes.
Check each cut against the list and dry-fit pieces on the workbench. If something’s off, remeasure and adjust before moving on; small fixes now save frustration later.
Cut and Fit Drawer Boxes Step by Step
Now that your panels and rails are ready, you’ll measure and mark each drawer component precisely to match the cut list.
Cut the parts to size, then assemble the boxes using glue and fasteners.
While assembling, check for squareness at each step.
Adjust as needed so every drawer runs true in the dresser carcass.
Measure And Mark
How precise do you want your drawers to fit? You’ll measure twice and mark once: mark rails, drawer sides, and face clearance. Use a reliable tape, square, and pencil; make light layout lines you can erase.
Make light layout lines you can erase. Mark front-to-back depths and note board grain direction. Transfer measurements to both paired pieces so drawers mirror each other.
When marking grooves or dados, label depth and side (left/right). Double-check clearances for slides or wood-on-wood runners. Trust your marks; they’ll guide clean cuts and snug fits.
Emotion: the right marks bring confidence, calm, and pride.
Assemble And Square
With your marks clean and verified, start assembling the drawer boxes so they sit square and true. Fit front, back, and sides with glue and clamps; check corners with a square and adjust until each corner measures 90°. Install bottoms, trim flush, and sand edges. Test fit in the carcass, shim where needed, and guarantee smooth travel.
| Step | Checkpoint | Action |
|---|---|---|
| 1 | Corners 90° | Clamp, glue, recheck |
| 2 | Bottom fit | Trim, secure |
| 3 | Slide smooth | Shim, sand |
Repeat adjustments until every drawer runs square and true.
Assemble the Carcass: Alignment and Squaring Tips
Because the carcass sets the dresser’s foundation, you’ll take extra care to align panels and square corners before glue or fasteners cure. Fit parts dry first, confirm edges flush, and clamp lightly to test. Use a reliable square at each corner, measure diagonals for true squareness, and adjust clamps until diagonals match.
Dry-fit and square the carcass, adjust clamps until diagonals match, then glue and fasten for a true, stable dresser.
Check face alignment so drawer fronts will sit evenly. Once satisfied, apply glue and tighten clamps incrementally, rechecking squareness. Finish fastening per plan, then remove clamps after glue sets.
Small corrections now save you frustration later—this step builds confidence and guarantees a stable result.
- Feel relief
- Gain pride
- Love the fit
Install Internal Dividers and Drawer Supports
Now that the carcass is square and secure, turn your attention to installing internal dividers and drawer supports to organize loads and carry weight evenly.
Measure the interior and mark divider positions for equal bay widths or varied compartments. Cut divider panels from plywood or hardwood, rabbeting edges if you’ll fit them into dados.
Dry-fit, then glue and screw or nail through the back and bottom into the dividers for strength.
Install drawer cleats at consistent heights so runners align; shim as needed for smooth travel.
Reinforce high-load areas with blocks or metal brackets.
Sand faces flush and check squareness before proceeding.
Attach the Top and Bottom Securely
How will you secure the top and bottom so they stay flat and support the dresser’s weight? You’ll align panels, clamp them, and fasten with strong joinery. Use glue along mating edges, then countersunk screws into rails or corner blocks to prevent sagging. Check squareness before final tightening and wipe excess glue.
Align, clamp, glue, and fasten with rails or blocks; check squareness and let the adhesive cure for a flat, sturdy top and bottom.
Add a center support if spans are wide, and let adhesive cure fully.
- Feel relief — clamps keep surfaces steady.
- Gain confidence — screws and blocks add lasting strength.
- Enjoy pride — a solid top and bottom make the dresser reliable.
Fit and Install Drawer Slides Correctly
With the top and bottom secured, you can move on to fitting the drawer slides so drawers run smoothly and sit square.
Begin by determining slide type and mounting position—side, under-mount, or center—then mark reference lines on carcass and drawer.
Use a square and tape to guarantee parallel alignment front to back.
Pre-drill pilot holes to prevent splitting, then fasten slides lightly so you can adjust.
Insert the drawer to check engagement, then tighten screws incrementally while confirming smooth travel.
Repeat for each drawer, keeping consistent measurements so all drawers operate evenly and align with the face.
Hang and Test Drawers for Fit and Smoothness
Once you’ve secured the slides, hang each drawer by aligning its runners with the cabinet slides and sliding it in until you hear or feel the engagement.
Gently open and close, checking for smooth travel, wobble, or binding. Adjust front-to-back and side-to-side using the slide’s adjustment screws until gaps are even and movement is effortless.
Test under load with a few items to guarantee consistent operation. If it sticks, remove and inspect for debris or misaligned screws.
Celebrate the satisfying glide — it shows your patience paid off.
- Relief
- Pride
- Anticipation
Prepare Surfaces: Sanding and Grain Filling
Now that the drawers fit smoothly, you’ll prepare the surfaces by choosing the right sandpaper grit for each stage to avoid over- or under-sanding.
Use a proper grain-filling technique—apply, level, and sand the filler so pores stay sealed without raised edges.
Finish with a careful final sanding and inspection to verify an even, smooth surface before finishing.
Choosing The Right Grit
How fine should your sandpaper be for each step? You’ll pick grits to control removal and finish: coarse for shaping, medium for smoothing, fine for finish. Match grit to task and wood to avoid gouges or haze.
- 80–100 grit: aggressive stock removal, fixes mistakes, feels decisive.
- 120–150 grit: evens surfaces, preps joints, gives calm progress.
- 180–220 grit: final smoothing before finish, reveals true grain, feels satisfying.
Change papers gradually, keep pressure light, sand with the grain. Your choices determine final texture and how the stain or finish will sit.
Proper Grain Filling Technique
After you’ve finished sanding to the final grit, fill the grain to get a glass-smooth surface that’ll accept stain or finish evenly.
Mix a grain filler to the manufacturer’s consistency; you want it past runny but spreadable. Work small areas with a flexible plastic scraper or cloth, pressing filler into pores along the wood’s grain.
Remove excess promptly by wiping at a shallow angle while filler’s still tacky, then scrape flat after it skins over.
Let it cure fully per product directions.
Lightly abrade only to level the filler, avoiding over-sanding that reopens pores or changes panel profiles.
Final Sanding And Inspection
Ready to give the dresser the smooth, even surface it deserves? You’ll finish by sanding progressively (220–320 grit), removing filler ridges, and wiping dust with tack cloth.
Inspect joints, edges, and drawer faces under bright light; feel for rough spots or raised grain. Address flaws with targeted sanding or light filler, then sand again lightly to blend.
When everything’s even and clean, you’re ready to seal or stain.
- Notice the transformation—pride swells.
- Find a stubborn flaw—patiently correct it.
- Run your hand across the top—satisfaction confirms readiness.
Choose a Finish: Paint, Stain, or Oil
Although the wood itself sets the style, the finish you pick—paint, stain, or oil—decides the dresser’s final look, durability, and maintenance.
Although the wood defines the style, your finish—paint, stain, or oil—determines the dresser’s final look and care.
Decide based on use: paint hides grain and offers color variety with easy cleaning for high-traffic rooms; stain enhances grain and gives natural warmth while requiring a topcoat for protection; oil seeps in, feels natural, and’s simple to refresh but offers less surface protection.
Consider wear, desired sheen, and repairability.
Test samples on scrap wood from your project, evaluate color and absorption, and factor drying time and VOCs before committing to one finish.
Apply Primer, Paint, or Stain
Wondering which application method will give you the best result? You’ll prep surfaces by sanding, cleaning dust, and using painter’s tape.
Choose primer for adhesion and uniform color, paint for opaque coverage and personality, or stain to highlight wood grain.
Apply thin, even coats, work with the grain, and sand lightly between coats for smoothness.
Drying times matter—don’t rush. Test your chosen product on a scrap piece first.
Follow safety: ventilate and wear a mask.
Let each coat fully cure before handling.
- Pride
- Anticipation
- Satisfaction
Seal the Dresser: Varnish, Polyurethane, or Wax
Once your paint or stain has fully cured, seal the dresser to protect the finish and make it durable for daily use. Choose varnish for warmth and toughness, oil-based polyurethane for maximum durability, or water-based polyurethane for faster dry times and less odor.
Wax gives a soft sheen and is easy to repair but needs periodic reapplication. Test your chosen sealer on scrap wood, follow manufacturer drying times, and sand lightly between coats with fine-grit paper.
Apply thin, even coats with a brush or foam applicator. Remove dust before each coat, and allow full cure before handling or loading drawers.
Install Pulls, Knobs, and Decorative Trim
Before you drill any holes, lay out and double-check the placement of pulls, knobs, and trim so everything lines up and looks balanced. Measure and mark centerlines, use a template or jig, and clamp a straightedge to keep rows true.
Pre-drill pilot holes to prevent splitting, then attach hardware with screws snug but not over-tightened.
For decorative trim, dry-fit pieces, sand joints, and glue with brad nails for support. Finish carefully to match stain or paint.
Follow this simple checklist to feel proud and confident:
- Precision
- Harmony
- Satisfaction
Add Base Trim, Feet, or a Plinth
After attaching your pulls and trim, give the dresser a stable, finished base by adding trim, feet, or a plinth that complements the style and hides seams.
Decide between individual feet for a lighter look or a continuous plinth for a modern, grounded feel.
Measure and mark mounting points, ensuring level alignment front-to-back and side-to-side.
Pre-drill holes for wood screws or use glue and brads for trim pieces.
Clamp while drying to prevent gaps.
Sand transitions smooth and touch up with stain or paint to match.
Test stability and adjust fasteners if any piece sits unevenly.
Troubleshoot Gaps, Drawer Binding, and Wobble
If you notice gaps, sticky drawers, or wobble, tackle each issue methodically so the dresser stays functional and looks professional.
First, inspect joints and faces for misalignment; clamp and re-glue or add shims to close gaps.
First, check joints and faces for misalignment—clamp and re-glue or add shims to close gaps.
Second, remove drawers to check runners, sand high spots, and apply wax or lubricant so they glide.
Third, level the dresser using adjustable feet or shim under one corner to stop rocking.
- Tighten loose screws to restore confidence.
- Square the carcass to calm frustration.
- Smooth slides to regain satisfaction.
Make the Dresser Safe for Kids and Pets
When kids and pets are around, anchor the dresser to the wall and secure drawers so it can’t tip or trap little hands and paws. Use furniture straps, add anti-slip pads, and install drawer stops. Keep small hardware out of reach and finish edges smooth. Check joints and fasteners regularly, and store heavy items low. Teach children not to climb drawers.
| Task | Tool | Frequency |
|---|---|---|
| Anchor to wall | Stud finder, strap | Once, verify yearly |
| Install stops | Screwdriver | Once |
| Pad feet | Anti-slip pads | Once |
| Smooth edges | Sandpaper | As needed |
| Store heavy | None | Ongoing |
Tips for Transporting and Installing Your Dresser
Because dressers are bulky and awkward, plan your route and enlist help before you move it so you avoid damage and strain. Measure doorways, stairs, and elevators; clear obstacles; protect floors with blankets. Keep drawers removed or secured, and wrap the dresser to prevent scratches. Use proper lifting technique and a dolly for long distances. Anchor the dresser to the wall once placed to prevent tipping. Move calmly; rushing causes injury and dents.
- Bring a friend — safety and confidence.
- Use padding — protect finish and floors.
- Anchor it — sleep easy knowing it won’t tip.
Customize Dimensions, Drawer Faces, and Trim Styles
Now’s the time to pick drawer face styles that match your room’s vibe—shaker, flat, or recessed will each change the look.
You’ll also set the dresser’s dimensions to fit your space and storage needs, tweaking height, width, and drawer depth.
Think about how face style and size work together so the finished piece feels balanced and functional.
Choosing Drawer Face Styles
As you decide on drawer faces, think about how dimensions, overlay type, and trim will shape both function and style. Tight, inset faces give a sleek, built-in look but need precise gaps, while full-overlay faces hide carcass edges and simplify alignment.
You’ll pick flat, shaker, or raised panels based on room style and skill. Consider edge reveal, hardware placement, and whether trim adds warmth or clutter. Test a mock face to see proportion and feel.
Choose for usability and emotion: confidence, calm, or charm.
Adjusting Dresser Dimensions
Want the dresser to fit a space and a life? Measure the room, doorways, and desired placement first. Decide overall height, width, and depth to suit storage needs and ergonomics.
Adjust drawer face heights for balanced proportion—taller bottom drawers for bulky items, uniform faces for a clean look. Keep consistent reveal gaps for smooth sliding and install appropriate runners for your chosen depth.
Select trim styles that complement face profiles: simple caps for modern, applied moulding for traditional. Update cut lists and hardware placement after resizing.
Dry-fit panels before final assembly to confirm fit and function.
Add-On Ideas for Your Dresser (Jewelry Tray, Charging)
When you plan a dresser, think beyond drawers: adding a built-in jewelry tray or a discreet charging station boosts daily convenience and keeps surfaces tidy. You’ll feel calmer with designated spots for rings, watches, and necklaces—add soft-lined compartments and a shallow slide-out tray.
For charging, hide a flush power strip in a rear cavity with cable grommets; add a ventilated shelf for adapters. Consider a shallow top drawer with felt inserts and a recessed USB panel.
Small tweaks create big joy every morning.
- Treasure: organized jewelry so nothing tangles.
- Ease: effortless device charging.
- Calm: clutter-free surfaces.
Eco-Friendly Materials and Finish Alternatives
When you build your dresser, choose sustainable woods like FSC-certified oak or reclaimed pine to cut environmental impact.
Use low-VOC finishes and natural oils to protect the wood without off-gassing.
Look for reclaimed or vintage hardware to give the piece character while keeping materials out of the landfill.
Sustainable Wood Choices
Looking for wood options that lower your dresser’s environmental impact without sacrificing durability? Choose sustainably harvested or reclaimed lumber to keep character and history in your piece. Local species cut to reduce transport emissions feel honest under your hands. Certified woods (FSC) give you transparency and peace of mind.
- Reclaimed hardwood — warmth, story, and lower carbon footprint.
- Rapidly renewable species (bamboo, cork) — surprising strength and quick replenishment.
- Locally milled oak or maple — supports community, reduces shipping, and ages beautifully.
Select straight-grain boards to minimize waste and design with repairability in mind.
Low-VOC Finishes
Once you’ve picked sustainable lumber, match it with low-VOC finishes to keep indoor air healthy and maintain the wood’s natural beauty. You’ll want to choose finishes that protect without off-gassing: water-based polyurethanes dry clear, natural oils deepen grain, and shellacs seal quickly. Apply thin coats, sand lightly between layers, and ventilate while curing. Test a scrap to confirm sheen and color. Here’s a simple comparison:
| Finish | Benefit |
|---|---|
| Water-based polyurethane | Durable, clear |
| Tung or linseed oil | Enhances grain, natural |
| Shellac | Fast drying, repairable |
Follow manufacturer instructions for best results.
Reclaimed Hardware Options
Why not give your dresser a second life by using reclaimed hardware? You’ll save resources and add character with pieces that carry history. Hunt flea markets, salvage yards, or recycle old furniture for knobs, pulls, and hinges that fit your style.
Clean and stabilize metal with gentle rust removal; finish wooden knobs with oil. Consider mixing finishes for contrast—brass with matte black, worn chrome with warm wood.
Choose hardware that’s functional and meaningful to you.
- Emotion: nostalgia
- Impact: reduced waste
- Beauty: unique patina
Time Estimates for Each Build Phase
Because efficient planning keeps a build on schedule, you’ll want realistic time estimates for each phase—design and material prep, cutting and assembly, finishing, and hardware installation—so you can allocate blocks for focused work, drying times, and unforeseen adjustments. Estimate: design/materials 1–3 hours; cutting/assembly 4–8 hours; finishing 6–24 hours (including coats and drying); hardware 1–2 hours. Pad each estimate by 10–20% for mistakes. Use the table below to visualize typical ranges and critical waits.
| Phase | Typical Range | Key Waits |
|---|---|---|
| Design/Prep | 1–3 hrs | Decisions, sourcing |
| Cutting/Assembly | 4–8 hrs | Fit checks |
| Finishing | 6–24 hrs | Drying between coats |
| Hardware | 1–2 hrs | Alignment, adjustments |
How to Schedule Your Dresser Build Efficiently
Start by using your realistic time estimates to block out each phase so you know when materials and work windows are needed.
Then create a task-sequencing plan that groups dependent steps and fits drying or cure times into gaps.
Stick to the schedule but build in short buffers for unexpected delays.
Realistic Time Estimates
When you plan your dresser build, break the project into clear tasks—design and measurements, material shopping, cutting and joinery, assembly, sanding and finishing, and hardware installation—so you can assign realistic time blocks to each step and avoid last-minute rushes.
Estimate each task based on skill level and tool access: novices add 25–50% buffer, experienced makers use tighter windows. Track actual times to refine future estimates.
Aim for daily, achievable goals rather than marathon sessions to keep momentum and reduce mistakes.
- You’ll feel confident with buffers.
- You’ll avoid burnout.
- You’ll finish on schedule.
Task Sequencing Plan
Now that you’ve broken the project into tasks and set realistic time buffers, lay out those tasks in a clear sequence that keeps work flowing and minimizes wait times. Order work so prep, cutting, assembly, finishing, and hardware installation overlap smartly: while glue dries, cut next parts; while finish cures, fit drawers. Use milestones and daily targets, and build in contingency. Track progress and adjust start times to avoid idle periods. Communicate timing with helpers or suppliers to prevent delays. Below is a simple schedule snapshot to guide planning:
| Task | Duration | Start Day |
|---|---|---|
| Prep | 1 day | Day 1 |
| Cutting | 1 day | Day 2 |
| Assembly | 2 days | Day 3 |
| Finishing | 2 days | Day 5 |
| Hardware | 1 day | Day 7 |
Cost-Saving Hacks Without Sacrificing Quality
Although you can cut costs, you don’t have to skimp on durability or finish; prioritize smart material choices, reuse quality components, and focus spending where it matters most—drawer slides, hardware, and solid joinery—so the dresser looks and functions like a higher-end piece without the high-end price.
Choose plywood for carcasses, hardwood faces for wear areas, and finish with durable topcoat. Salvage knobs or repurpose trim to add character.
Use plywood for the carcass, hardwood on wear surfaces, durable topcoat, and reclaimed knobs or trim for character.
Invest time in accurate cuts and clamps to guarantee tight joints. Emotional payoff comes from craftsmanship and savings:
- Pride in a sturdy build
- Joy in reclaimed details
- Relief from cost savings
Maintain and Repair Your Dresser for Years of Use
Saving money and using reclaimed parts feels great, but keeping your dresser looking and working like new takes regular care and the occasional fix.
Inspect joints, slides, and hardware monthly; tighten loose screws and glue small separations before they worsen. Wax or oil wooden surfaces and runners to reduce friction and protect finish.
Replace damaged drawer bottoms or runners promptly with matching materials to maintain alignment. Address scratches with touch-up markers or shellac, and treat stains with gentle cleaners.
Store drawers lightly to avoid sagging. With routine checks and timely repairs, your dresser will stay functional and attractive for years.
Final Checklist Before Delivering and Using Your Dresser
Before you move the dresser, run through a quick checklist to make sure it’s safe, level, and fully finished. Inspect joints and fasteners for tightness, test drawer slides for smooth operation, and confirm finish coats are dry. Secure anti-tip hardware and verify weight distribution.
Before moving the dresser, run a quick safety and finish check: tighten joints, test drawers, secure anti-tip, ensure dry finish.
Clean surfaces, fit knobs or pulls, and remove dust. Give everything a final wipe and try opening each drawer fully. Trust your instincts — if something feels off, fix it now. Deliver with care to avoid damage.
Enjoy the pride of a job well done.
- Safety first — peace of mind.
- Functionality — daily joy.
- Beauty — lasting satisfaction.
Frequently Asked Questions
How Do I Remove Old Finish From an Antique Dresser Safely?
You should test for lead, then work in a ventilated area, wear gloves and a respirator, and use chemical stripper or heat gun plus scrapers and steel wool; finish by neutralizing, sanding lightly, and applying appropriate finish.
Can I Convert This Dresser Into a Wall-Mounted Floating Unit?
Yes — you can convert it into a floating unit; you’ll reinforce the back, add a cleat or steel bracket system, relocate weight-bearing parts, and secure studs. Measure carefully, use proper hardware, and test load capacity before mounting.
What Weight Capacity Can Each Drawer Realistically Hold?
Each drawer can realistically hold about 30–75 pounds depending on glide type, construction, and materials; you should expect heavier capacity with full-extension ball-bearing slides and reinforced bottoms, and lighter capacity with cheap or undermounted hardware.
How Do I Repair Water Damage or Swollen Drawer Bottoms?
You should remove swollen bottoms, dry them thoroughly, sand or plane warped edges, replace severely damaged panels with plywood or new drawer bottoms, seal with waterproof glue and finish, then reassemble so drawers slide smoothly.
Are There Legal Restrictions for Selling Furnture I Built Commercially?
Yes — you’ll face regulations: zoning, business licenses, sales tax, product safety, labeling, and potentially consumer protection or warranty laws; check local, state, and federal rules, and consider insurance and trademark or copyright limits.
Conclusion
You’ve planned thoughtfully and picked the right materials, so now bring the dresser to life with confidence. Follow your schedule, use the right tools, and take shortcuts that don’t cut quality. Assemble carefully, check drawer alignment, and finish with protective coating. Keep a simple maintenance routine and repair small issues early. When you deliver and set up the dresser, inspect one last time—your careful work will reward you with a durable, beautiful piece.