You can build a sturdy, stylish ladder shelf in a weekend using basic tools, affordable wood, and clear measured steps that suit beginners and experienced makers alike. Pick a spot, choose a lean or freestanding style, measure carefully, cut precise pieces, sand and assemble with screws or dowels, then finish to match your decor. Safety and small-space fit are covered, plus customization tips so your shelf works and looks great—keep going and you’ll find full plans and templates.
Search Intent: Who This Ladder-Shelf Guide Serves
If you’re a DIYer who wants a simple, stylish storage solution—whether you’re a beginner tackling your first woodworking project or an experienced maker looking for a quick build—this guide is for you.
You’re likely seeking clear steps, measured cuts, and material lists that save time and prevent mistakes.
Clear, measured steps and material lists to save time and avoid costly mistakes.
Maybe you want a compact shelf for a small apartment, a decorative display for plants, or a sturdy organizer for tools.
You’ll get practical tips on tool choices, safety basics, and customization options so the result fits your space, skill level, and aesthetic without unnecessary complexity or expensive materials.
Quick Overview: Build a Ladder Shelf in One Weekend
Because this project uses common lumber and simple joinery, you can plan, cut, assemble, and finish a sturdy ladder shelf over a single weekend.
Start by gathering materials—boards, screws, wood glue, sandpaper, finish—and basic tools: saw, drill, square, and clamps.
Day one, measure, mark, and cut uprights and shelves; sand edges and pre-drill pocket holes or dowel locations.
Day two, dry-fit, glue, and fasten components, check squareness, then sand final surfaces and apply stain or sealer.
Allow brief drying time between steps.
In two focused days you’ll have a functional, attractive shelf ready for use.
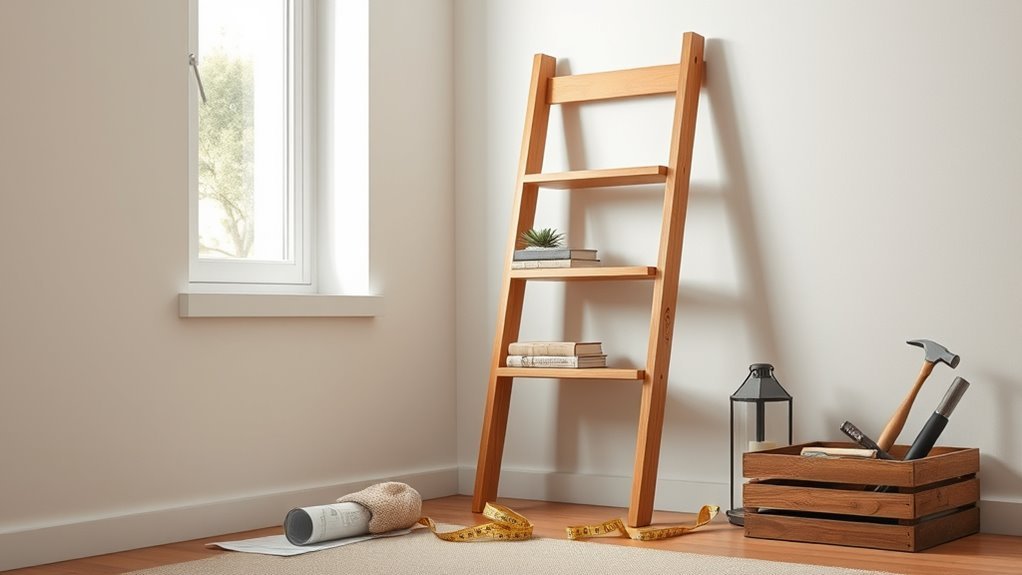
Decide Where the Ladder Shelf Will Go
Where will your ladder shelf fit best in the room? Measure floor space, ceiling height, and wall clearance before you cut wood.
Consider traffic flow so the shelf won’t block pathways or doors.
Check for nearby outlets if you’ll display lamps or charge devices.
Aim for a spot with balanced light—too much sun fades items; too little hides them.
Think about stability: lean shelves need a solid wall and level floor.
If placing near fragile items, leave extra buffer.
Mark the footprint with tape and test sightlines from common viewpoints before you finalize placement.
Choose the Right Ladder-Shelf Style for Your Room
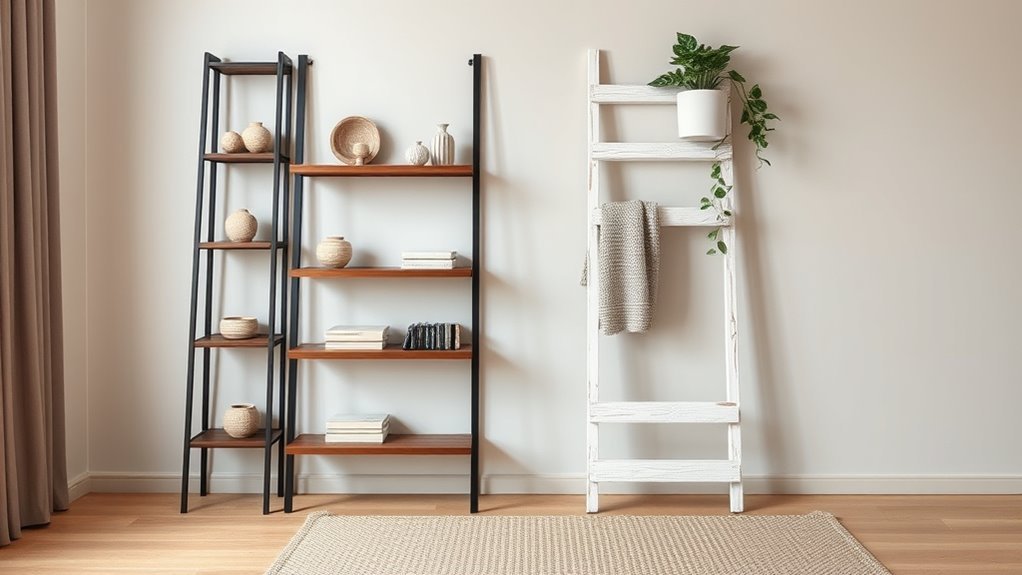
When picking a ladder-shelf style, match its lines and materials to the room’s function and existing decor so it feels deliberate rather than tacked on.
In a living room, choose warm woods and tapered frames for a relaxed, furniture-like look.
In a bathroom, pick moisture-resistant finishes and slim, open shelves to keep it airy.
For a modern office, go with metal or painted geometric profiles that read clean and efficient.
Kid spaces benefit from rounded edges and durable, washable surfaces.
Think scale, sightlines, and how items will be displayed so the shelf complements, not competes, with the room.
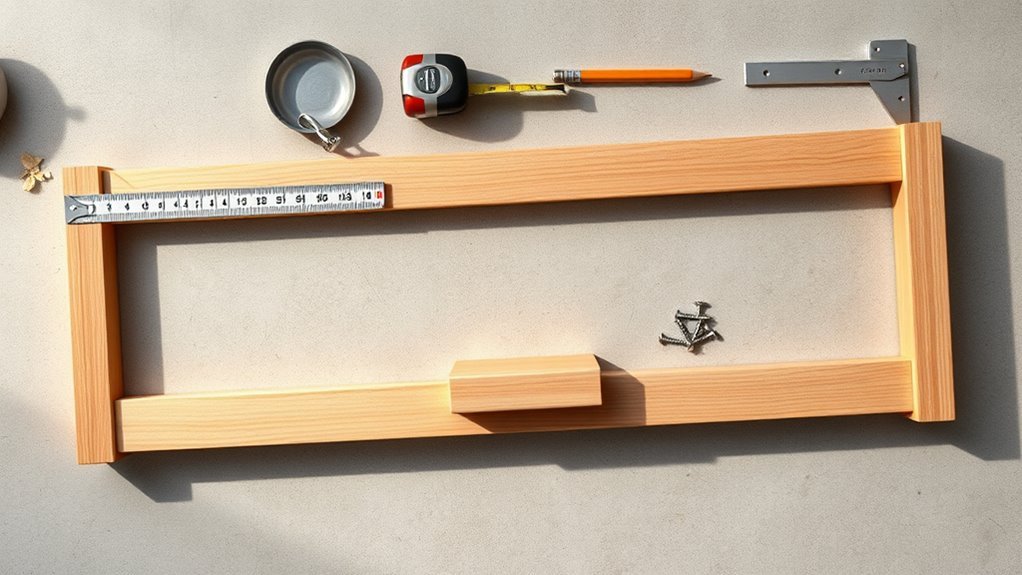
Measure Your Space for a Ladder Shelf
Measure the wall width first so you know how wide your ladder shelf can be without crowding the room.
Account for shelf depth next, including clearance for doors or walkways so items won’t stick out.
Finally, mark the studs and use a level to position and secure the shelf safely.
Measure Wall Width
How wide is the wall space you’re working with? Measure from trim to trim at three heights—top, middle, bottom—and note the smallest width. That gives you the true maximum shelf span. Mark the centerline if you want symmetry. Check for obstacles like switches or vents and record their positions so shelves won’t conflict.
| Measurement Point | Width (in) |
|---|---|
| Top | |
| Middle | |
| Bottom | |
| Centerline mark | |
| Obstacles (positions) |
Use a level when marking. These measurements keep your ladder shelf proportional and fitting without guesswork.
Account For Shelf Depth
Wondering how deep your ladder shelf should be? You’ll balance function and feel: too shallow looks skimpy; too deep overwhelms the room. Measure usable floor space, consider what you’ll display, and leave walkways clear. Think visual weight and reachability—shelves should invite you to place items without strain.
- Imagine cozy nooks and airy openness
- Picture stacked books vs. sculptural pieces
- Feel the flow of traffic around it
- Consider kid or pet access and safety
- Anticipate future decor changes
Choose depths (8–14 inches typical) that match your items and the room’s mood.
Mark Stud And Level
Now that you’ve settled on shelf depths and placement, it’s time to locate studs and get everything level before you start mounting. Use a stud finder to mark centerlines for each support—double-check by tapping or probing if needed.
Measure and transfer heights for the top and each shelf to the wall; draw a single horizontal guide with a level to keep shelf runs straight.
If studs don’t align with your design, add a ledger or use heavy-duty anchors.
Re-measure diagonals or use a laser level for long spans.
Mark drilling points clearly and label left/right to avoid mistakes during installation.
Determine Ladder-Shelf Height and Angle
Before cutting or drilling, decide how tall you want the shelf and how steeply it will lean against the wall, since those choices determine shelf spacing, stability, and where the top will sit relative to trim or outlets.
Picture the finished piece, hold a board at different angles, and mark desired top height. A steeper angle gives more vertical clearance; a shallower angle feels relaxed but needs longer legs.
Check base clearance, wall obstructions, and ceiling height before committing.
Consider load and stability; test by leaning a clamp-secured frame.
- Excitement for the reveal
- Confidence in your measurements
- Pride in craftsmanship
- Calm during setup
- Joy displaying items
Calculate How Many Shelves You Need
Once you’ve settled on height and angle, count the items you want to display and group them by height to decide shelf spacing and quantity.
Next, measure tallest group heights and allow clearance for easy placement and removal.
Decide if you need full-width shelves or staggered heights for variety; assign items to each shelf and note counts.
Factor in balance: heavier items lower, lighter items higher.
Leave a margin for future additions and seasonal swaps.
Finally, translate item groups into shelf count along the ladder, verifying proportions visually before cutting materials to avoid unnecessary adjustments.
Pick Shelf Depth and Spacing for Your Items
Because shelf depth and vertical spacing determine what you can actually store and how the ladder looks, measure the tallest, deepest pieces you plan to display and add a couple inches clearance for easy handling.
Measure your tallest, deepest pieces and add a couple inches clearance for comfortable display and handling.
Now decide function: books, plants, art, or décor. Deeper shelves feel substantial; shallow ones look airy. Keep consistent spacing rhythm or vary it for visual interest.
Remember weight: deeper shelves may need stronger brackets.
- Imagine favorite items fitting perfectly
- Picture the shelf’s silhouette in your room
- Feel the ease of grabbing objects
- Anticipate overflowing displays with confidence
- Enjoy a balanced, intentional layout
Set a Realistic Materials and Finish Budget
As you plan your ladder shelf, set a clear materials-and-finish budget that reflects both function and look so you don’t overspend or compromise quality. Decide priorities: durable hardware versus premium finish. List required items, estimate costs, and include waste and contingency (10–15%). Choose finishes that match your use—waterproofing for bathrooms, simple oil for living spaces—and price accordingly. Track receipts and adjust if a component runs over. A modest shift in finish choice often saves more than swapping structural pieces.
| Item | Estimated Cost |
|---|---|
| Materials | $50–$200 |
| Finishes & Hardware | $20–$100 |
Best Lumber Types for a Sturdy Ladder Shelf
When you pick lumber for a ladder shelf, prioritize strength, stability, and how the wood will take finish—those factors determine longevity and appearance. You want woods that resist warping, hold screws, and look great with stain or paint.
Consider hardwoods for strength and softwoods for budget-friendly lightness. Think about grain, knot frequency, and moisture content; those affect durability and final look.
- Oak: solid, classic, confidence
- Maple: smooth, refined, dependable
- Pine: warm, affordable, cozy
- Poplar: neutral, paint-friendly, practical
- Walnut: rich, elegant, proud
Recommended Timber Sizes and Board Lengths
Decide on timber thickness and width first, since those dimensions determine load capacity and shelf appearance. For most home ladder shelves you’ll use 18–25 mm thick boards and 100–200 mm widths depending on how chunky you want the look.
Then choose board lengths that fit your design—common shelf depths are 200–350 mm and ladder side rails typically range 1.5–2 m.
Timber Thickness And Width
Because the shelf must support weight without wobbling, pick timber thickness and widths that balance strength and appearance. You’ll want sturdy uprights and proportional shelves so the ladder feels solid and looks intentional.
Choose thicker timber where load concentrates and narrower planks for lighter tiers. Consider edge profile and grain to match your room’s mood.
- Solid 38mm uprights feel reassuring and reliable.
- 18–25mm shelf boards look clean without seeming flimsy.
- Wider shelves carry visual weight and confidence.
- Narrow treads convey lightness and elegance.
- Match thickness to expected load and decor.
Recommended Board Lengths
Start by laying out the overall height and spacing you want, then cut boards to lengths that keep proportions and structural support in mind.
For a typical 6-shelf ladder shelf about 72″ tall, use side rails 72″ long and progressively shorter shelves: top 10–12″, next 12–14″, middle 16–18″, then 18–20″ and bottom 20–24″.
If you build a 48″ tall unit, scale side rails to 48″ and reduce shelf depths by 20–30%.
Keep shelf overhang minimal, 1″–1.5″ past the rails.
Dimension boards to match your chosen thickness; consistent lengths ensure clean assembly and balanced load distribution.
Alternative Materials: Plywood, MDF, and Metal Options
When choosing materials for your ladder shelf, think about strength, appearance, and how much finish work you’re willing to do. Plywood gives a warm, stable base, and shows grain; it resists warping. MDF lets you get smooth painted surfaces at low cost, and sands and paints flawlessly. Metal offers a sleek, industrial look with superior load capacity, but needs welding or brackets.
Choose materials by balancing strength, look, and finish work—plywood warmth, MDF paintability, or metal’s industrial strength.
You’ll decide by balancing durability, budget, and style. Consider edge treatments, fasteners, and weight capacity before cutting.
- Excited by warmth?
- Craving smooth paint?
- Want industrial boldness?
- Worried about moisture?
- Loving strength?
Where to Buy Wood and Supplies Affordably
You can save money by comparing local lumber yards, big-box home centers, and online wood suppliers to find the best price and quality.
Local yards often have unique boards and flexible cuts.
Big-box stores offer convenience and frequent sales.
Online suppliers can give access to specialty species or bulk discounts.
Check stock, shipping, and return policies before you buy so you don’t pay extra.
Local Lumber Yards
Although big-box stores can be convenient, local lumber yards often give you better prices, wider board selection, and helpful advice from staff who actually know wood—so check them first when sourcing lumber and supplies for your ladder shelf.
You’ll find seasoned stock, custom cutting, and tips on moisture content and joinery. Talk to staff about defects, grades, and matching boards. Ask about delivery for large pieces.
Expect friendlier service and flexible pricing for project buys.
- Relief when you find perfect boards
- Pride in choosing quality lumber
- Excitement over custom cuts
- Confidence from expert advice
- Satisfaction saving money
Big-Box Home Centers
You’ll find standard lumber sizes, plywood, screws, sandpaper, and paint in one trip, plus rentals like panel saws and truck hire.
Compare grades—choose straight, knot-free boards for visible shelves—and inspect for warping.
Look for bundled deals on hardware and finish supplies to save money.
Staff can help with basic cuts, but measure twice before asking for cuts.
Keep receipts for easy returns if a board is damaged or doesn’t fit your project.
Online Wood Suppliers
When you shop online for lumber and hardware, you’ll find a wider selection and often better prices than local stores can offer. You can compare species, dimensions, and finishes quickly, read reviews, and schedule deliveries that fit your build timeline.
Look for retailers with clear return policies and milling options so your boards arrive ready. Prioritize suppliers known for quality and customer service to avoid delays.
Emotional benefits help—confidence, relief, excitement.
- Relief: delivered materials save time
- Confidence: clear specs reduce mistakes
- Excitement: new options spark creativity
- Trust: good reviews ease worry
- Pride: quality wood boosts results
Essential Tools You Need for This Build
Before you cut your first board, gather a few reliable tools that’ll make the build faster, safer, and more accurate: a circular saw (or miter saw) for straight cuts, a drill with bits and countersink, a sander or sanding block, clamps, a tape measure and square for layout, wood glue and screws, and safety gear like goggles and hearing protection.
You’ll also want a pencil and marking knife for precise lines, a level to keep shelves true, and a workbench or sawhorses to support pieces.
Keep spare drill bits, sandpaper, and screw sizes matched to your material.
Optional Tools That Speed Up the Project
If you want to shave hours off the build and get cleaner results, consider adding a few optional power tools to your kit: a plunge router for crisp edge profiles and dados, a biscuit joiner or pocket-hole jig for faster strong joints, and a plunge-cut track saw for perfectly straight rip cuts without a table saw.
You’ll work smarter, not harder. Consider these that make the project smoother:
- Faster cuts that boost confidence
- Cleaner joints that look professional
- Repeatable setups that save frustration
- Less sanding for a nicer finish
- Safer cutting with guided tools
Hardware and Fasteners You Should Buy
Although the wood does most of the visual work, the right hardware and fasteners keep your ladder shelf square, sturdy, and long-lasting.
Start with wood screws: pick #8 or #10, length 1¼”–2½” depending on board thickness. Use construction screws for load-bearing joints and confirm they’re rated for interior use.
Grab 1¼” and 2″ pocket-hole screws if you plan pocket joinery.
Add metal L-brackets or corner braces for extra rigidity and small flat washers with bolts where needed.
Use wood glue plus screws for permanent joints, and stainless or zinc-plated fasteners to resist rust over time.
Safety Gear and Workshop Setup Tips
You’ve picked the right screws and brackets, now protect yourself and your work area so those fasteners can do their job safely. Wear eye and ear protection, gloves that grip, and a dust mask when sanding. Keep a clear, well-lit space with sturdy sawhorses and a fire-safe waste bin. Secure clamps and a first-aid kit nearby will save time and panic.
- You’ll feel confident with reliable PPE.
- You’ll avoid nasty splinters and sparks.
- You’ll breathe easier without dust clouds.
- You’ll work faster when everything’s organized.
- You’ll finish proud, not injured.
Read the Cutting Diagram
Before you cut anything, study the cutting diagram so you understand each labeled piece and how it fits the shelf.
Measure every component twice to confirm lengths and widths.
Then mark clear, straight cut lines on your boards so your cuts are accurate.
Understanding The Diagram
Wondering where to start with the cutting diagram? You’ll feel less anxious once you spot labels, scales, and part shapes. The diagram shows each piece’s orientation and edge details so you won’t guess.
Follow symbols for grain direction and joinery, and note any notes about safety cuts. Double-check quantities before cutting.
- Relief when pieces match the plan
- Confidence from clear measurements
- Calm knowing grain and joins align
- Satisfaction as parts fit together
- Pride in avoiding wasted wood
Trust the diagram: it guides your hands and protects your time and materials.
Measuring Each Component
When you read the cutting diagram, take each component one at a time and confirm its length, width, thickness, and any angled cuts so you cut precisely. Measure twice, note tolerances, and record each piece on a checklist. Use consistent units and check grain direction for shelves and rails. Verify stranded pieces like uprights and braces against the diagram before you touch the saw. Keep a clear workspace with measuring tools at hand and recheck measurements after clamping.
| Component | Dimension |
|---|---|
| Upright | 72″ x 2″ |
| Shelf | 24″ x 10″ |
Marking Cut Lines
How will you transfer the cutting diagram onto your stock so every cut lands where it should? You’ll align the diagram, double-check dimensions, and trace crisp lines. Use a sharp pencil, square, and marking knife for clarity. Score along edges to prevent tearout. Label pieces immediately so you don’t mix them later.
- Pride in neat, deliberate marks
- Confidence when your saw meets the line
- Relief from avoiding wasted wood
- Excitement seeing parts come together
- Satisfaction of a job done right
Work slowly, verify measurements again, and keep lines thin but visible for precise cutting.
Cut List With Exact Board Dimensions
Before you cut anything, gather the exact board sizes below so you can measure, mark, and rip confidently; keeping everything precise saves time and prevents wasted lumber.
You’ll need: two 1×3 rails at 72″ (sides), two 1×2 top and bottom stretchers at 18″, five 1×8 shelves at 30″ (adjust depth as desired), five 1×2 front trim pieces at 30″, and assorted cleats: ten 1×2 shelf supports at 8″.
Allow for saw kerf and plan for final sanding. Double-check grain direction and board quality, and list any additional filler or backing panels before cutting.
How to Cut Rails and Shelf Boards Accurately
Before you cut, measure twice and mark clearly so each rail and shelf board fits the cut list exactly.
Clamp a stop block to your saw fence for repeatable, identical cuts and reduce room for error.
Take your time on the first cut—consistent setup saves you from rework.
Measure Twice Cut Once
Although it feels tempting to rush, take the time to measure twice and mark carefully so your rails and shelves fit square and true. Accurate measuring prevents wasted cuts and keeps the ladder stable. You’ll avoid frustration when pieces align perfectly: use a reliable tape, square, and pencil.
Hold boards flat, mark cut lines on the waste side, and re-check both ends for consistent length. Cut confidently when measurements match.
- Relief when parts fit
- Pride in clean edges
- Confidence in a sturdy frame
- Satisfaction from no wasted wood
- Calm knowing you did it right
Use Stop Block Guides
When you need repeatable, identical cuts for the ladder’s rails and shelves, clamp a stop block to your miter gauge or fence and rout each board against it—this keeps every piece the same length without remeasuring.
Position the stop block so the first cut is perfect, then lock it firmly. Feed each board consistently, supporting long pieces to prevent drift.
Use a sacrificial pad to protect the fence and reduce tear-out.
Double-check blade alignment and test on scrap before cutting good stock.
Label completed pieces immediately so you don’t mix lengths, and periodically verify the stop hasn’t shifted.
How to Mark and Cut Angled Ladder Legs
Once you’ve laid out your ladder’s riser spacing and shelf locations, you’ll mark and cut the angled legs to match those measurements precisely. Measure twice, transfer top and bottom cut lines onto each leg, and use a square to extend lines across the face.
Clamp a scrap backer to prevent tear-out, and set your miter saw or circular saw to the exact angle. Cut slowly, checking fit against your layout.
Sand ends smooth and label each leg left or right.
- You’ll feel confident as pieces align.
- You’ll avoid costly mistakes.
- You’ll enjoy the clean lines.
- You’ll save time later.
- You’ll build pride in craftsmanship.
Drill and Pocket-Hole Layout for Strong Joints
With the angled legs cut and labeled, you can lay out pocket holes and drill them to lock the shelves and rails to the stile without guesswork.
Measure each shelf location from the top reference, transfer marks to the inside face of the stiles, and clamp a stop-block to keep spacing consistent.
Use a pocket-hole jig set for your board thickness; drill at a steady feed to avoid tear-out.
For rails, position holes toward the thicker end so screws bite into solid end grain.
Countersink screw heads slightly below the surface and dry-fit pieces to verify alignment before final fastening.
Assemble the Ladder Frame Step by Step
After you’ve dry‑fitted and verified the pocket‑hole layout, start assembling the ladder frame by clamping one stile flat and attaching the lowest shelf and rail first so you establish a square, stable base. Work upward, aligning pocket holes, applying glue sparingly, and driving screws just until flush.
Check squareness after every connection and re-clamp as needed. Keep parts clean of squeeze-out and test-fit braces before final tightening. Trust the layout you prepared.
- Excitement as the frame takes shape
- Pride in precise joinery
- Calm from steady progress
- Anticipation for the finished shelf
- Satisfaction in a sturdy result
Attach Shelves Level and Flush to the Legs
Because the shelves determine both function and appearance, align each shelf carefully so it’s level and sits flush against the legs before you secure it. Measure and mark shelf positions on both legs, then clamp a shelf in place.
Align each shelf carefully—measure, clamp, square and level so it sits flush against the legs before securing.
Use a small square to confirm it’s square to the legs and a torpedo level across the front and depth to verify level. If the shelf sits proud or recessed, shim behind it until it’s flush.
Pre-drill screw holes through the legs into the shelf edge to prevent splitting, then drive screws countersunk below the surface.
Repeat for remaining shelves, checking alignment as you go.
How to Reinforce Joints for Long-Term Stability
To keep your ladder shelf sturdy for years, start by fastening corners with metal braces and screws.
You’ll also want to use wood glue and dowels in critical joints for extra shear strength.
Finally, add a solid backing panel or metal straps to prevent racking and keep everything square.
Secure With Corner Braces
Want your ladder shelf to stay sturdy for years? Use metal corner braces at each joint to stop wobble and spread load. Position braces inside corners where shelves meet uprights, mark pilot holes, and screw them tight. Choose braces sized for your shelf and rust-resistant finishes. Check alignment before final tightening and test each shelf under weight to guarantee stability.
- Relief: you won’t fear sagging.
- Pride: your work looks intentional.
- Confidence: shelves hold decorations safely.
- Calm: joints feel solid every day.
- Joy: your space feels finished and reliable.
Use Glue And Dowels
If you want joints that last, combine wood glue with hardwood dowels for a bond that resists shear and keeps shelves perfectly aligned.
Mark dowel positions precisely, drill straight holes using a dowel jig or guide, and test-fit dry before gluing.
Apply a thin, even coat of PVA glue in both holes and on the dowel ends; excess squeezes out and signals full contact.
Assemble quickly, align parts, and clamp firmly until the glue cures.
Sand any squeeze-out after drying.
Dowels add shear strength and alignment without visible hardware, giving your ladder shelf durable, clean-looking joints.
Add Backing Or Straps
Although dowels and glue give your ladder shelf strong joints, adding a backing or metal straps locks everything square and keeps shelves stable under load. You’ll want to attach a thin plywood backing or screw galvanized straps across the back corners. That simple addition resists racking, protects stored items, and eases worry about wobble.
Use countersunk screws, clamp while fastening, and predrill to avoid split wood. Finish edges for a clean look.
- You’ll feel relief when it’s rock-solid.
- You’ll trust heavier books.
- You’ll reduce future repairs.
- You’ll gain confidence in your skills.
- You’ll enjoy a durable piece.
Sanding Sequence for Smooth, Professional Surfaces
Before you apply finish, follow a clear sanding sequence that moves from coarse to fine grits so you remove machine marks, level joints, and leave a consistent surface ready to take stain or sealer. Start with 80–120 grit to flatten glue lines and trim saw marks, then 150–180 to smooth transitions. Finish with 220 grit for a uniform tooth that accepts stain or sealer. Sand with the grain, keep pressure even, and vacuum between grits. Check edges and corners by touch. Replace worn sandpaper; a fresh sheet cuts cleaner and prevents swirl marks.
| Step | Grit |
|---|---|
| Flatten | 80–120 |
| Smooth | 150–180 |
| Final | 220 |
| Touch-up | 240–320 |
| Clean | Vacuum |
How to Fill Gaps and Hide Screw Holes
When you’re ready to hide screw holes and fill small gaps, choose a filler that matches the wood and the finish—wood putty for painted surfaces, stainable wood filler for stained pieces, or thin CA glue for hairline cracks—and work quickly so the repair blends smoothly.
Press filler into holes, let it cure, then sand flush with surrounding wood.
Pack filler into holes, allow it to cure, then sand level so repairs disappear into the wood.
For gaps between joints, use matching wood strips or flexible caulk where movement occurs.
Clean dust before finishing.
- Relieved: imperfections vanish
- Confident: joints feel solid
- Proud: your shelf looks seamless
- Calm: repairs won’t reappear
- Satisfied: craftsmanship shows
Choose a Finish: Paint, Stain, or Oil
Now you’ll pick a finish that fits the look and durability you want: paint gives full color and hides grain, while stain enhances the wood’s natural pattern.
Consider an oil finish if you want easy maintenance and a warm, hand-rubbed feel that soaks into the wood.
Think about how the shelf will be used and choose a finish that balances appearance with protection.
Paint Versus Stain
Although paint, stain, and oil all protect and finish wood, you’ll pick one based on look, durability, and maintenance. Paint hides grain, gives bold color, and covers imperfections—great if you want a modern, crisp shelf.
Stain soaks in, enhances grain, and feels more natural; it’s better for rustic warmth.
Choose paint for bright, clean lines; pick stain to celebrate wood.
Consider prepping, recoat frequency, and repair ease.
- Imagine a bright, cheerful room
- Picture cozy, grain-forward warmth
- Feel confident about upkeep
- Visualize quick touch-ups
- Sense the mood you’ll create
Oil Finish Benefits
If paint gives you crisp color and stain highlights grain, oil offers a middle ground: it soaks into the wood, deepens color, and leaves a natural, low-luster look that feels warm and lived-in.
You’ll appreciate oil for easy application and repair — spot-sanding and re-oiling refreshes worn areas without stripping finish.
Oils accentuate texture and protect against moisture while keeping the shelf breathable.
Expect longer drying times between coats and occasional reapplication over years, but also simple upkeep with oil rubs.
Choose tung, linseed, or modern wipe-on blends based on drying time and desired sheen.
Paint Without Brush Marks
When you want a smooth, professional finish on your ladder shelf, choose the right paint and applicator and work in thin, even coats to avoid visible brush strokes. Start with light sanding, remove dust, and use a high‑quality roller or foam brush for thin layers. Let each coat dry fully and lightly sand between coats.
Keep a steady hand and maintain a wet edge to prevent lap marks.
- Pride in a flawless surface
- Calm as brushstrokes disappear
- Satisfaction from careful sanding
- Joy when color feels even
- Confidence in a durable finish
How to Stain Wood Evenly and Seal It
Before you stain, you’ll prep the wood by sanding, cleaning off dust, and testing the color on a scrap.
Work methodically to apply an even coat—wipe off excess and follow the grain for consistent absorption.
Finish with a clear sealer or poly to protect the surface and let each coat dry fully between applications.
Preparing The Wood
Although staining can seem straightforward, getting an even color and a durable seal requires careful prep and the right technique. You’ll sand with the grain, remove dust, and inspect for dents or glue spots. Condition porous woods if needed, and test stain on scrap to confirm tone.
Apply stain in controlled sections to avoid lap marks, then wipe excess promptly. Let each coat dry fully before sealing. Take your time—good prep saves rework and makes the finish feel professional.
- Pride in smooth grain
- Calm knowing tests worked
- Satisfaction at even tone
- Confidence in lasting seal
- Joy in a finished shelf
Applying Even Stain
Now that your boards are smooth and tested, you can move on to staining so the color goes on evenly and the seal lasts. Work with a clean, dry surface, stir stain well, and apply with a lint-free cloth or brush following grain direction. Wipe excess quickly to avoid blotches, testing on scrap. Let first coat dry fully before evaluating color; add thin additional coats rather than heavy ones. Sand lightly between coats with fine grit for smoothness. Use gloves and ventilate the area.
| Step | Tool | Tip |
|---|---|---|
| Prep | Sandpaper | Clean dust |
| Apply | Cloth/brush | With grain |
| Wipe | Rag | Remove excess |
| Dry | Time | Test color |
Sealing And Protecting
How will your stain hold up to daily use? You’ll seal and protect the shelf so the finish stays beautiful. Lightly sand between coats, wipe dust, then apply thin, even layers of polyurethane or spar varnish. Let each coat dry fully and rub with fine steel wool for smoothness. Protect edges and corners where wear shows first.
- Pride when the finish gleams
- Relief knowing it’s water-resistant
- Joy from a smooth, touchable surface
- Confidence that scratches resist
- Satisfaction in a job that lasts
Cure fully before loading shelves; maintenance is occasional cleaning and gentle care.
Apply a Protective Topcoat for Durability
Before you seal the shelf, make sure the stain or paint is fully dry so the topcoat bonds properly.
Choose a clear polyurethane or water-based polycrylic for indoor shelves; oil-based gives a tougher finish but longer cure and ambering.
Stir, don’t shake, to avoid bubbles.
Lightly sand with fine-grit between coats and wipe dust with a tack cloth.
Apply thin, even coats with a synthetic brush or foam applicator, following grain.
Allow recommended drying time, usually a few hours, then apply two to three coats for wear resistance.
Let the final coat cure fully before loading shelves.
Wall-Anchoring Options to Prevent Tipping
After the finish cures, you’ll want to secure the ladder shelf to the wall to prevent tipping, especially if kids, pets, or heavy items will be nearby. Choose a method that matches wall type and your comfort level. Use studs when possible for the strongest hold; anchors work for drywall.
Here are options to contemplate—each gives peace of mind:
- Screw a metal L-bracket into a stud for solid stability.
- Use toggle bolts through drywall if studs aren’t available.
- Attach anti-tip straps to studs for discreet safety.
- Use furniture anchors with adhesive for minimal drilling.
- Mount a cleat across studs for heavy loads and confidence.
How to Level the Shelf on Uneven Floors
Need the shelf to sit true even if the floor doesn’t? You can shim legs, use adjustable feet, or trim a leg for a permanent fix. Start by placing a level across a middle shelf, note low corners, then lift and slide thin shims until level. For wobble, tighten fasteners and add adhesive rubber pads beneath feet to grip. If you prefer permanence, measure and plane the long leg carefully. Check again with the level after adjustments.
| Method | When to use |
|---|---|
| Shims | Minor unevenness |
| Adjustable feet | Frequent moves |
| Trim leg | Permanent fix |
| Rubber pads | Grip improvement |
| Tighten fasteners | Wobble fixes |
Weight Distribution Tips: Lightweight vs Heavy Loads
Once the shelf sits steady on your floor, think about how you’ll place items so weight won’t strain the frame or pull the shelf out of level. You want balance: heavier items near the back and lower shelves, lighter decor up top. Rotate loads and check fasteners regularly. Use baskets to group small things and prevent tipping.
Once the shelf sits steady, balance weight low and back, rotate loads, and group small items for stable, airy display.
- Place books and dense objects low to ground for stability — comforting solidity.
- Keep top shelves airy with plants or ceramics — uplifting lightness.
- Cluster items to avoid slippage — reassuring order.
- Stagger heavy items side-to-side — calming symmetry.
- Inspect and adjust often — confident care.
Child- and Pet-Proofing Your Ladder Shelf
You’ll want to anchor your ladder shelf securely to the wall using straps or brackets to prevent tipping.
Add rounded edge covers to exposed corners so kids and pets won’t get hurt if they bump into it.
For extra stability, consider a non-tip weighted base or adding weight to the lower shelves.
Secure Anchoring Methods
Because ladder shelves can tip if climbed on or bumped, anchoring them securely is essential for child- and pet-proofing—especially in homes with curious little ones or energetic animals. You’ll choose anchors rated for your wall type, install anti-tip straps high on the frame, and test stability before use.
Bolt brackets into studs when possible; use heavy-duty wall anchors for masonry or drywall where studs aren’t available. Keep cords tucked and mounts out of reach.
- Imagine relief when shelves stay put
- Feel safer knowing kids can’t topple them
- Enjoy calmer pets and fewer accidents
- Trust tested hardware every time
- Sleep easier tonight
Rounded Edge Covers
How can you make a ladder shelf safer without changing its look? Fit rounded edge covers to exposed corners and shelf ends to reduce bumps and scrapes. Choose clear silicone bumpers, rubber caps, or soft PVC sleeves that match finish and slip on easily.
Measure thickness, trim to length, and secure with double-sided tape or a dab of adhesive for high-traffic areas. Test fit before permanent glue.
For a subtle DIY option, wrap thin felt or leather strips and stitch or glue into a rounded profile. Check covers periodically for wear and replace when compressed or damaged to keep protection reliable.
Non-Tip Weighted Base
When kids or pets are around, give your ladder shelf extra stability by adding a non-tip weighted base that keeps it firmly planted without altering its look. You’ll attach a slim, dense plate or sand-filled tray to the rear feet, lowering the center of gravity so the shelf resists tipping when bumped.
Use non-slip pads and secure brackets to keep the weight hidden and removable for moving. Test by gently pushing at different heights. If you want peace of mind, choose materials that match your finish.
- Relief knowing it’s safer
- Comfort when little ones play
- Confidence during busy days
- Pride in smart design
- Calm from practical protection
Quick Troubleshooting: Common Build Mistakes and Fixes
If your ladder shelf isn’t square, don’t panic—most issues come from a few predictable mistakes and you can fix them quickly with the right checks. First, verify measurements and diagonals; tighten loose joints and shim uneven legs. If shelves wobble, add corner braces or adjust screw depth. Misaligned rungs usually need re-drilling or sanding new slots. Finish problems? Sand and recoat in thin layers.
| Problem | Quick Fix |
|---|---|
| Out of square | Check diagonals, loosen clamps, realign |
| Wobble | Add brace or shims |
| Misaligned shelf | Re-drill or sand slot |
Variation: Leaning Ladder Shelf With Drawers
If you want a leaning ladder shelf with drawers, start by planning where each drawer will sit so weight and spacing stay balanced.
Next, build the leaning frame with angled rails that support both shelves and drawer openings.
Finally, install properly rated drawer slides and test smooth operation before finishing.
Planning Drawer Placement
Where should your drawers go to balance storage and the ladder shelf’s lean? You’ll place drawers to keep the shelf stable, usable, and visually calm. Think about weight low for stability, spacing for access, and symmetry to soothe the eye.
Measure clearances so drawers glide without scraping, and plan stops to prevent tipping. Use these emotional touchpoints to guide placement:
- Comfort: drawers at a height you’ll reach without strain
- Reassurance: lower, heavier drawers for steadiness
- Pride: aligned fronts that look intentional
- Ease: smooth, accessible slides for everyday use
- Calm: balanced spacing that feels orderly
Building Leaning Frame
As you begin building the leaning frame for your ladder shelf with drawers, set the two side rails at the designed angle and confirm they’re identical so the shelves and drawer openings line up perfectly. Clamp them to a flat surface to keep alignment while you mark shelf and drawer locations.
Cut cross supports and stretchers to fit, pre-drill pocket holes or use biscuits for strong, concealed joints.
Dry-fit each shelf, adjusting for squareness with a carpenter’s square. Glue and fasten permanently once everything aligns.
Sand joints smooth and bevel outer edges for a refined look before finishing.
Installing Drawer Slides
Ready to add smooth, reliable drawers to your leaning ladder shelf? You’ll measure, mark, and mount slides precisely so drawers glide without binding. Choose side- or undermount slides, match travel length to box depth, and verify cabinet carriages align perfectly.
Pre-drill screw holes, clamp rails, and test movement before final fastening. Adjust front face for even gaps and soft-close if desired. Installation transforms storage and feel—solid, quiet, satisfying.
- Pride when drawers glide
- Relief from clutter
- Joy in precise fit
- Confidence from sturdy hardware
- Calm from smooth operation
Variation: Floating Ladder Shelf Between Studs
Want a sleek, space-saving shelf that looks built-in? You can mount a floating ladder shelf between studs for a clean, minimalist look.
Locate and mark studs, then cut side rails to fit the cavity with a small gap for shimming. Attach hidden cleats or use metal floating brackets secured into studs; guarantee level and square before fastening.
Fit shelves onto cleats or brackets, using narrow shelf depths so they don’t bridge drywall. Finish edges and paint or stain before installation for a seamless appearance.
Anchor the top rail to studs and add final shims for a snug, stable fit.
Variation: Industrial Ladder Shelf With Metal Accents
If you liked the clean, built-in look of a floating ladder shelf, an industrial version gives you the same ladder silhouette with tougher, raw-metal elements for an edgier aesthetic. You’ll pair reclaimed wood with blackened pipe or steel brackets, letting texture and contrast drive the design. Keep lines simple and fittings visible for authenticity. Use finishes that resist wear and highlight grain. Fasten securely so weight feels safe.
- You’ll love the rugged contrast
- You’ll feel pride in sturdy, honest materials
- You’ll enjoy low-maintenance surfaces
- You’ll get customizable industrial flair
- You’ll build something bold and lasting
Scale Up: Turn a Ladder Shelf Into a Bookcase
When you scale a ladder shelf into a full bookcase, you keep the ladder’s angled charm but add depth, closed sides, and sturdier shelving so it can hold rows of books without sagging or tipping.
Start by widening each shelf and adding plywood backing to square the frame. Install full-height side panels to support weight and hide gaptingled edges; use cleats or dado joints for shelf support.
Widen shelves, add plywood backing to square the frame, and fit full-height side panels for sturdy, concealed support
Increase shelf thickness or add center supports for long spans. Anchor the unit to the wall with brackets.
Finish with paint or stain and edge-banding for a seamless, bookstore-ready look.
Cost-Saving Hacks Without Sacrificing Quality
Scaling your ladder shelf into a full bookcase can add strength and style, but you don’t have to spend a fortune to get professional results. You can save smartly by planning, shopping selectively, and using a few clever tricks that keep quality high.
- Hunt clearance lumber and sand imperfections into character.
- Reuse hardware from old furniture for sturdy, inexpensive fittings.
- Buy fewer, higher-quality tools you’ll use again and again.
- Cut precise measurements to avoid waste and extra trips.
- Learn one finishing technique well instead of trying every trend.
These moves protect your budget and pride in the finished piece.
Eco-Friendly Material and Finish Choices
You can cut waste and give your ladder shelf character by using reclaimed wood—it’s sturdy, often cheaper, and has a story.
Choose low‑VOC stains and sealers so you won’t bring harmful fumes into your home while preserving the wood.
We’ll cover how to source reclaimed boards and pick the right finish for durability and indoor air quality.
Reclaimed Wood Options
Although salvaged timber can look rustic, it often gives you stronger, more character-rich boards than new lumber, and it’s a smart eco choice for a ladder shelf. You’ll find reclaimed wood from barns, pallets, and demolition that tells a story, adding warmth and personality.
Check for rot and nails, and plan cuts to highlight grain and patina. You can mix species for contrast or match tones for cohesion. Choose responsibly sourced pieces to reduce waste and support sustainable building.
- nostalgia of weathered grains
- pride in rescued materials
- warmth from aged tones
- satisfaction in upcycling
- connection to history
Low‑VOC Finishes
When you’re finishing a ladder shelf, choosing low‑VOC stains, sealers, and paints keeps indoor air healthier and reduces environmental impact. Pick water‑based polyurethane or plant‑based oils; they dry fast, resist yellowing, and emit fewer fumes.
Look for products labeled “low‑VOC” or certified by Green Seal or GREENGUARD. Test a small scrap to confirm color and absorption.
Apply thin, even coats, sanding lightly between layers for durability. Ventilate the workspace and wear a mask if sensitivity’s an issue.
Proper application preserves the wood, protects shelves from moisture and stains, and maintains a safer home environment.
How to Style Your Finished Ladder Shelf by Room
Set the mood of each room by choosing a clear purpose for your ladder shelf—display, storage, or a mix—and arranging items to support that role.
Set each ladder shelf with a clear purpose—display, storage, or both—and style items to reinforce that role.
In bedrooms, lean soft linens, a scented candle, and a small plant to soothe.
In kitchens, stack cookbooks and pretty jars for practicality.
Bathrooms benefit from rolled towels and baskets.
Home offices need neat files, a lamp, and a photo for focus.
In kids’ rooms, mix toys and books for playfulness.
- Warm textures
- Personal photos
- Fresh greenery
- Functional containers
- Mood lighting
Styling Tips for Living Rooms and Entryways
If you want your ladder shelf to greet guests and anchor your living room, focus on a balanced mix of function and personality. Place everyday items—keys, mail tray, a small bowl—near the entry for easy access.
Reserve middle shelves for framed photos, a sculptural object, and a couple of books. Use plants to add life: a trailing pothos on an upper rung and a sturdy snake plant below.
Keep proportions varied but cohesive by repeating one or two colors or materials. Add a statement lamp or candle for mood, and leave some negative space to avoid clutter.
Styling Tips for Bathrooms and Kitchens
You can bring the same balance of function and personality to bathrooms and kitchens by tailoring the ladder shelf’s contents to moisture, scale, and daily routines. Place towels and oil-proof baskets low, display glass jars up high, and keep frequently used items within easy reach.
Use natural textures and a restrained color palette to calm busy spaces.
- Soft folded towels that invite touch
- Mason jars with cotton rounds and wooden lids
- A small potted plant for fresh scent
- Ceramic soap dispensers that feel luxe
- A scented candle to set a relaxed mood
Maintenance Tips to Keep the Shelf Looking New
Keep a regular dusting routine so dirt doesn’t build up and scratch the finish.
Wipe spills promptly and use felt pads or coasters to protect surfaces from moisture and heavy items.
For small nicks or worn spots, do quick finish touch-ups to keep the shelf looking fresh.
Regular Dusting Routine
Although dust can settle quickly on open shelves, a simple, regular dusting routine will keep your ladder shelf looking sharp and protect finishes over time. You’ll want to dust weekly, working top to bottom so particles fall to lower shelves. Use a microfiber cloth for gentle pickup and a soft brush for crevices.
For painted or stained surfaces, wring the cloth slightly damp, then dry immediately. Keep decor minimal to dust less and rotate items to clean beneath them.
- Enjoy the calm of a tidy corner
- Feel pride in well-kept craftsmanship
- Notice colors stay truer
- Prevent grime buildup
- Save effort later
Protecting Finish Touch-ups
After your weekly dusting, inspect the finish for small nicks or water rings so you can address them before they worsen. Use a soft cloth and mild cleaner to reveal damage without stripping finish.
For light scratches, apply a matching wood marker or wax stick, then buff gently.
For water rings, dab a bit of diluted vinegar on a cloth, test in an inconspicuous spot, then dry and reapply finish if needed.
Keep a small touch-up kit with stain, clear topcoat, fine sandpaper, and rags nearby.
Reapply protective wax or polyurethane annually to maintain sheen and resist future damage.
When to Repair Versus When to Rebuild
Decide whether to repair or rebuild by evaluating damage, costs, and the shelf’s remaining usefulness. You’ll weigh sentimental value, safety, and budget. If joints wobble or rot is extensive, rebuilding may be wiser; small cracks, loose screws, or finish wear often call for repair. Consider time, tool access, and future use before choosing. Trust your judgment: a sturdy shelf should hold weight and look right.
- Fear of losing a beloved piece
- Relief when a simple fix works
- Pride in restoring function
- Frustration if repairs fail
- Excitement to start fresh
Project Timeline: What to Expect Each Hour
Once you’ve chosen repair or rebuild, map out your hours so the work stays focused and predictable.
Hour 1: gather tools, measure the space, and mark cuts.
Hour 2: cut uprights and shelves, double-check measurements.
Hour 3: sand edges and pre-drill holes.
Hour 4: dry-fit pieces and make minor adjustments.
Hour 5: apply glue and clamp joints; let set.
Hour 6: drive screws and reinforce corners.
Hour 7: fill holes and sand smooth.
Hour 8: stain or paint first coat; let dry.
Hour 9: apply finish coat and reassemble.
Hour 10: inspect, clean up, and position shelf.
Where to Find Plans and Downloadable Templates
Looking for reliable ladder-shelf plans? You’ll find clear, downloadable templates from trustworthy sources that fit your skill level and style. Pick plans that include measurements, cut lists, and hardware notes so you won’t guess. Download a PDF, print a full-size template, or use a digital version on your tablet at the bench. Check license terms before sharing or selling finished pieces.
- A workshop-ready PDF that calms your nerves
- A beginner plan that builds confidence fast
- A timed step-by-step that keeps momentum
- A minimalist template that soothes clutter
- A detailed plan that sparks pride
Frequently Asked Questions
Can I Disassemble the Ladder Shelf for Moving or Storage?
Yes — you can disassemble the ladder shelf for moving or storage. You’ll remove shelves, unscrew supports, label parts for reassembly, and keep hardware in a bag. Reassemble carefully to maintain stability.
Will the Shelf Scratch Painted or Delicate Walls Over Time?
Yes, it can scratch painted or delicate walls over time if it rubs or shifts. You should add felt pads, rubber bumpers, or a wall anchor/rail to prevent movement and protect finishes, checking pads periodically.
How Do I Add Integrated Lighting to the Shelves Safely?
You add integrated lighting safely by using low-heat LED strips, hide wiring in channels, use a GFCI-protected circuit, mount drivers outside the shelf, secure connections with wire nuts, and test with a qualified electrician if unsure.
Can I Incorporate Cable Management for Electronics on the Shelf?
Yes — you can incorporate cable management: route wires through drilled holes, add adhesive cable clips or channels, hide power strips behind vertical supports, use grommets for neat passthroughs, and secure cords to prevent strain and tangling.
Is Condensation or Humidity Likely to Warp the Shelves in Basements?
Yes — basements’ humidity can warp wood shelves if you don’t control moisture. You should use sealed/engineered wood, apply finish, raise shelves off floor, add a dehumidifier, and monitor humidity to prevent long-term damage.
Conclusion
You’ve got everything you need to build a ladder shelf that fits your space and style. Pick the right spot, measure carefully, and choose a design that matches your room. Follow the plans, work steadily through the timeline, and keep up with basic maintenance to extend the shelf’s life. Repair small issues promptly; rebuild only if damage’s extensive. With a weekend’s work and a little care, you’ll have a stylish, functional shelf you’ll enjoy.